13.7
Date Code 20080213 Instruction Manual SEL-351A Relay
Testing and Troubleshooting
Testing Methods and Tools
Test Methods
Test the pickup and dropout of relay elements using one of three methods:
➤ target command indication
➤ output contact closure
➤ sequential events recorder (SER)
The examples below show the settings necessary to route the phase time-
overcurrent element 51PT to the output contacts and the SER. The 51PT
element, like many in the SEL-351A, is controlled by enable settings and/or
torque control SEL
OGIC
®
control equations. To enable the 51PT element, set
the E51P enable setting and 51PTC torque control settings to the following:
E51P = 1 (via the SET command)
51PTC = 1 (set directly to logical 1, via the SET L command)
Testing Via Target Commands
Display the state of relay elements, inputs, and outputs using the front-panel
or serial port TAR commands. Use this method to verify the pickup settings of
protection elements.
Testing With the Front-Panel TAR Command (only on models with LCD)
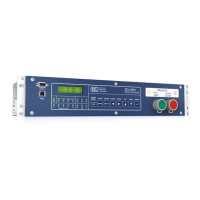
Access the front-panel TAR command from the front-panel {OTHER}
pushbutton menu. To display the state of the 51PT element on the front-panel
display, press the {OTHER} pushbutton, cursor to the
TAR option, and press
{SELECT}. Press the {Up Arrow} pushbutton until
TAR 6 is displayed on the top
row of the LCD. The bottom row of the LCD displays all elements asserted in
Relay Word Row 6. The relay maps the state of the elements in Relay Word
Row 6 on the bottom row of LEDs. The 51PT element state is reflected on the
LED labeled RS. See Table 9.5 for the correspondence between the Relay
Word elements and the TAR command.
Testing With the Serial Port TAR Command
To view the 51PT element status from the serial port, issue the TAR 51PT
command. The relay will display the state of all elements in the Relay Word
row containing the 51PT element.
Review TAR command descriptions in Section 10: Serial Port
Communications and Commands and Section 11: Front-Panel Interface
(Only on Models With LCD) for further details on displaying element status
via the TAR commands.
Testing Via Output Contacts
You can set the relay to operate an output contact for testing a single element.
Use the SET L command (SEL
OGIC control equations) to set an output
contact (e.g., OUT101–OUT107) to the element under test. The available elements
are the Relay Word bits referenced in Table 9.5.
Use this method especially for time testing time-overcurrent elements. For
example, to test the phase time-overcurrent element 51PT via output contact
OUT104, make the following setting:
OUT104 = 51PT
Time-overcurrent curve and time-dial information can be found in Section 9:
Setting the Relay. Do not forget to reenter the correct relay settings when you
are finished testing and ready to place the relay in service.
Courtesy of NationalSwitchgear.com