B.13
Date Code 20080213 Instruction Manual SEL-351A Relay
Firmware Upgrade Instructions
Relay Firmware Upgrade Instructions
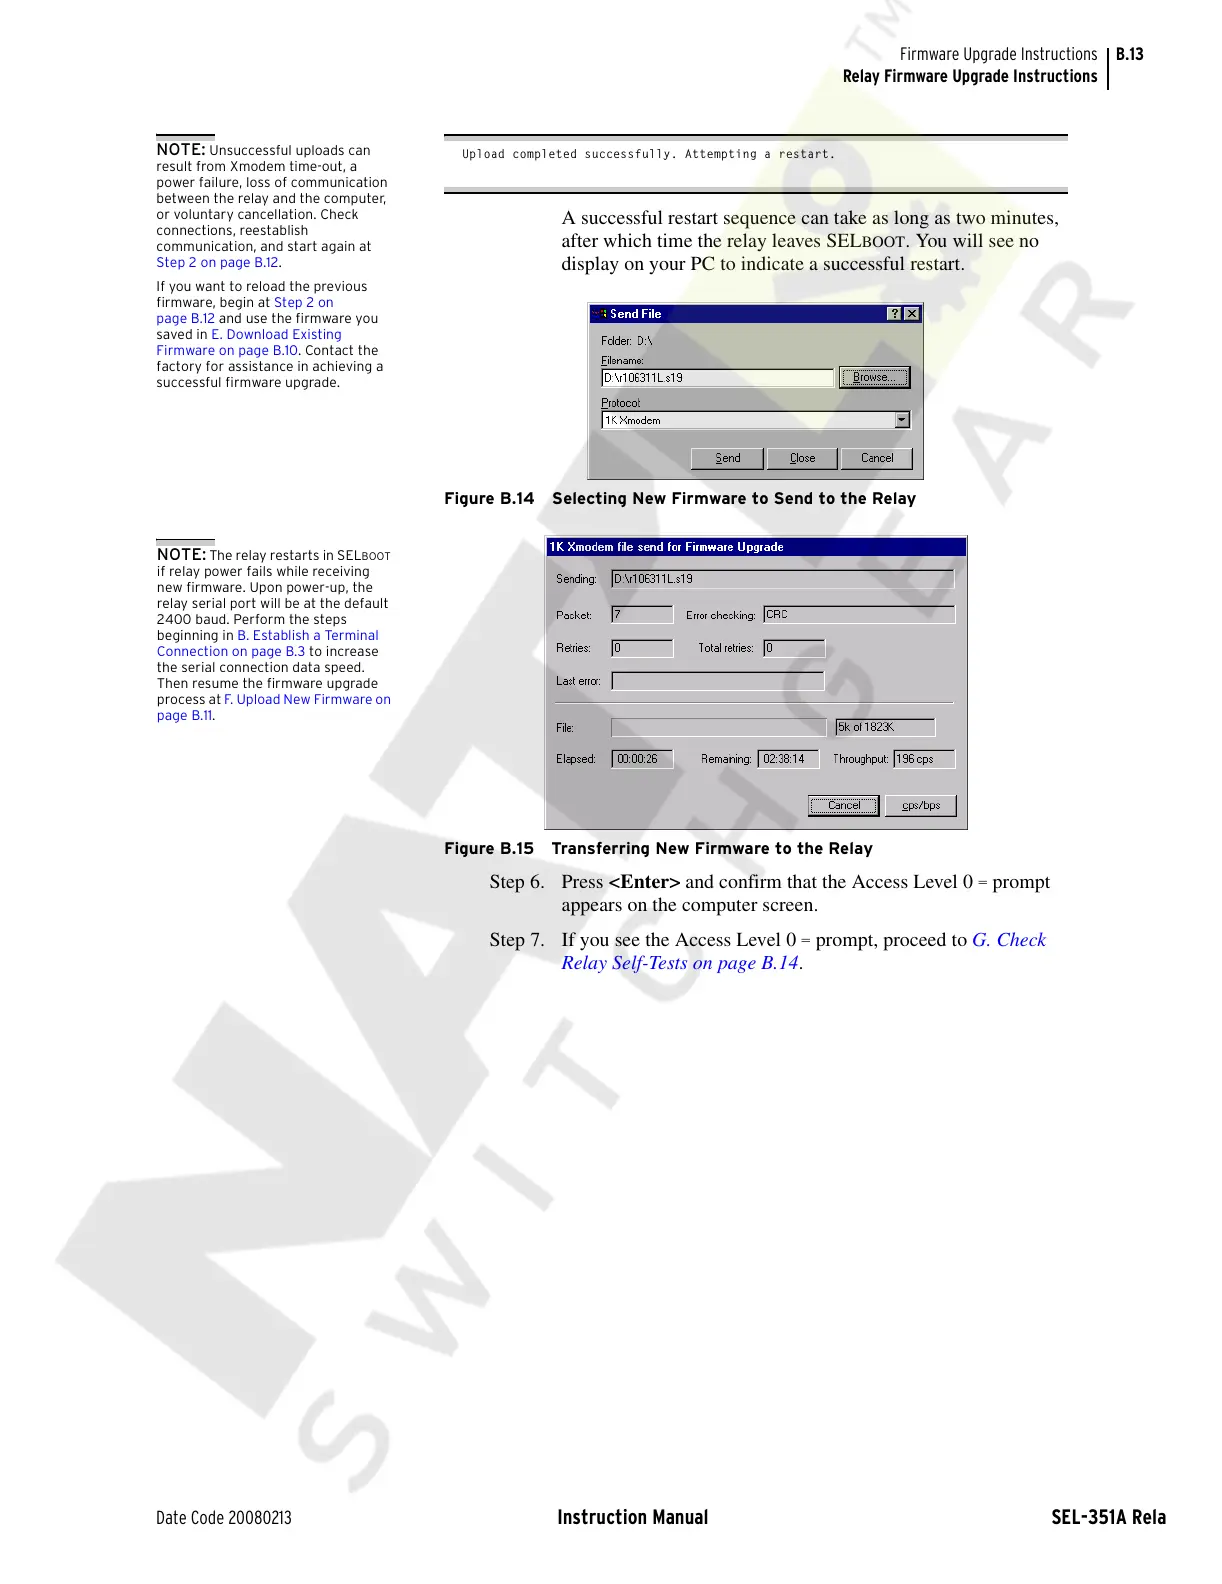
Upload completed successfully. Attempting a restart.
A successful restart sequence can take as long as two minutes,
after which time the relay leaves SEL
BOOT. You will see no
display on your PC to indicate a successful restart.
Figure B.14 Selecting New Firmware to Send to the Relay
Figure B.15 Transferring New Firmware to the Relay
Step 6. Press <Enter> and confirm that the Access Level 0 = prompt
appears on the computer screen.
Step 7. If you see the Access Level 0
= prompt, proceed to G. Check
Relay Self-Tests on page B.14.
NOTE: Unsuccessful uploads can
result from Xmodem time-out, a
power failure, loss of communication
between the relay and the computer,
or voluntary cancellation. Check
connections, reestablish
communication, and start again at
Step 2 on page B.12.
If you want to reload the previous
firmware, begin at Step 2 on
page B.12 and use the firmware you
saved in E. Download Existing
Firmware on page B.10. Contact the
factory for assistance in achieving a
successful firmware upgrade.
NOTE: The relay restarts in SELBOOT
if relay power fails while receiving
new firmware. Upon power-up, the
relay serial port will be at the default
2400 baud. Perform the steps
beginning in B. Establish a Terminal
Connection on page B.3 to increase
the serial connection data speed.
Then resume the firmware upgrade
process at F. U p lo ad Ne w F ir m ware on
page B.11.
Courtesy of NationalSwitchgear.com