Section 11 HULL/BODY
Subsection 02 (3D SERIES)
1
3
2
smr2005-069-008_a
RIDING PLATE
Removal
Remove inlet grate.
Remove jet pump. Refer to JET PUMP.
Remove the speed sensor from the riding plate (if
applicable).
Loosen riding plate screws.
NOTE: An impact screwdriver should be used to
loosen tight screws.
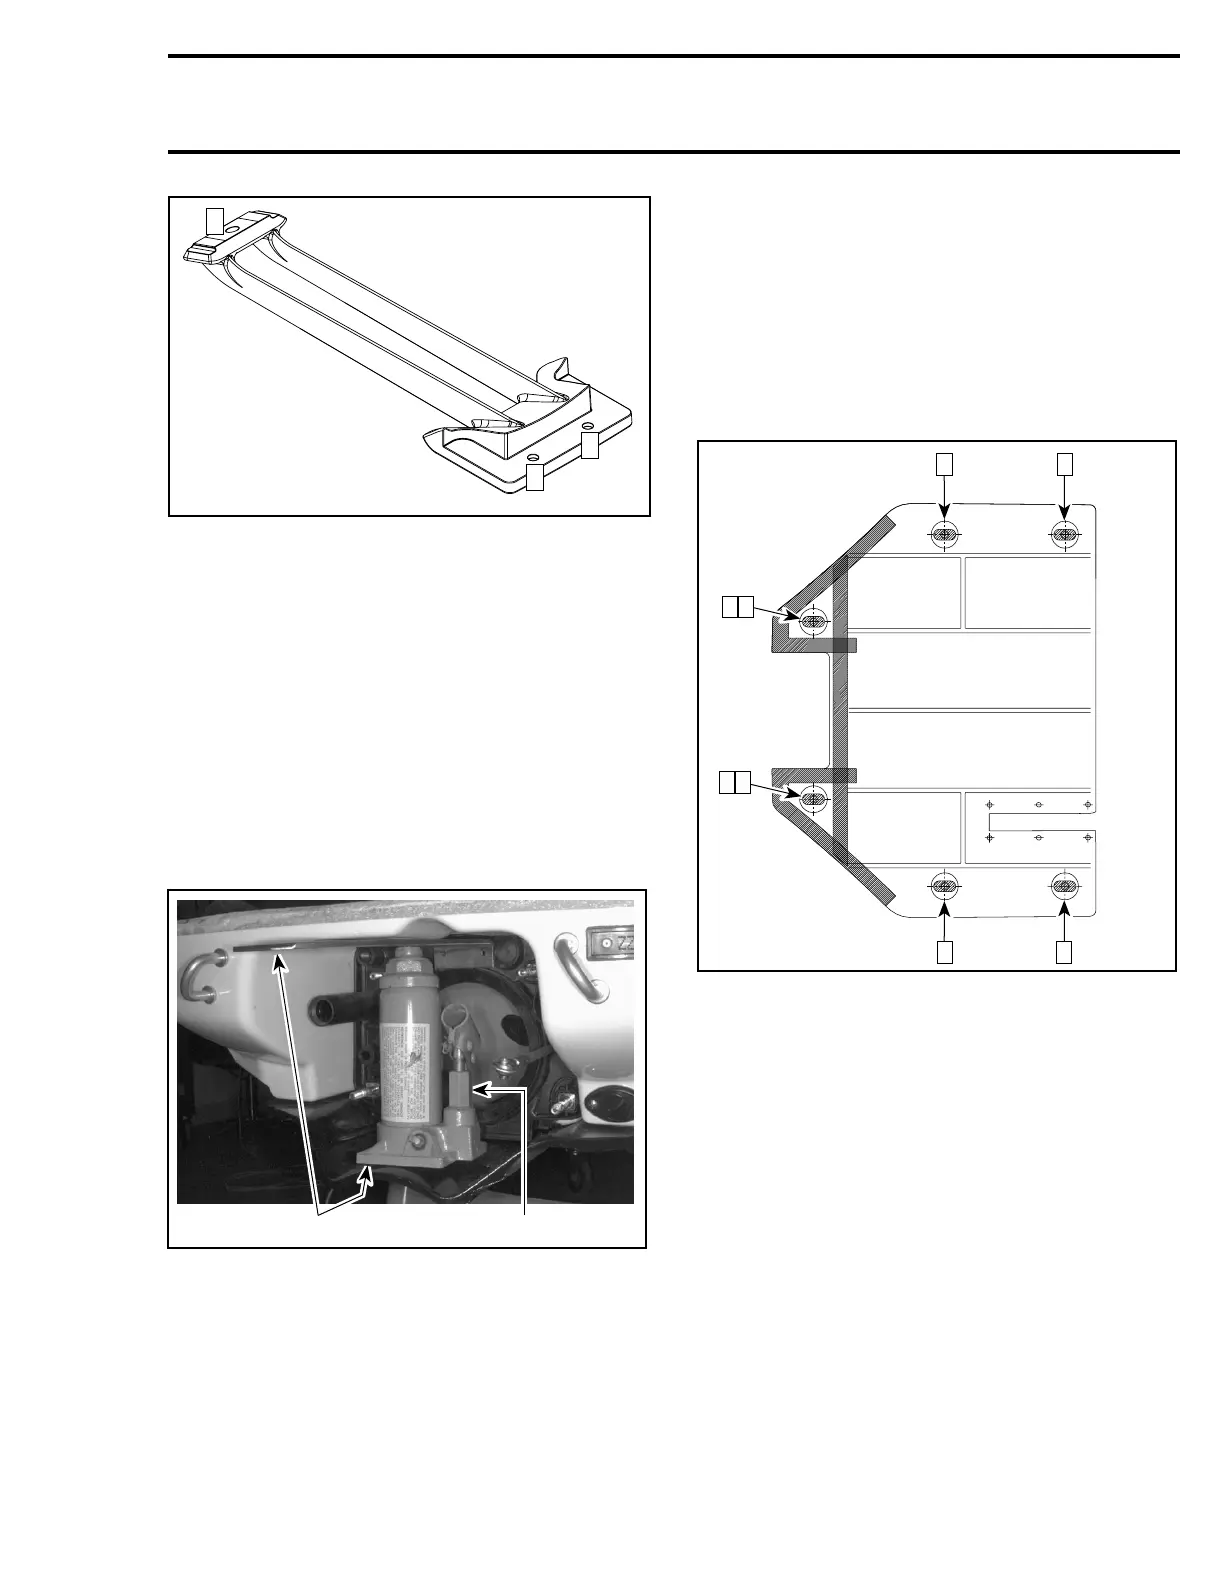
Using a low height hydraulic bottle jack and 2 steel
plates, pry out riding plate.
F05J03A
2 1
TYPICAL
1. Hydraulic bottle jack
2. Steel plates
Cleaning
Scrape off all excess of sealant from riding plate
and hull.
Clean hull surface with solvent to eliminate
grease, dust and any residue of sealant. Clean
fitting threads.
Installation
Apply Loctite 5900 (P/N 293 800 066) as indicated
by the shaded areas in the next illustration. Follow
also the torquing sequence as shown in the same
illustration. Torque screws to 26 N•m(19lbf•ft).
F08L1TA
6 4
8 2
7 1
5
3
TYPICAL
Install all removed parts.
JET PUMP SUPPORT
Removal
Remove jet pump. Refer to JET PUMP.
Remove inlet grate and riding plate.
Remove ball joint, boot, nut, half rings and O-rings
from steering cable.
smr2005-069 343