Section 11 HULL/BODY
Subsection 01 (GTI SERIES)
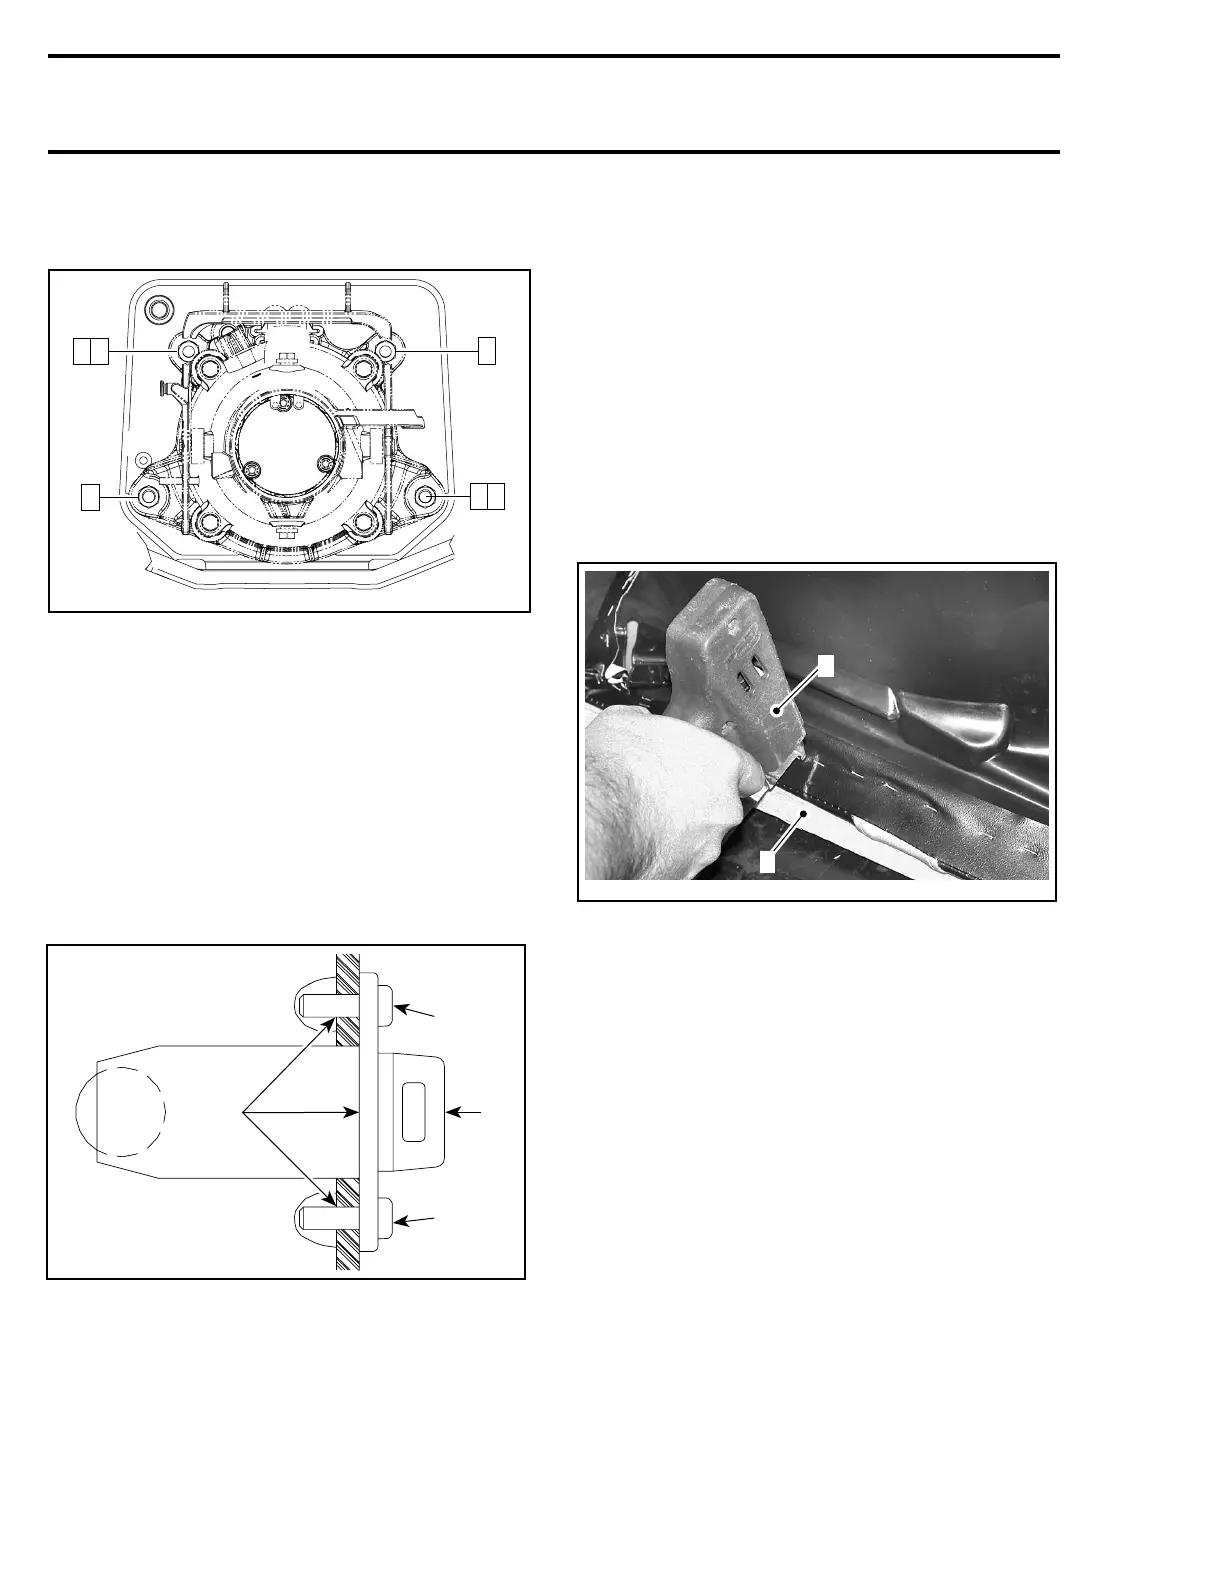
Torque nuts to 31 N•m(23lbf•ft) as per the fol-
lowing sequence.
5 1
6 2
4
3
smr2005-069-010_a
DRAIN PLUG
Installation
Before installation of drain plug no. 16, clean all
residues of old silicone sealant on hull and on drain
plug housing.
Apply silicone sealant (clear) (P/N 293 800 086) in
the screw holes.
Torque screws to 2.2 N•m(19lbf•in).
From inside of bilge, apply silicone sealant (clear)
(P/N 293 800 086) around and on screws.
2
F00L2RA
3
3
1
1. Drain plug
2. Silicone sealant
3. Torque screws to 2.2 N•m(19lbf•
in)
SEAT COVER
Replacement
Remove the old seat cover. Check the foam and
replace it if necessary.
Install staples with an electric tacker such as Ar-
row tacker no. ETN-50 or with a manual tacker
such as Arrow tacker no. T-50.
NOTE: For an easier installation, it's highly recom-
mended to use an electric tacker.
Ensure that the seat rest firmly against a hard sur-
face such as a piece of wood. This is done to get
the staples completely pushed in place.
A35H0HA
2
1
TYPICAL
1. Piece of wood
2. ETN-50 (electric) or T-50 (manual)
After cover installation cut all around the excess
of material.
BUMPER
Removal and Installation
– Remove trim no. 17 from side bumper rail
no. 18.
– Drill pop rivets no. 19 to remove side bumper
rail no. 18.
– Mark hole positions on body straight and bow
sections.
326 smr2005-069