Section09PROPULSION
Subsection 01 (JET PUMP)
– Apply Loctite 567 (pipe sealant) (P/N 293 800
013) on threads of fitting tool (P/N 295 000 086)
then secure on cover.
– Connect pressure/vacuum pump (P/N 529 021
800) to fitting.
– Pressurize pump to a maximum of 70 kPa
(10 PSI).
– Pump must maintain this pressure for at least
10 minutes.
CAUTION: Repair any leak, failure to correct a
leak will lead to premature wear of pump com-
ponents.
NOTE: If there is a pressure drop spray soapy wa-
ter around cover. If there are no bubbles, impeller
shaft, impeller shaft seal, or jet pump housing is
leaking through porosity and has to be replaced.
Jet pump unit has to be disassembled. If jet pump
has been overhauled, the impeller shaft seal no. 7
may be leaking; add a small quantity of jet pump
synthetic oil (P/N 293 600 011) to wet the oil seal.
Let soak and recheck.
– Disconnect pump and remove fitting.
– Check oil level. Refill as necessary.
– Apply Loctite 567 (pipe sealant) (P/N 293 800
013) to threads of filler plug then secure it in
cover.
INSTALLATION
Jet Pump Housing
Generously apply synthetic grease (P/N 293 550
010) on drive shaft splines.
Make sure rubber damper is on drive shaft end.
Install jet pump. If necessary, wiggle jet pump to
engage drive shaft splines in impeller.
CAUTION: Some watercraft require a shim
between hull and pump; if shim has been re-
moved at pump removal, be sure to reinstall
it, otherwise engine alignment will be altered.
Apply Loctite 243 (blue) (P/N 293 800 060) on stud
threads of jet pump housing.
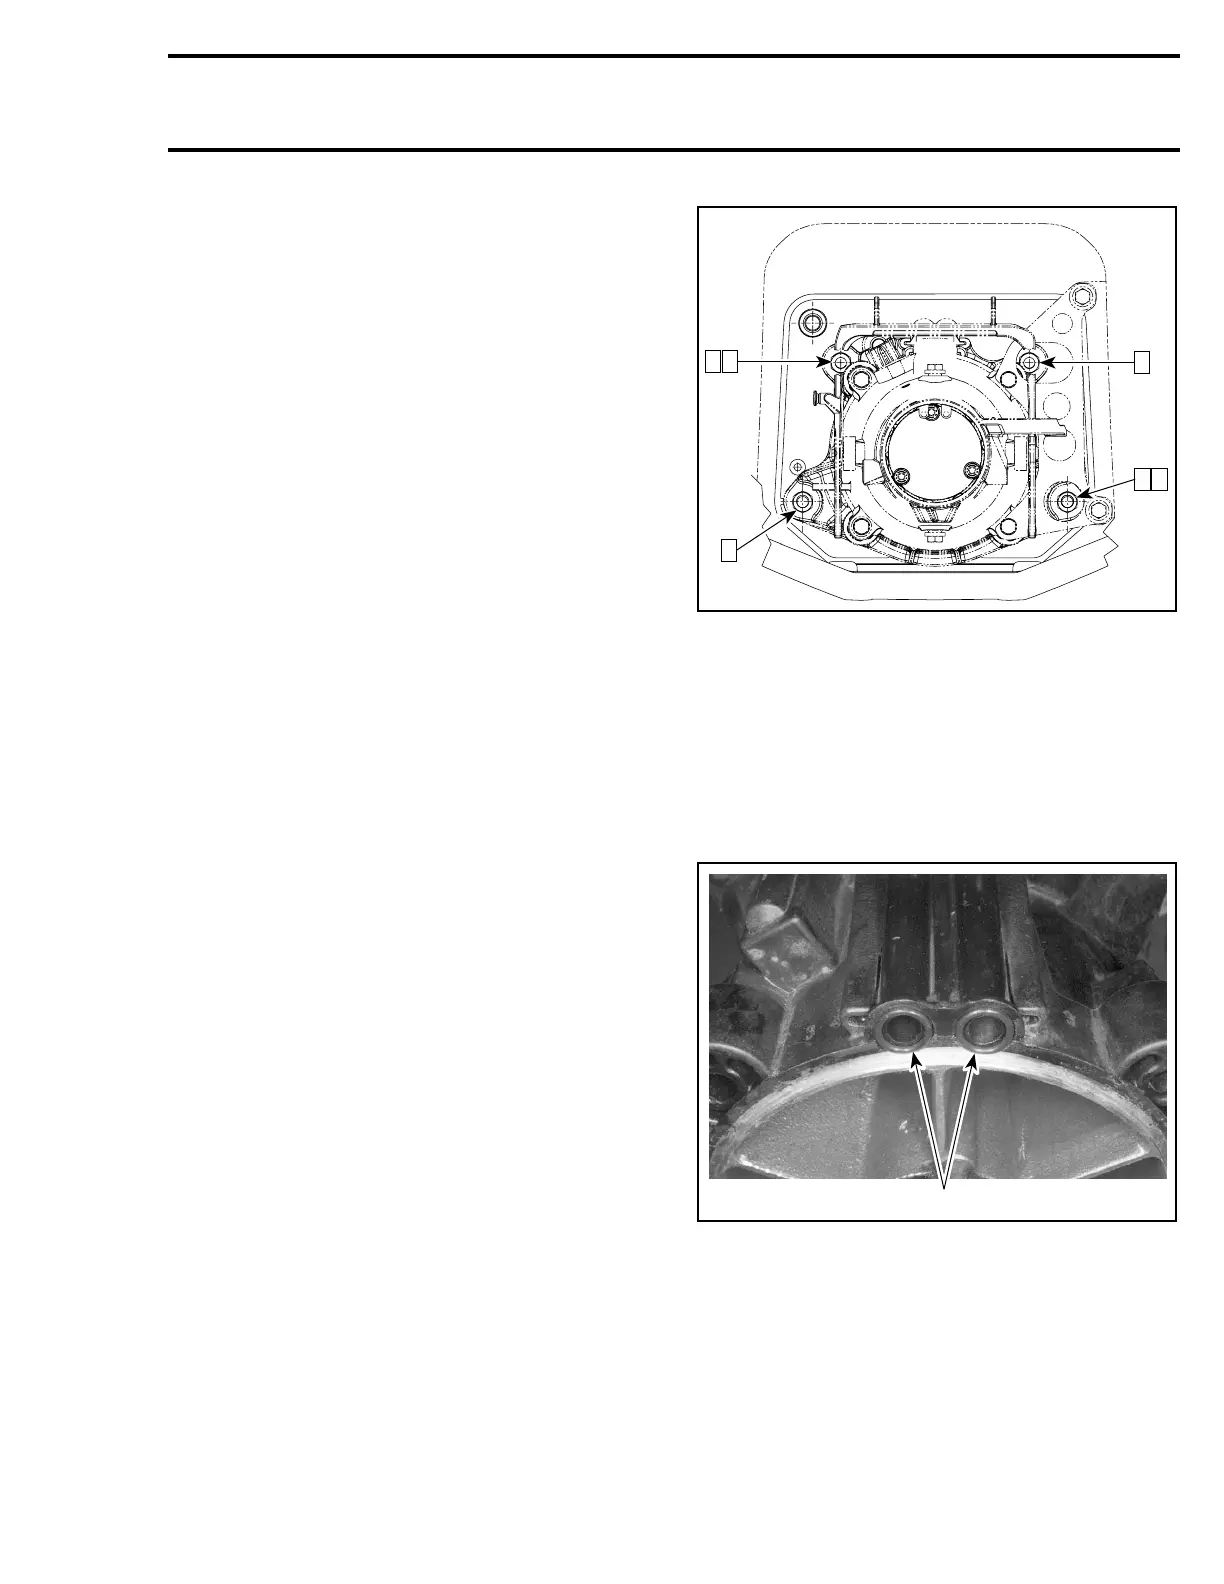
Install flat washers, lock washers and nuts. Tight-
en nuts of jet pump housing as per the following
sequence.
F18J1YA
3
15
62
4
Step 1: From 1 to 2: 16 N•m(12lbf•ft)
Step 2: From 3 to 6: 31 N•m(23lbf•ft)
NOTE: Slightly lubricate wear ring with BOM-
BARDIER LUBE (P/N 293 600 016) to minimize
friction during initial start.
Venturi/Nozzle
If needed, install new O-rings no. 22 around bailer
passages.
F00J0KA
1
1. O-rings
Position venturi no. 4 with bailer passages on top.
Apply Loctite 243 (blue) (P/N 293 800 060) on
threads of screws no. 10.
Install screws no. 10, lock washers and flat wash-
ersthentorqueto21N•m(16lbf•ft).
smr2005-062 249