Section 03 ENGINE SYSTEM
Subsection 02 (EXHAUST SYSTEM)
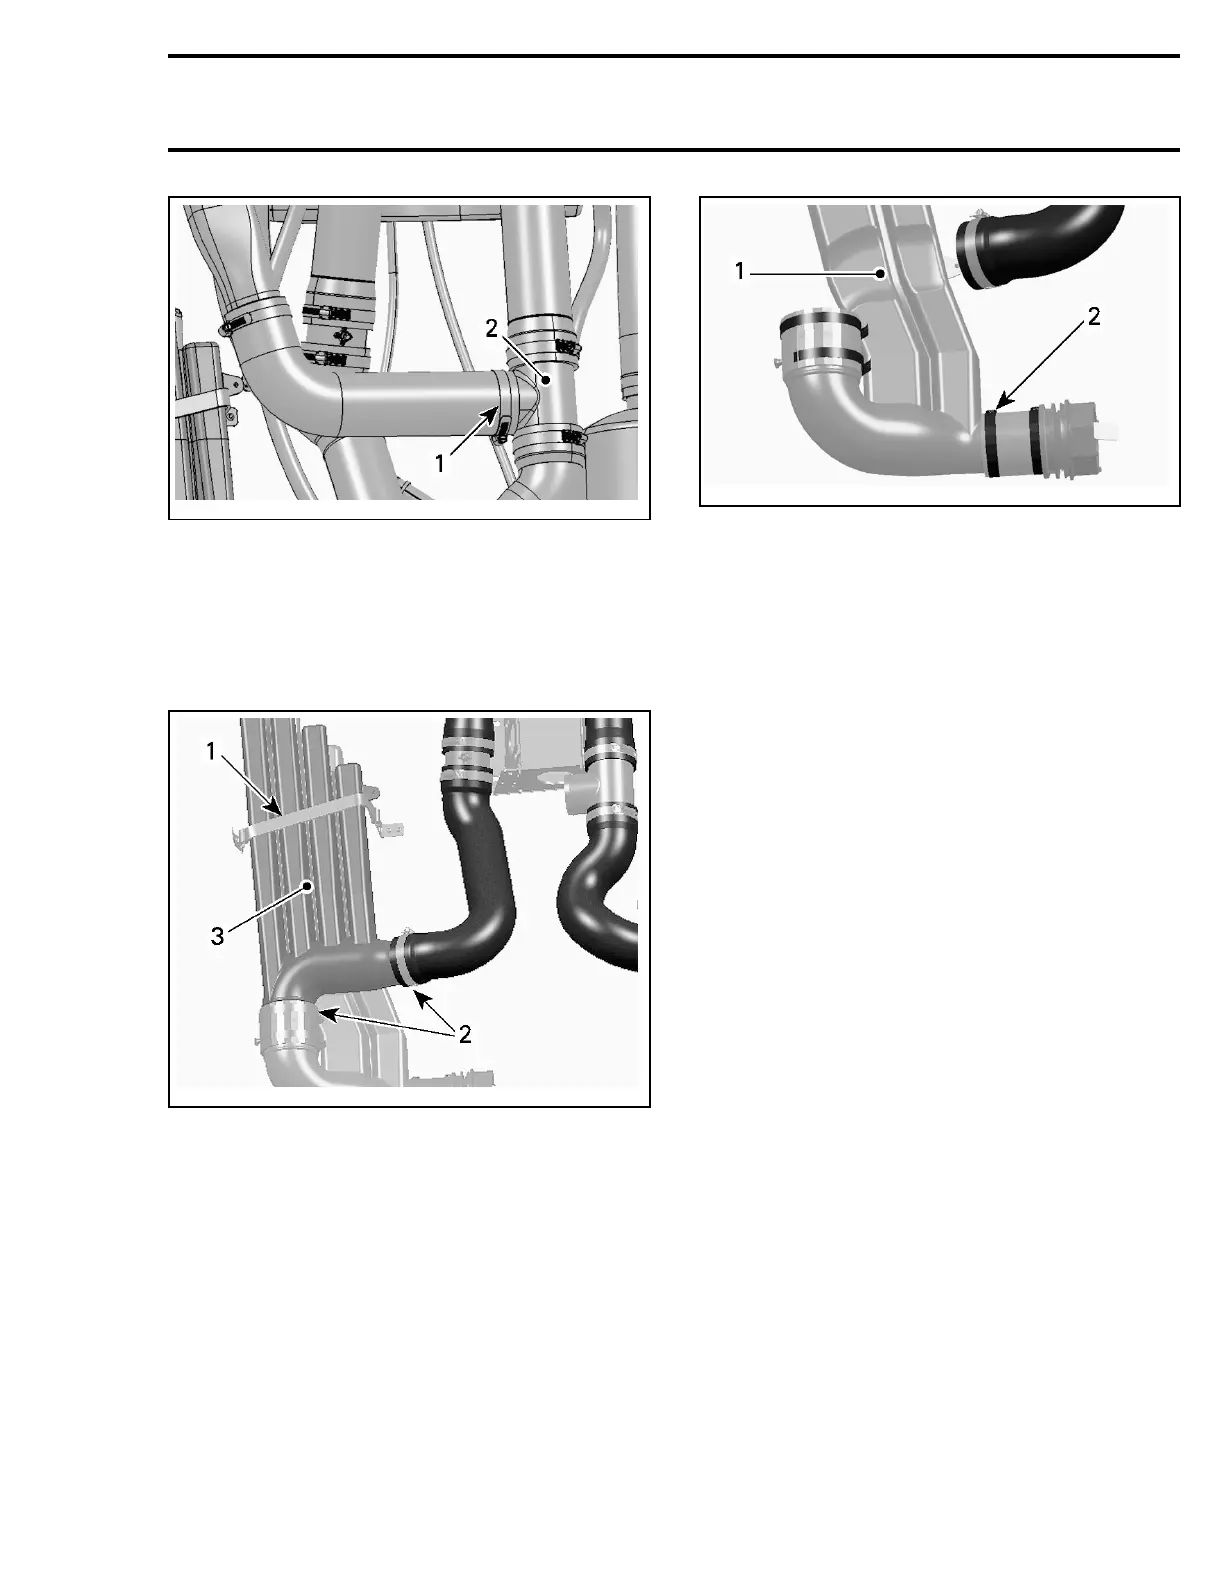
smr2005-048-016_A
1. Straight resonator hose clamp
2. T-fitting
Remove hose with resonator.
Upper Resonator
Remove strap, loosen clamps then pull out res-
onator.
smr2005-048-003_A
1. Resonator strap
2. Clamps
3. Upper resonator
Lower Resonator
Loosen clamp then pull out resonator.
smr2005-048-018_A
1. Lower resonator
2. Clamponhullfitting
REPAIR
Tuned Pipe
This procedure is given to repair tuned pipe cracks
using T.I.G. welding process.
– Sand the cracked area to obtain bare metal.
– Perform a 1.50 mm (1/16 in) depth chamfer over
crack.
– Use pure argon gas with 5.55 mm (3/32 in)
tungsten electrode (puretung “green”,zirtung
“brown”) and AC current.
– Use a 5.55 mm (3/32 in) aluminum welding rod
(no. 4043), to fill crack.
– Sand welding slightly to remove material sur-
plus.
Test
– Usecompressedairat124kPa(18PSI)topres-
surize tuned pipe.
CAUTION: Always ensure water passages are
not blocked partially or completely while weld-
ingtunedpipe.
NOTE: Prior to verify leaks, plug all holes and pres-
surize tuned pipe while immerging it in water.
INSTALLATION
Installation is essentially the reverse of removal
procedures. However, pay particular attention to
the following.
Tuned Pipe
NOTE: Loosen all tuned pipe supports from en-
gine before installing tuned pipe.
smr2005-048 55