Section 13 ELECTRICAL CONNECTORS AND WIRING DIAGRAMS
Subsection 01 (ELECTRICAL CONNECTORS)
Terminal Removal
SIGNAL WIRE
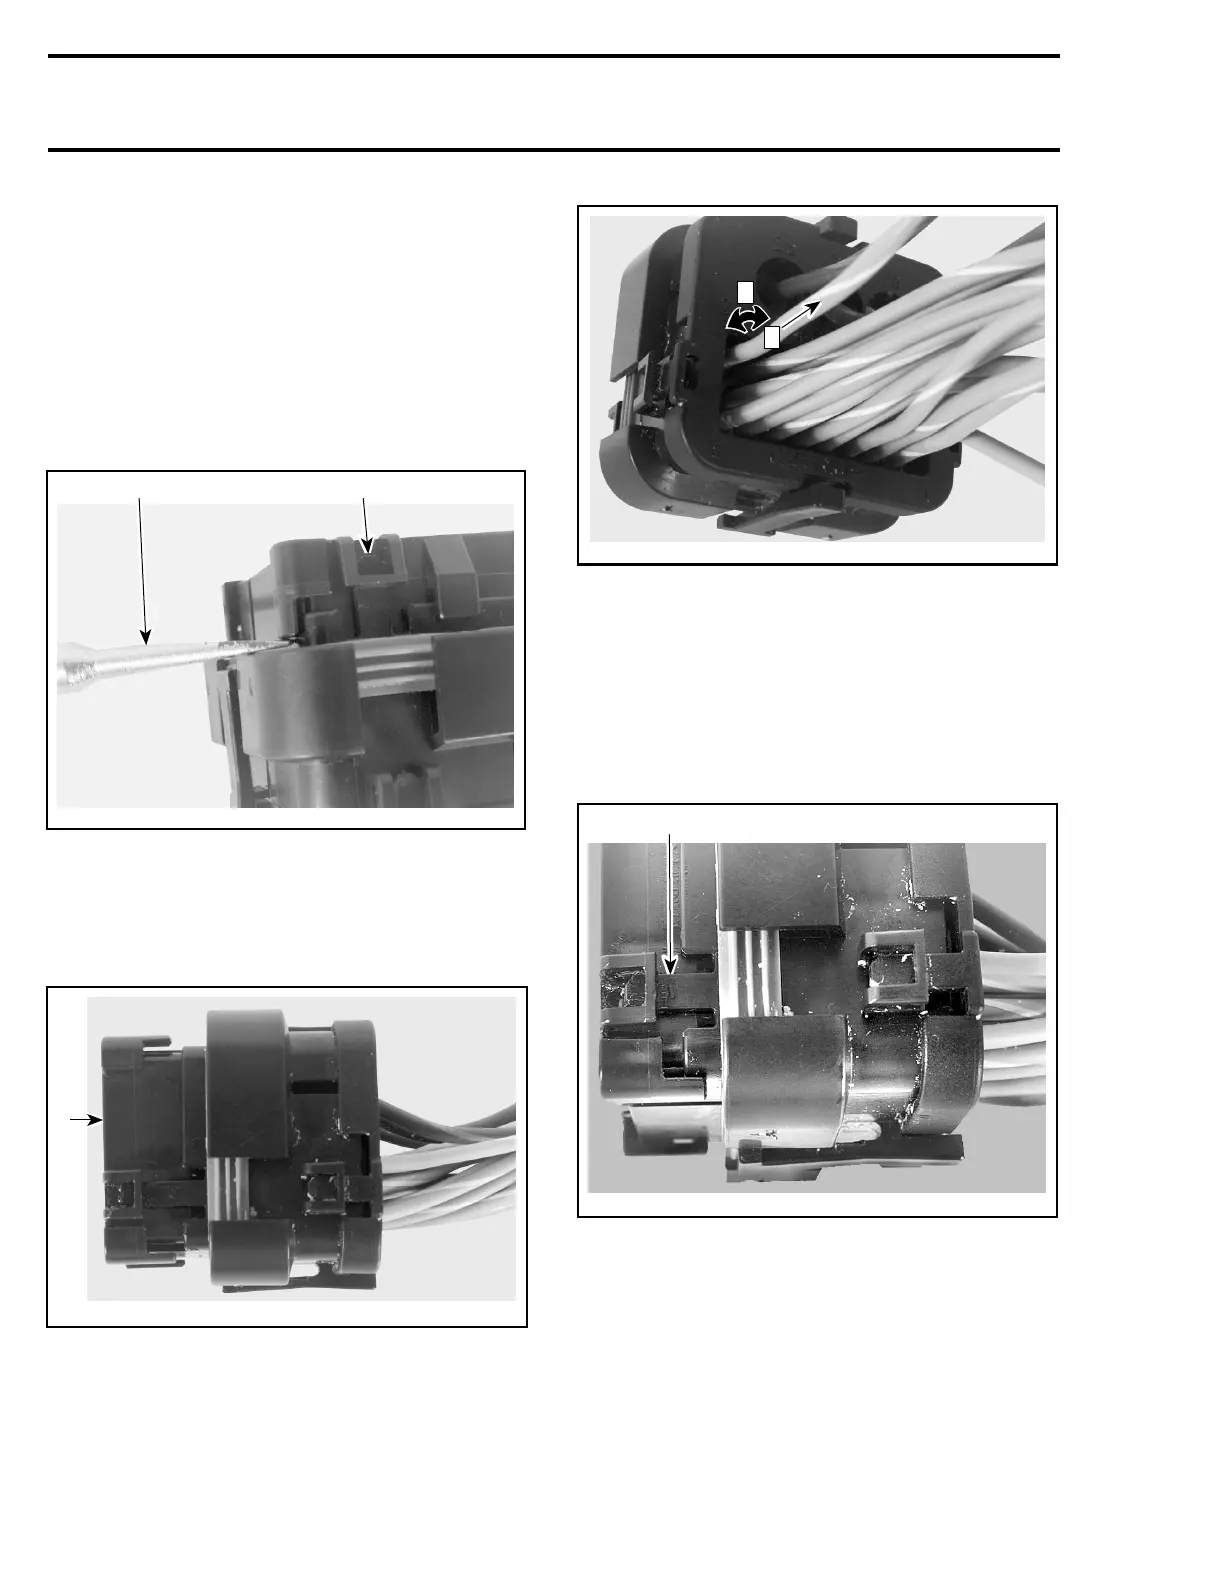
Insert a screwdriver blade between the connector
and the wedge lock tab.
Release the locking tab and at the same time, pry
the wedge lock to the open position.
CAUTION: The wedge lock should never be re-
moved from the connector for insertion or re-
moval of the signal wire terminals.
F00H0OA
1 2
1. Screwdriver between wedge lock and connector
2. Locking tab
Repeat the same steps for the other locking tab
retaining the wedge lock.
The wedge lock is now in the open position.
F00H0PA
1
1. Wedge lock opened
While rotating the wire back and forth over a half
turn (1/4 turn in each direction), gently pull the wire
until the terminal is removed.
F00H0QA
1
2
Step 1: Rotate wire back and forth
Step 2: Pull wire
POWER WIRE TERMINAL
NOTE: Thewedgelockmustberemovedtoex-
tract power terminal.
Open the wedge lock.
Pull both locking tabs and remove wedge lock
from connector.
F00H0RA
1
1. Pull locking tab (both sides)
Before extraction, push wire forward to relieve
pressure on retaining tab.
Insert a 4.8 mm (.189 in) wide screwdriver blade
inside the front of the terminal cavity.
364 smr2005-073