Phaser 6000/6010 and WC 6015 MFP Xerox Internal Use Only 8-47
Service Parts Disassembly
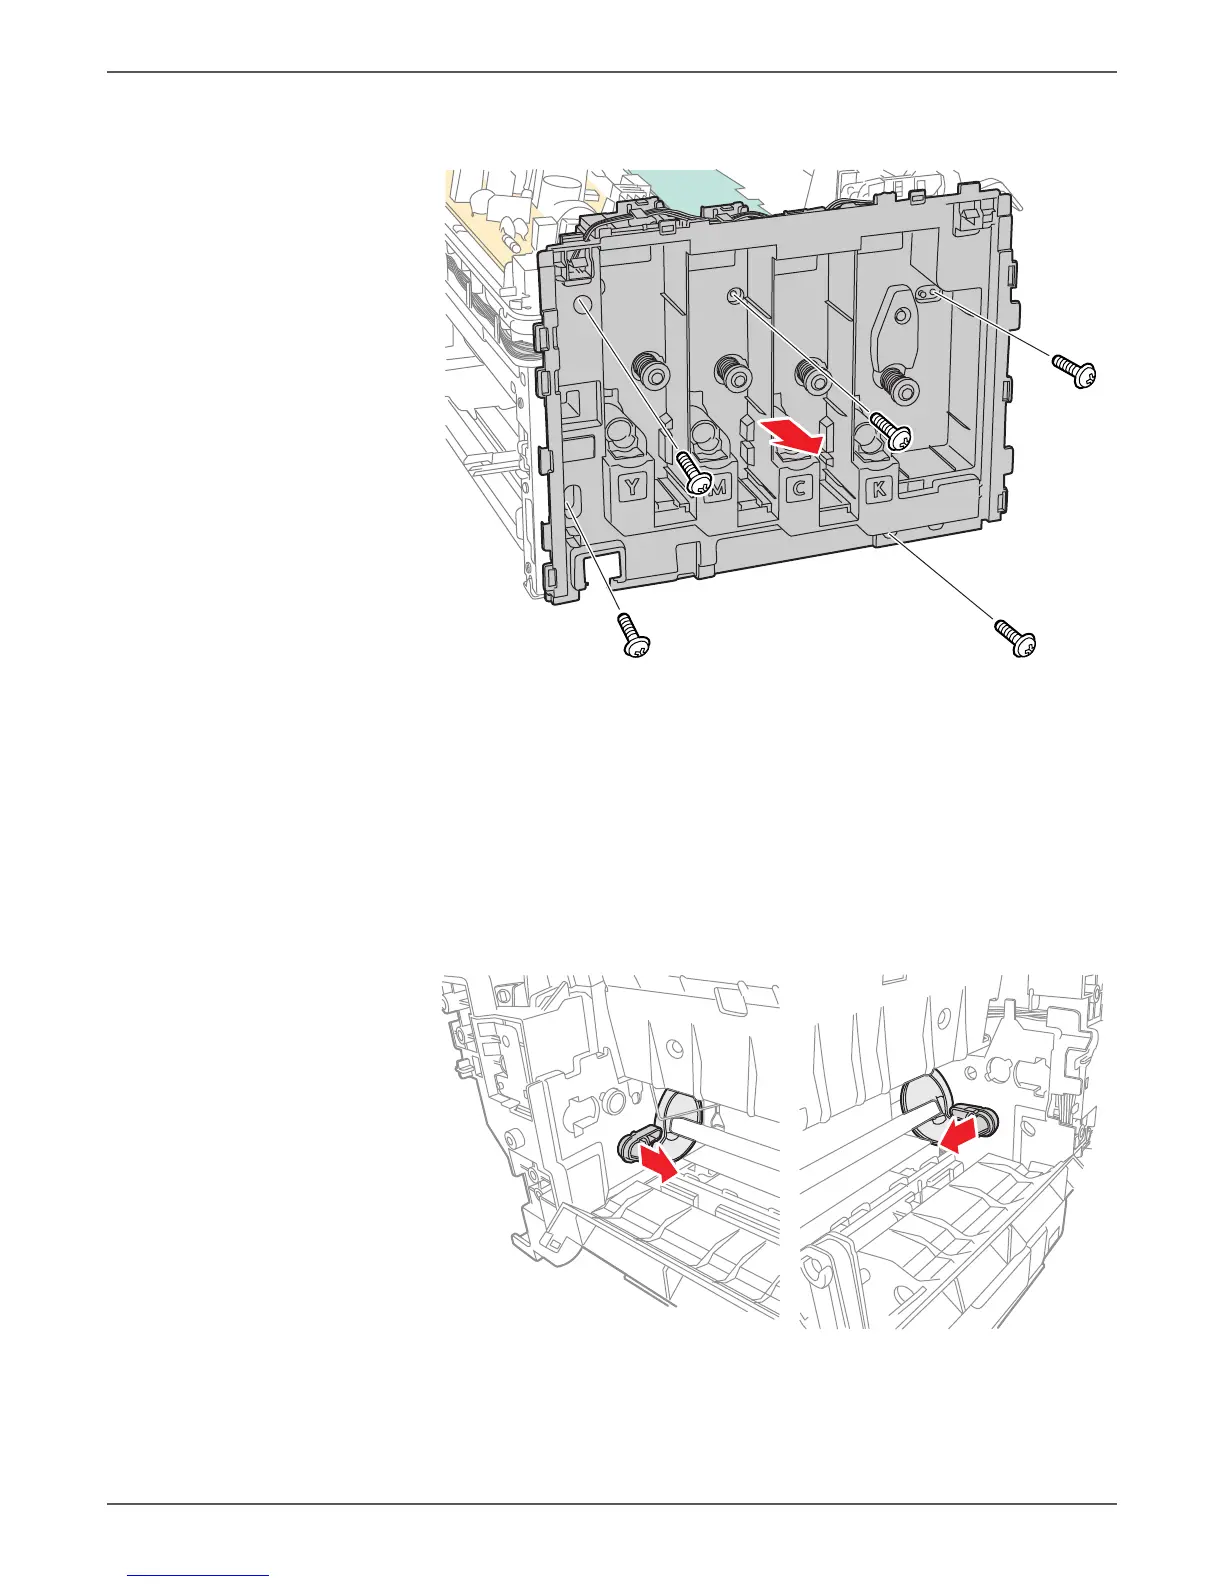
12. Remove 5 screws (silver, tap, 8 mm), and remove the toner dispense frame
from the printer.
13. Remove the IP Board (page 8-114).
14. Remove the Feed Drive Assembly (page 8-91).
15. Remove the Registration Clutch (page 8-66).
16. Remove the Registration Pinch Roller (page 8-57).
17. Remove the Registration Roller (page 8-61).
18. Remove the Main Paper Tray Chute (page 8-64).
19. Remove the Registration Actuator (page 8-67).
20. Remove the Separator Assembly (page 8-49).
21. Release the hooks on the Left Cam (PL 2.2.7) and Right Cam (PL 2.2.2).

 Loading...


