13-21
IM 701450-01E
13
Ethernet Communications (Optional)
Preparations for Using the Web Server Function
Connecting the PC and the DL7400 to the Network
Connect the PC and the DL7400 to the network. For the connection procedure, see
section 13.1.
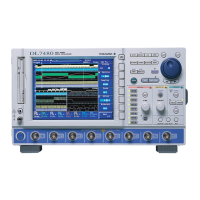
Preparations on the DL7400
Setting the Communication Interface to Network
X-Y
PHASE
MENU MENU
SETUP FILE
MISC
RESET
SELECT
MATH
SHIFT
GO/NOGO
CURSOR
MEASURE
HISTORY
PRINT
ACQ
START/STOP
IMAGE SAVE
DISPLAY
• To exit the menu during operation, press ESC located
above the soft keys.
• For a description of the operation using a USB keyboard or
a USB mouse, see section 4.3.
Turn ON the power to the DL7400. After the DL7400 boots up normally, carry out the
following procedure.
1. Press MISC. The MISC menu appears.
2. Press the Remote Control soft key. The Remote Cntl menu appears.
3. Press the Device soft key. The Device menu appears.
4. Press the Network soft key. The Ethernet interface is selected for the
communication interface.
Setting Up the TCP/IP
5. Set the TCP/IP on the PC and the DL7400. For the procedure on the DL7400,
see section 13.2.
Creating a User Account for Accessing the DL7400
6. Create the user account used to access the DL7400 from the PC. For the setup
procedure, see section 13.6.
Note
The User Account in the menu that appears after step 4 is the user account that is used to
control the DL7400 through communication commands via the Ethernet network. It is not the
user account for using the Web server function.
Setting the Time Difference from GMT (Greenwich Mean Time)
7. Set the time difference between the location where the DL7400 is installed and
GMT. For the setup procedure, see section 13.8.
Rebooting
8. To activate the TCP/IP, user account, and time difference settings, turn OFF the
power switch. After a few seconds, turn ON the power switch to boot the
DL7400.
13.7 Using the Web Server Function
 Loading...
