27. Fixture Library 445
1. Open the fixture window (Open + Fixtu re) and click on the Fixture Builder button
located at the top of the fixture window.
2. In the fixture builder window, use the Curr ent Type drop down menu to select Cre ate
New...
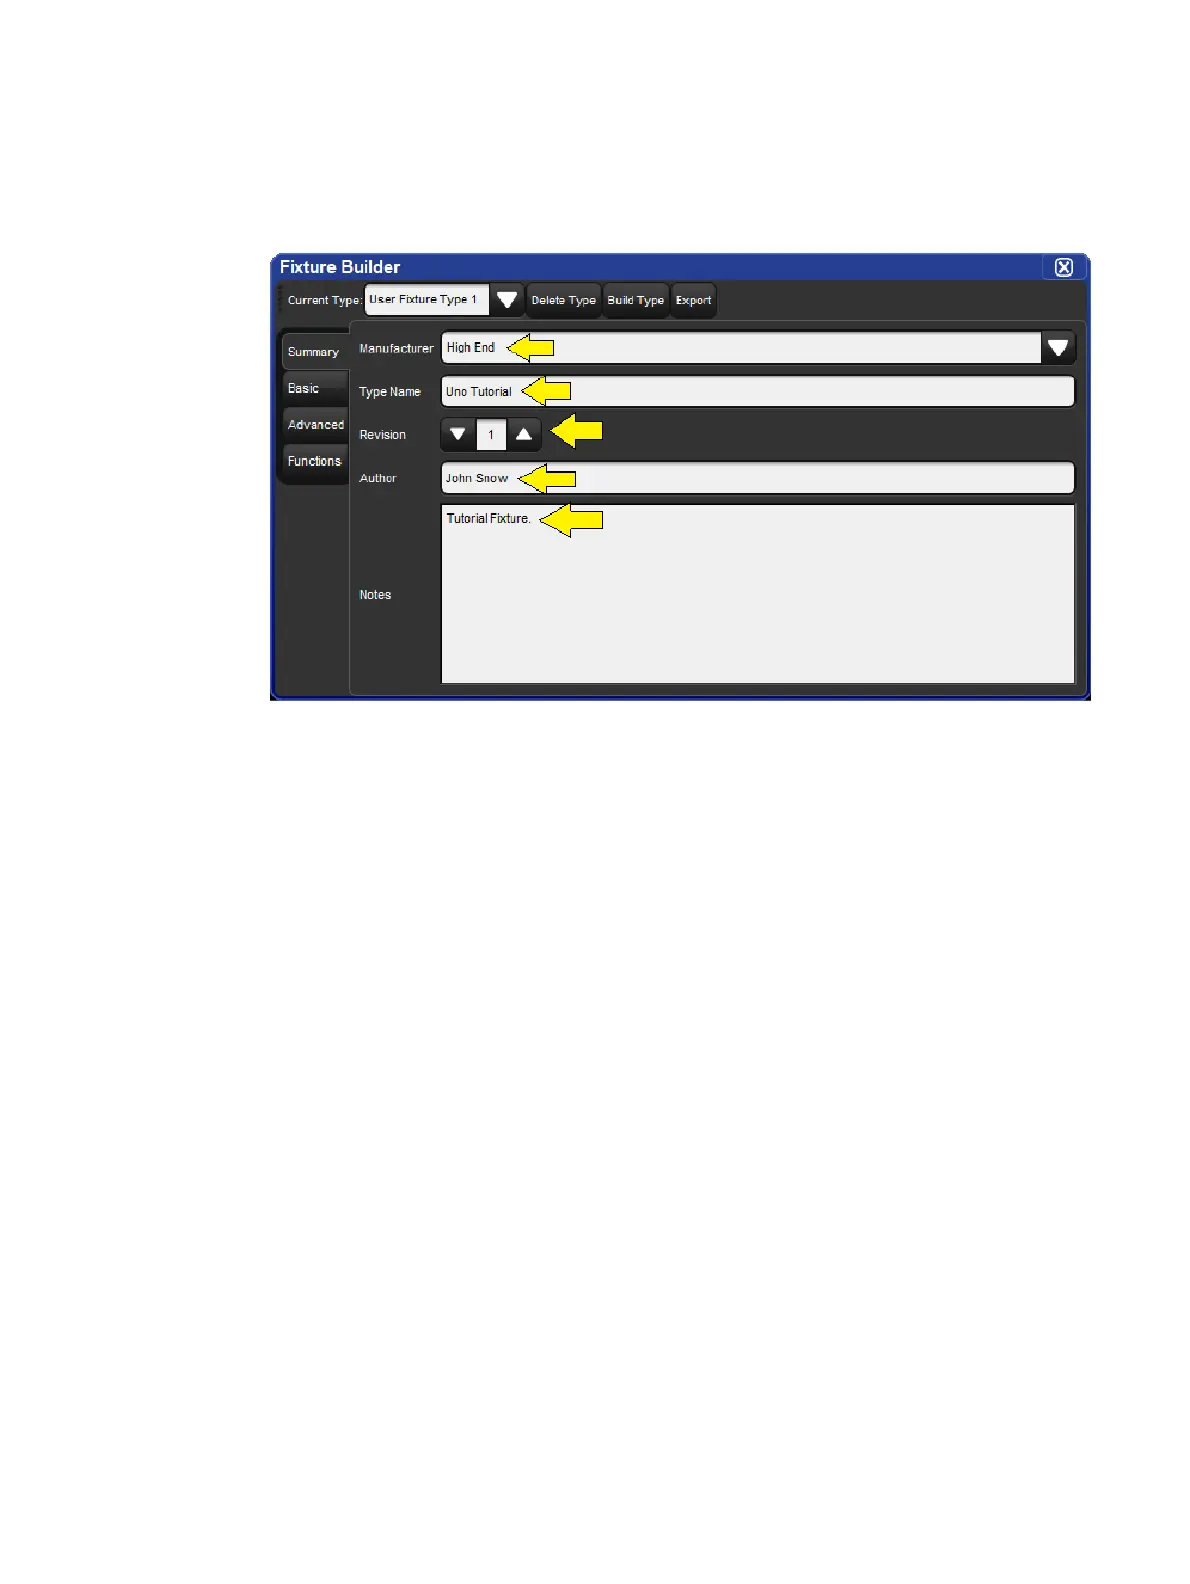
3. Select the Summary tab in the fixture builder window and fill in the fixture information
as shown in the figure below:
4. Fill in the fixture summary, as noted in the image above.
5. Select the Basic tab in the fixture builder window.
6. Click on the Re d X located to the far right of the DMX block for channel 1 to remove
intensity. Click OK to confirm the remove.
7. Click on the Blu e Plus button for channel 1. A template menu containing common
fixture components will appear. Refer back to the Uno DMX chart and look at channels
1 through 4. The first thing you'll notice is that channels 1 thru 4 control the Pan and Tilt
constructs of the fixture. You'll also notice that pan and tilt each occupy two DMX
channels (one for coarse control and one for fine control of each parameter). This is
known as 16-bit Pan and 16-bit Tilt. Press the 16 bit button listed next to Pan & Tilt in
the template menu for channel 1. Notice how fixture builder automatically fills in
channels 1 thru 4. Channels 1 and 3 are labeled as Pan and Tilt while channels 2 and 4
are attached to channels 1 and 3. This is how 16-bit channels are represented in fixture
builder.
8. Next we need to defined the real world values for pan and tilt. Refer to the DMX chart.
As you can see no adjustments need to be made to Pan as the Uno's values happen to
match the template's pre-filled values. However, you will need to type in new real world
values for Tilt (- 1 3 2 . 5 < 1 3 2 . 5 ).
9. Now let's move on to defining DMX channel 5. Once again, refer to the DMX chart for
the Uno. Here we see that channel 5 is defined as "colour mode". Since "colour mode"
is not a native function in Hog 4 OS we must use an alternative function. In this case
we will use Con trol Mode. Since basic view doesn't have a Co ntrol Mode option in
the template menu we need to switch to advanced view. Click on the Advanced tab in
the fixture builder.
10. In the advanced view you will see a tree view of all of the DMX channels that we've
specified in the fixture so far. Now we are going to add and define DMX channel 5.
Click on the black he ade r for chan nel 4 and then press the Add Below button
located in the edit menu on the right. This will add channel 5 to the channel tree.