28. Visualizer Connectivity 459
28.4 Configuring the Visualizer PC
28.4.1 Network Settings on the Visualizer PC
1. Navigate to the network and sharing center of your Visualizer PC by right clicking on
the network icon on the windows desktop and select properties. If the network icon is
not shown on your desktop then do a search for "network and sharing center" on your
PC and click on the appropriate search result to open the network and sharing center
window.
2. Click on "change adapters settings" located in the left hand pane of the network and
sharing center window.
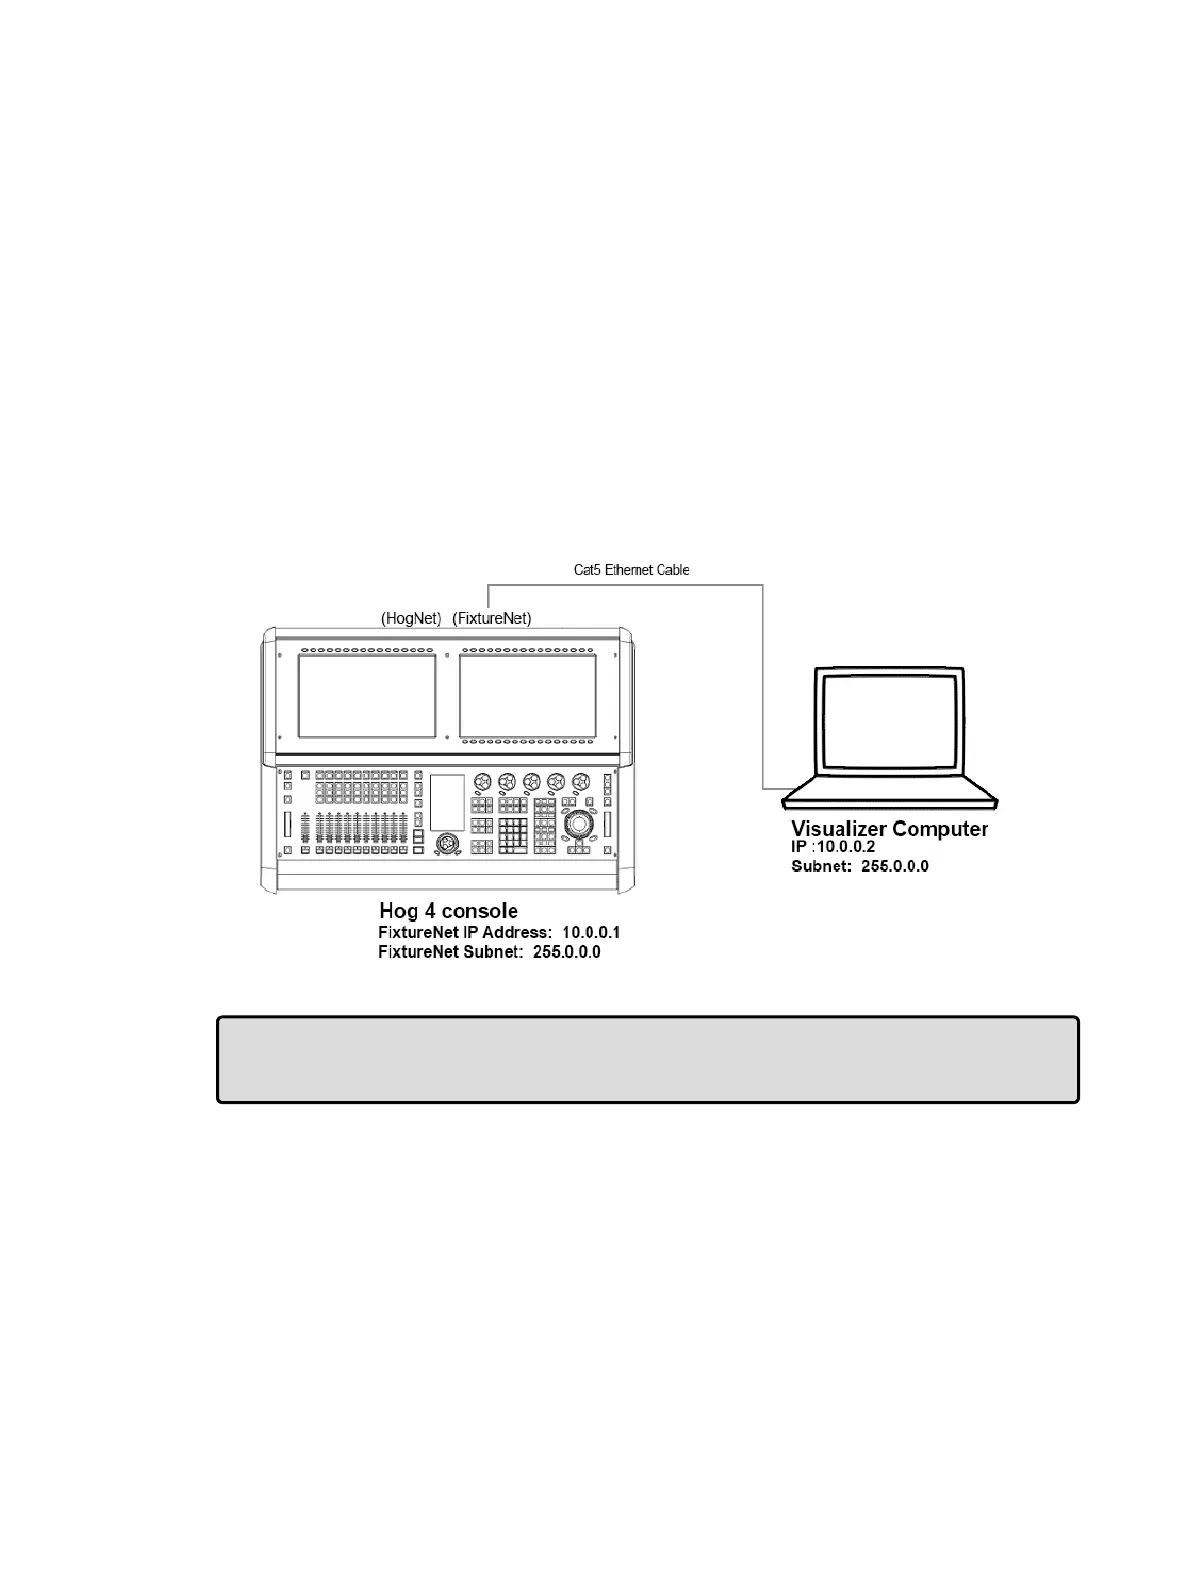
3. Ensure that the network adapter associated with the Ethernet port you connected the
Cat5 cable to is enabled and assigned an IP address that is within the same sub-
network as the console's FixtureNet port. This can be accomplished by assigning the
network adapter a static IP address or by using a DHCP router in the network and
assigning the network adapter to "obtain an IP address automatically". A typical static
IP address configuration is shown in the image below
Tip: In some cases it may be necessary to also right click and disable the other network
adapters including Bluetooth and wireless network adapters to ensure the visualizer
application is sending data to the appropriate network adapter.