FLIGHT CONTROLS / ROLL CONTROLS 9-29
CHANGE C3 ICON A5 / MAINTENANCE MANUAL
1. Remove (See “Baggage Floor Removal” on page 3-41.) Retain all fastening hardware.
2. Remove seat backs and seat pans. (See “Seat Back Removal” on page 3-50.)(See “Seat Pan
Removal” on page 3-52.) Retain all fastening hardware.
3. Remove cockpit interior side panels. (See “Cockpit Floor Board Removal” on page 3-46.)
4. Remove baggage side panels. (See “Baggage Sidewall Panel Removal” on page 3-43.)
5. Remove headliner. (See “Headliner Removal” on page 3-37.)
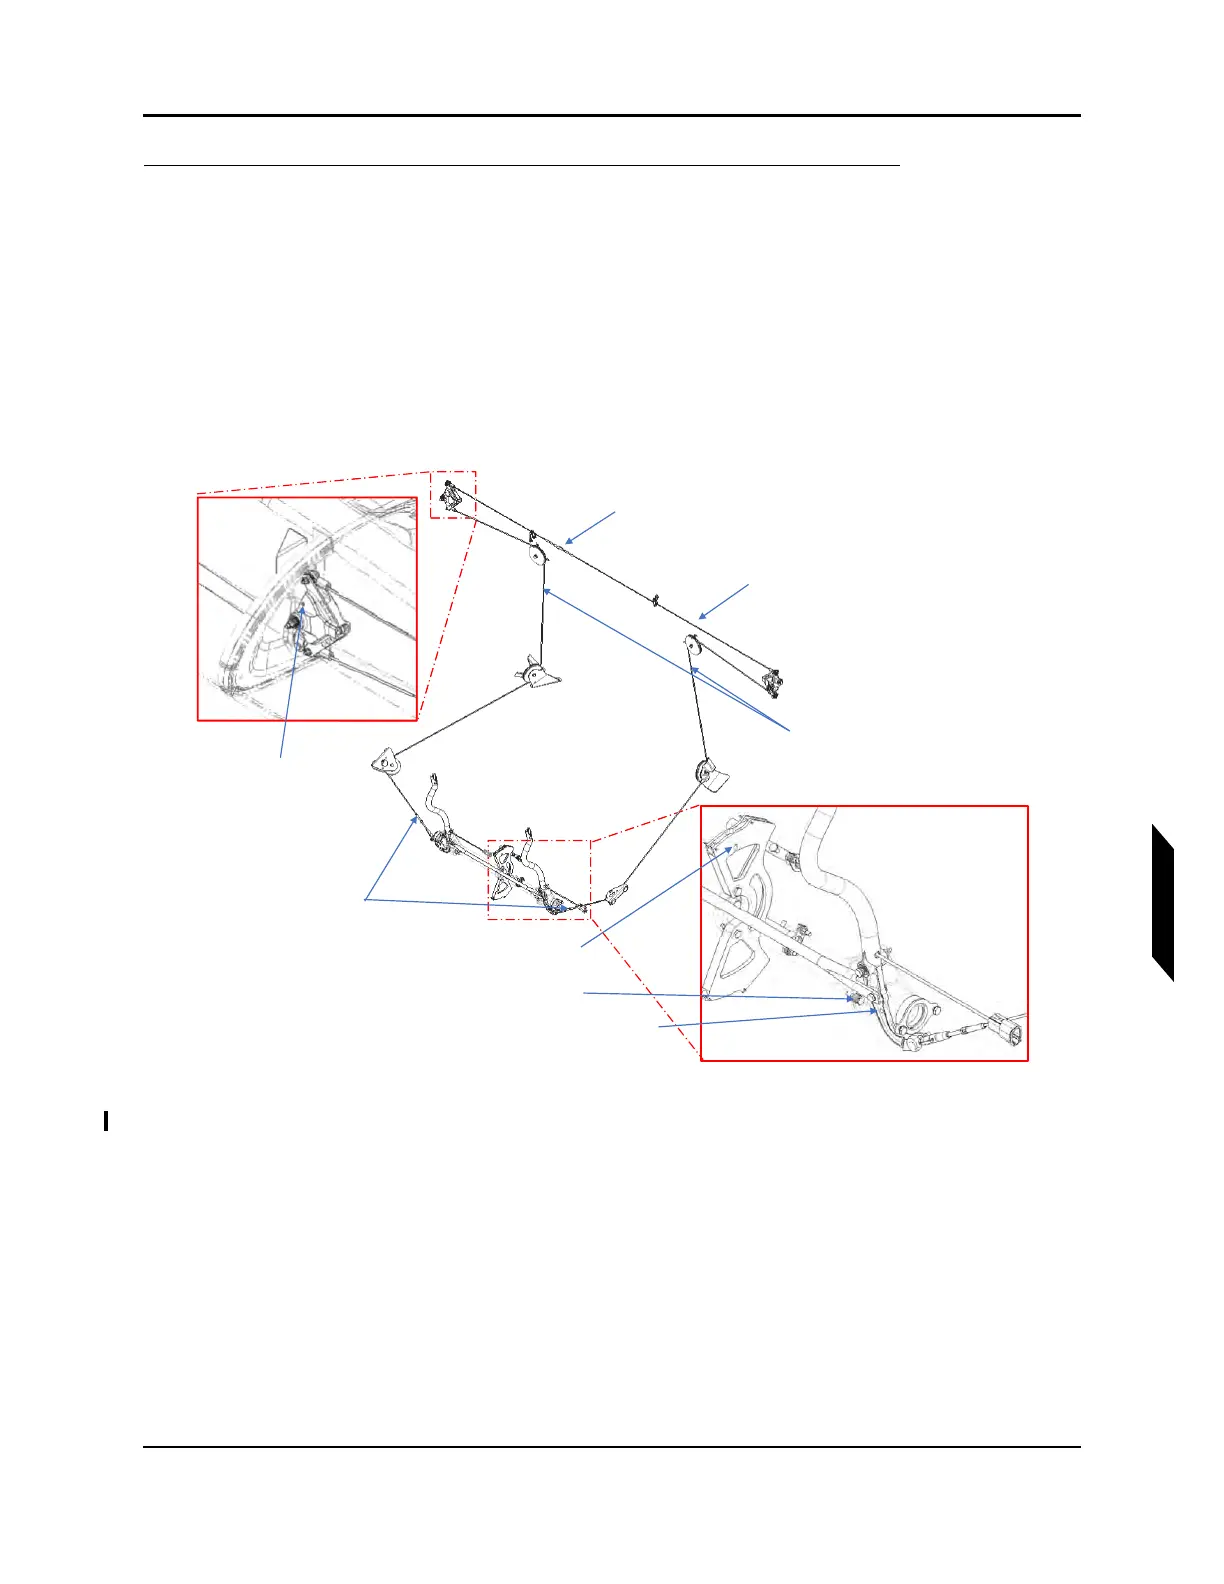
6. De-tension the affected lower flight control cable by removing the safety wire or turnbuckle clips
and loosen the turnbuckle located at the torque tube entrance shown in Figure 9-21 below.
FIGURE 9-21
ROLL CONTROL SYSTEM OVERVIEW
7. Disconnect the lower roll cable at the roll socket and at the turnbuckle at the stick. Ensure that
cable is held while disconnecting the turnbuckle.
Upper Roll Cable
Tensiometer Location
BL38 Clamshell Rig
Pin Hole
Upp
T
n
RH&LH Lower
Roll Cable
Turnbuckles
RH&LH Lower Roll
Cables Tensiometer
Location
FWD Pitch Sector Rig Pin Hole
Secondary Stop
Control Stick Rig Pin Hole
Upper Roll Cable
Turnbuckle