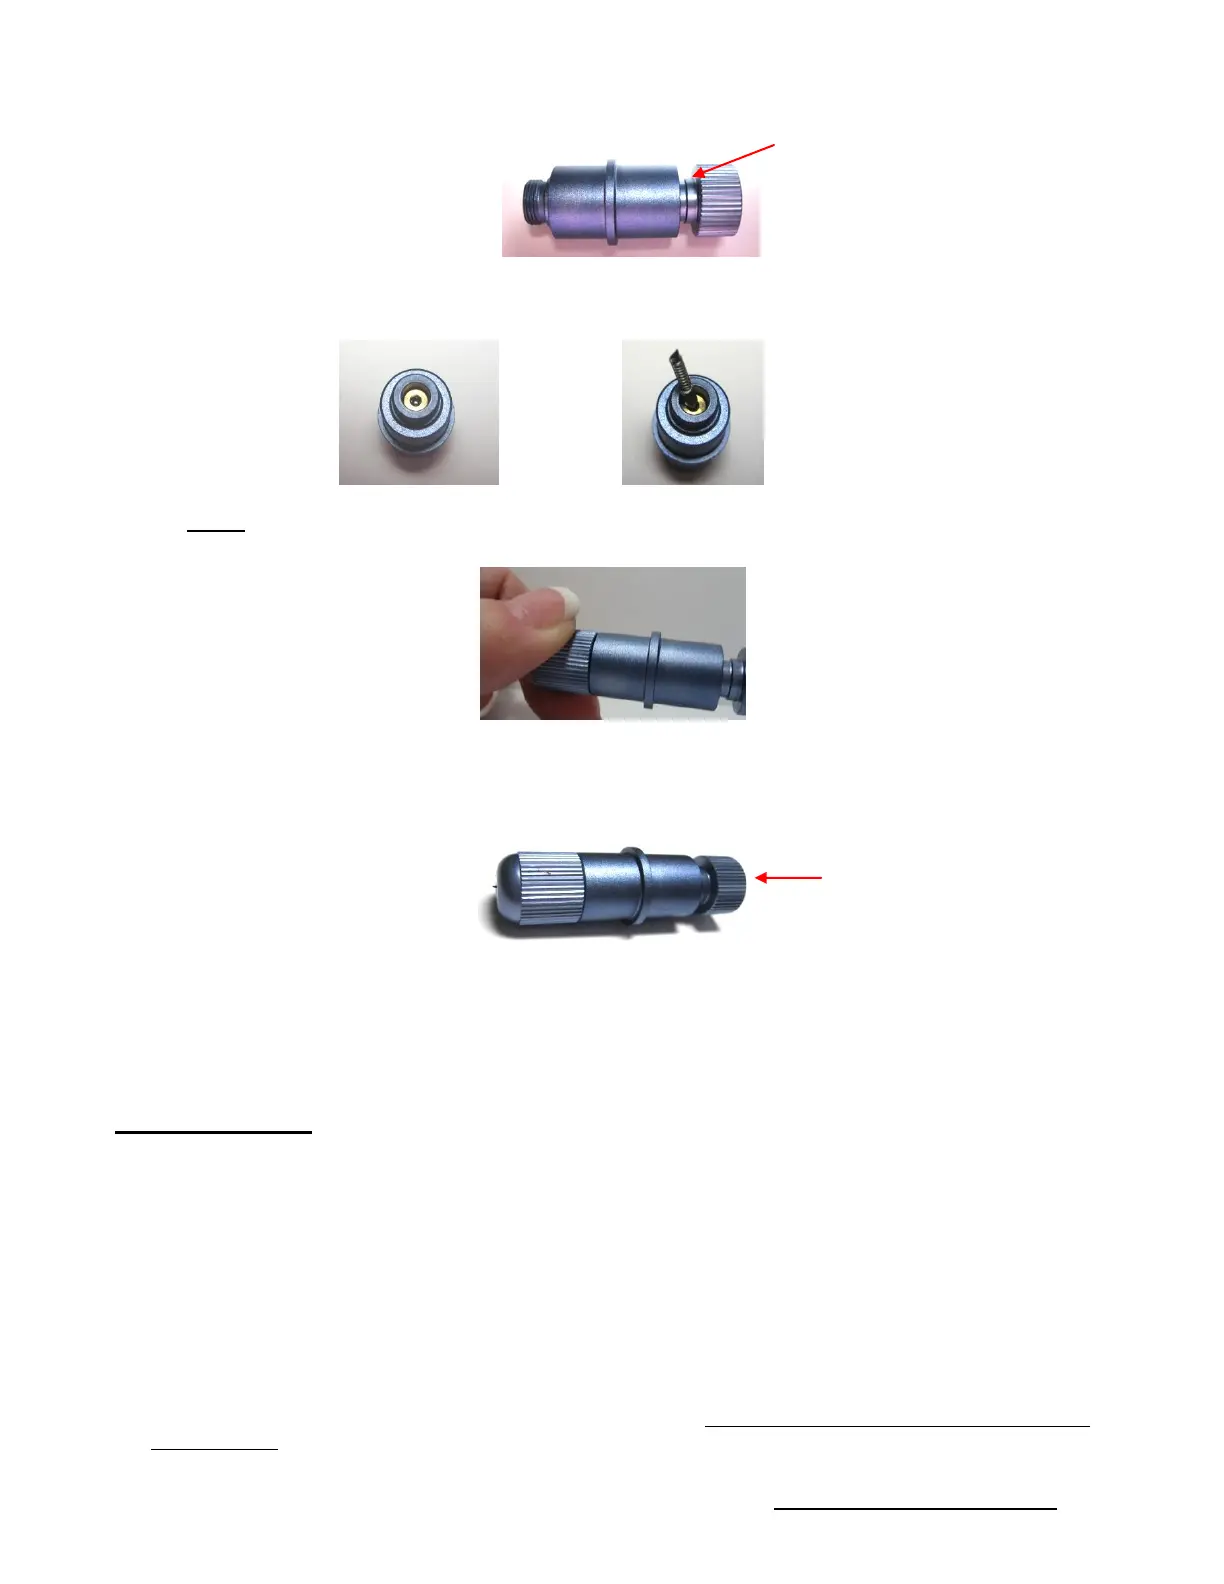
Place the blade into the tiny hole in the main part of the blade holder:
Gently guide the cap over the top of the blade and then begin screwing the cap on. You may need to
wiggle the cap slightly for the cap to catch the threads and screw onto the main part of the blade holder:
Screw the cap tight. Then, as you screw the main part of the blade holder (the top), the blade will begin
to show through the hole in the cap. You only need as much blade exposed as is necessary to
penetrate the material you are cutting. More blade does NOT result in better cutting. In fact the opposite
is true.
Please read Chapter 2 before cutting. There are some tips on setting the blade exposure as well as other
important information you need to know to be successful with your cutting.
Mat (Carrier Sheet)
Always use the mat to hold the material to be cut unless the material has its own protective backing. For
example, paper, fabric, and gum paste require a carrier sheet, whereas wall vinyl and iron-on transfer do
not. Also, any materials that are less than 11” wide will need to be placed on a mat so that the pinch wheels
can properly feed the material.
When placing the material you plan to cut onto the mat, you can locate the material anywhere it is sticky.
When mats begin to lose their stickiness, they can be washed. Use a mild dishwashing detergent, warm
water, and a brush to thoroughly clean the surface. Then allow to thoroughly dry. Normally, the mat will
regain its original stickiness. But if not, apply a repositionable adhesive as necessary. IMPORTANT: Do not
spray adhesives around your KNK! Not only can the adhesive get stuck to important parts of your Zing, but
these adhesives should only be used in well-ventilated areas. Breathing in the adhesive can be damaging
to your health!
If the newly-sprayed mat is too sticky, causing difficulty in removing cut items without tearing, place an old
but clean dish towel, fuzzy side down, over the surface of the mat and press with a brayer or rolling pin.
Step 1. Push
inwards so that
blade can be
inserted.
Turn top of holder until there is
about 1/8” gap
Turn clockwise to expose more
blade. Turn counterclockwise to
retract the blade. The blade depth
you want should be ~ the
thickness of the material you are
cutting.