The image will now be slightly grayed, but still distinct enough for tracing.
Manual Tracing Using the Bézier Curves and Straight Line (Pen Tool)
As mentioned at the beginning of this section, you will want to read Section 7.12 to learn how to comfortably
and successfully use Pen Tool.
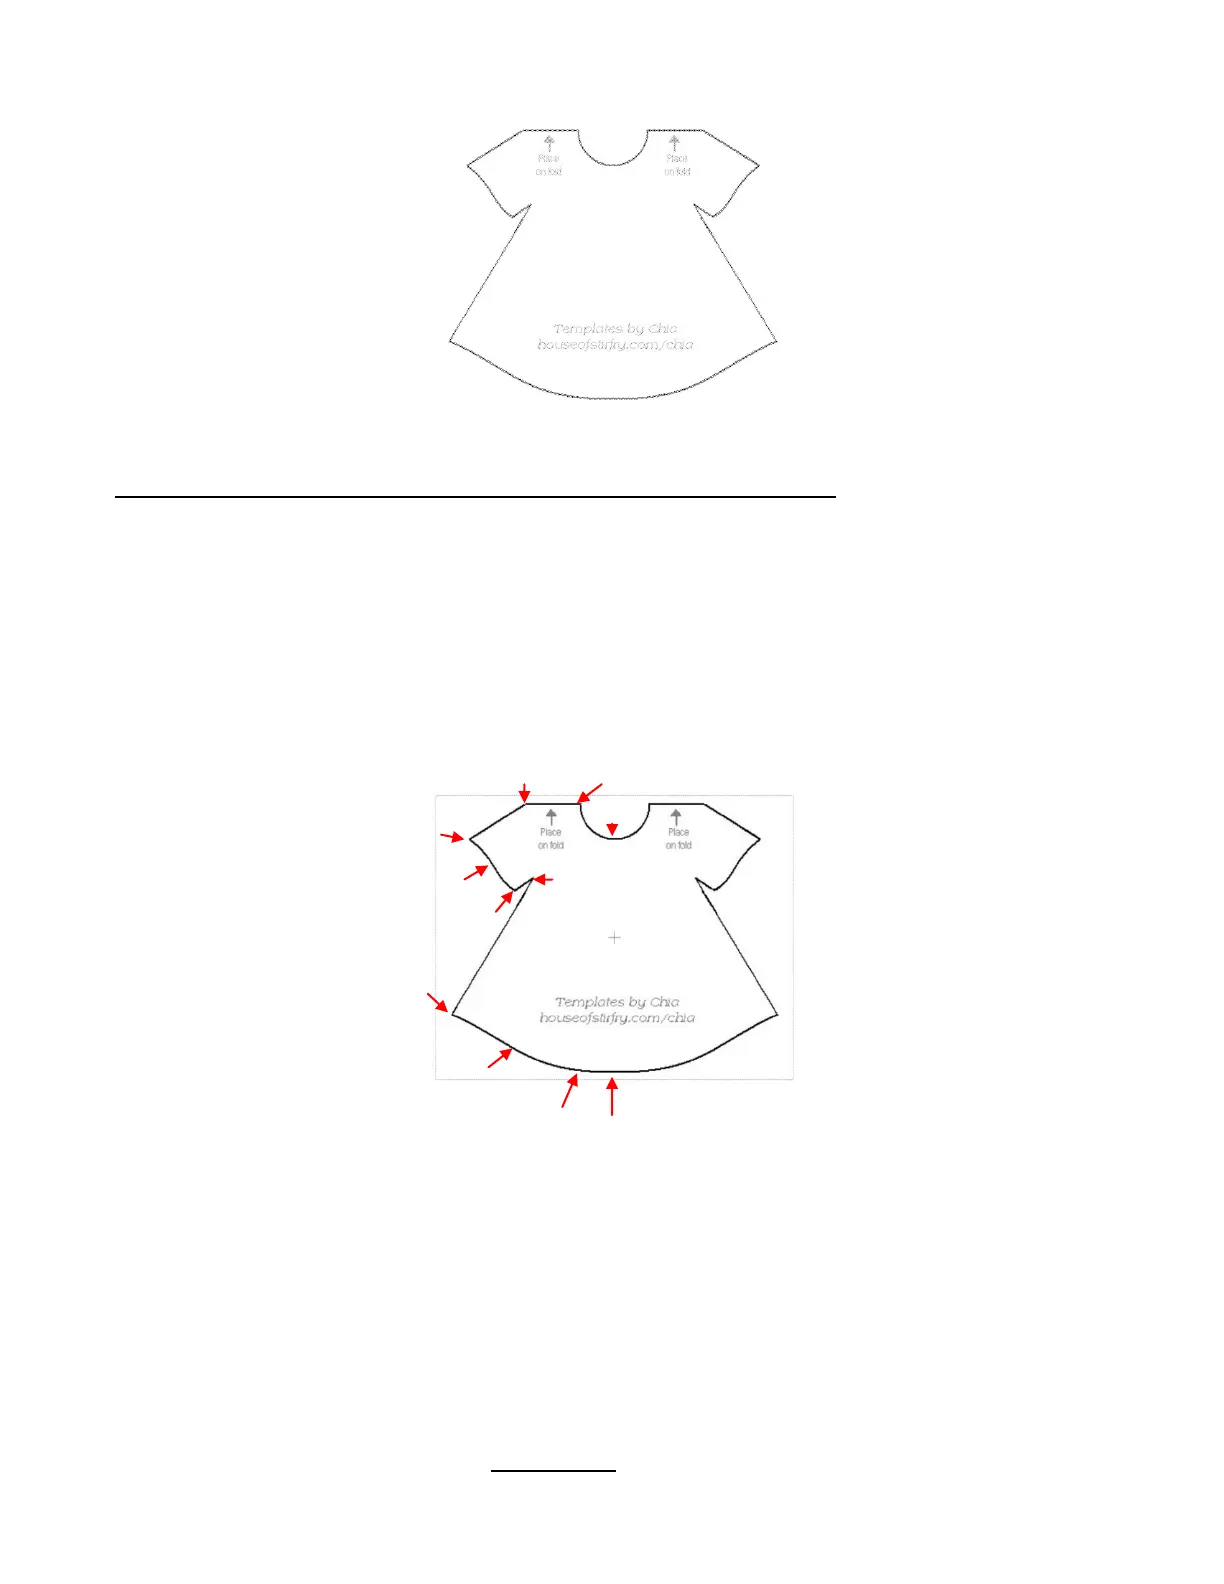
Now, the best method for tracing a symmetrical image is to only trace one half. Then you can make a mirror
image copy and weld to the origin to create a perfectly symmetrical shape. This is what will be done in this
case because the dress is symmetrical.
Before beginning the trace, take note of how many changes in curves and straight lines exist. This will help
you understand where you will be beginning and ending paths as you trace:
The process guidelines are as follows:
Left click once to plant a node. Right click to end a segment and plant the end node.
A series of straight line segments can be made, one right after another, without needing to right click.
Curve segments must always be individually ended by right clicking before starting the next segment,
whether it’s another curve segment or a straight line segment. If you try to add another segment, both
segments will become distorted.
After ending a segment, you can left click in that same spot where the last one ended to begin the next
segment. The new segment will automatically connect to that last node.
You do not need to end a straight line segment before adding a curve segment. After left clicking to
plant the last node for the straight line segment, click and hold the left mouse button at the point where
that next curve segment should end and drag the mouse, as needed, to form the curve that fits the
image. With the left mouse button still held down, right click to end that curve.
Trace will begin and end here moving
counter- clockwise around the dress.
Red arrows indicate where a
change in direction or
curvature occurs and where a
new path begins.