Color Trace
The Color Trace is similar to the Palette Trace but you can individually click on a color, from your original
imported raster, to trace and then specify a Tolerance level which will add or subtract similar colors to
include in that selection. This is the image to be used in this example and has been imported:
To switch to the Color Trace method, click on the tab named Color and the following will appear:
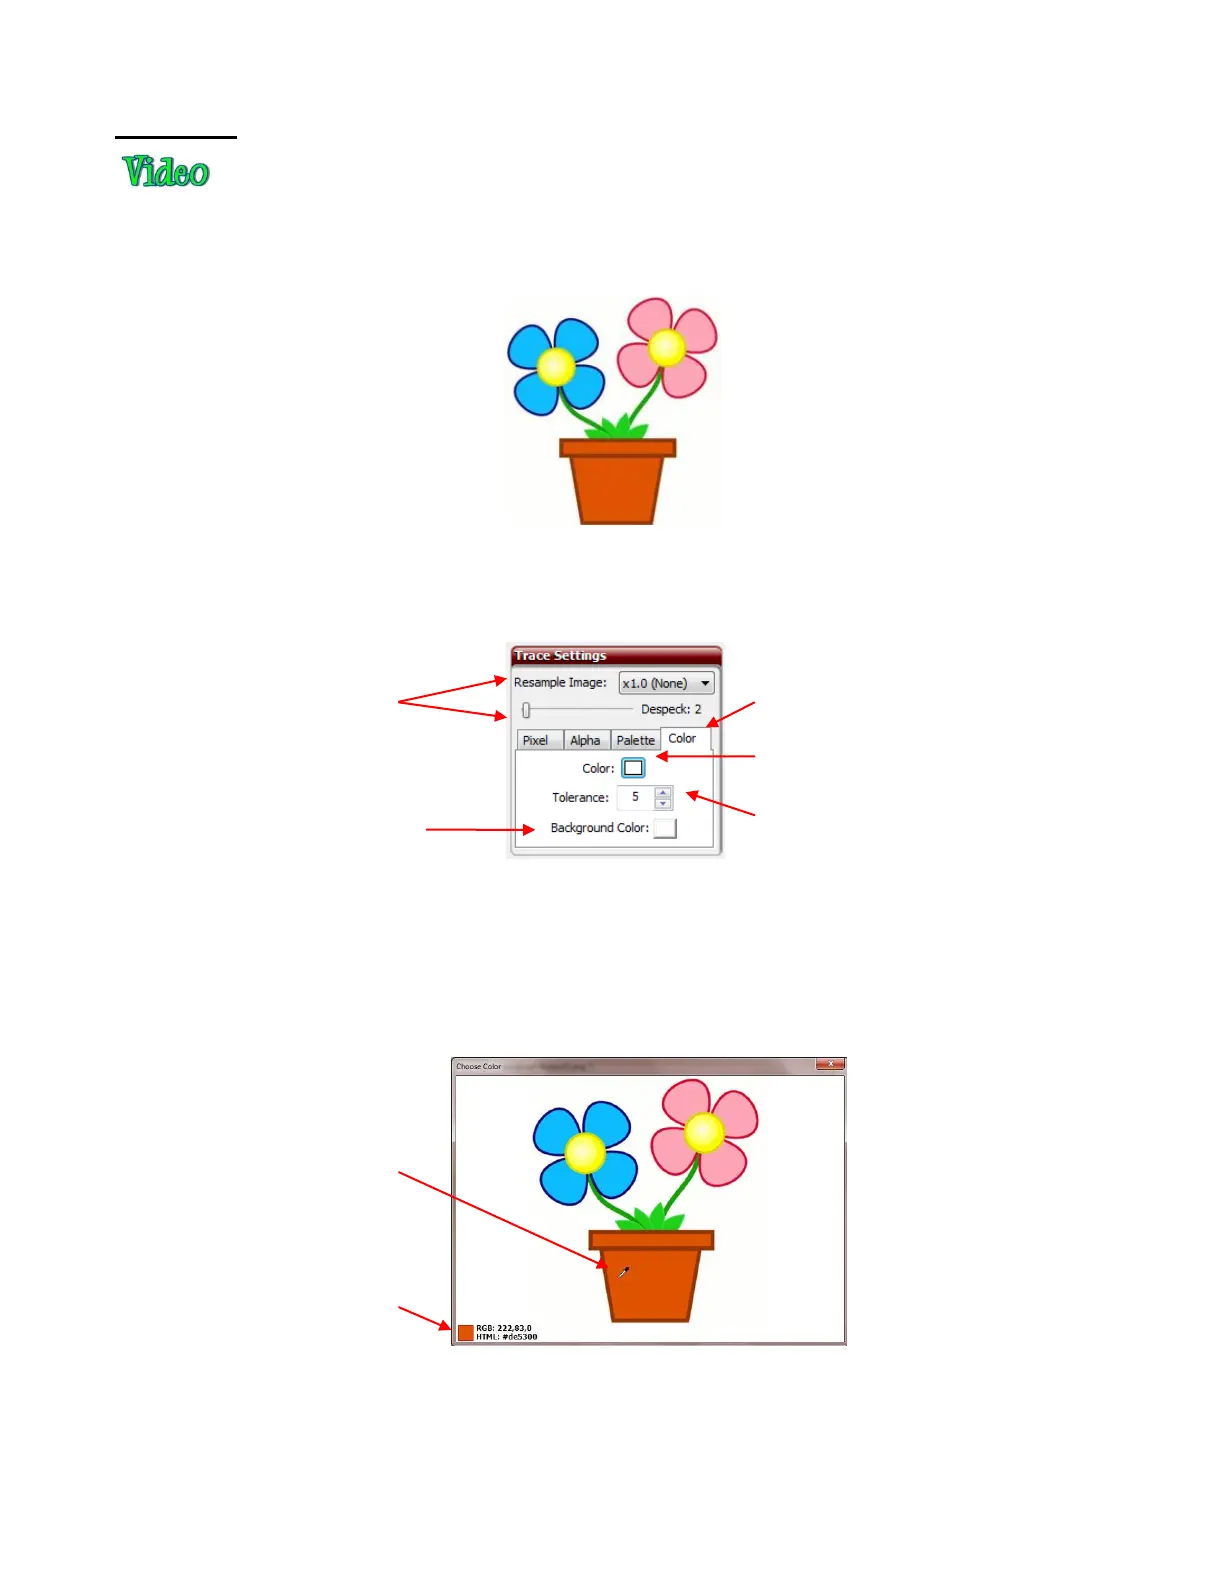
The first step is to click on the little white box on the Color Trace tab. A window will open showing the
imported image and you can select the first color to be traced. Let’s start with the interior of the flower pot.
An eyedropper cursor will appear and it can be moved around the screen so pick up the color of any part of
the image. To select the color of the flower pot, simply place the eyedropper anywhere over the flower pot:
When the desired color is selected, left click once to select it, click on Apply Changes, and the trace will be
immediately made using current settings. Just like with the other trace methods, other settings in this
window can be adjusted. In this particular case, the Despeck setting will need to be used to eliminate tiny
paths being added to the tracing.
Resample Image and
Despeck will be used
just as they were in
Pixel.
Click on the white box to open
a window for selecting the
color to trace
Since this is a PNG file,
Background Color can
be modified, if needed
Increase or decrease Tolerance
to add or subtract portions of the
image to be included in the trace
An eyedropper icon is
moved around the image
This box indicates the
color of the current pixel
under the eyedropper.