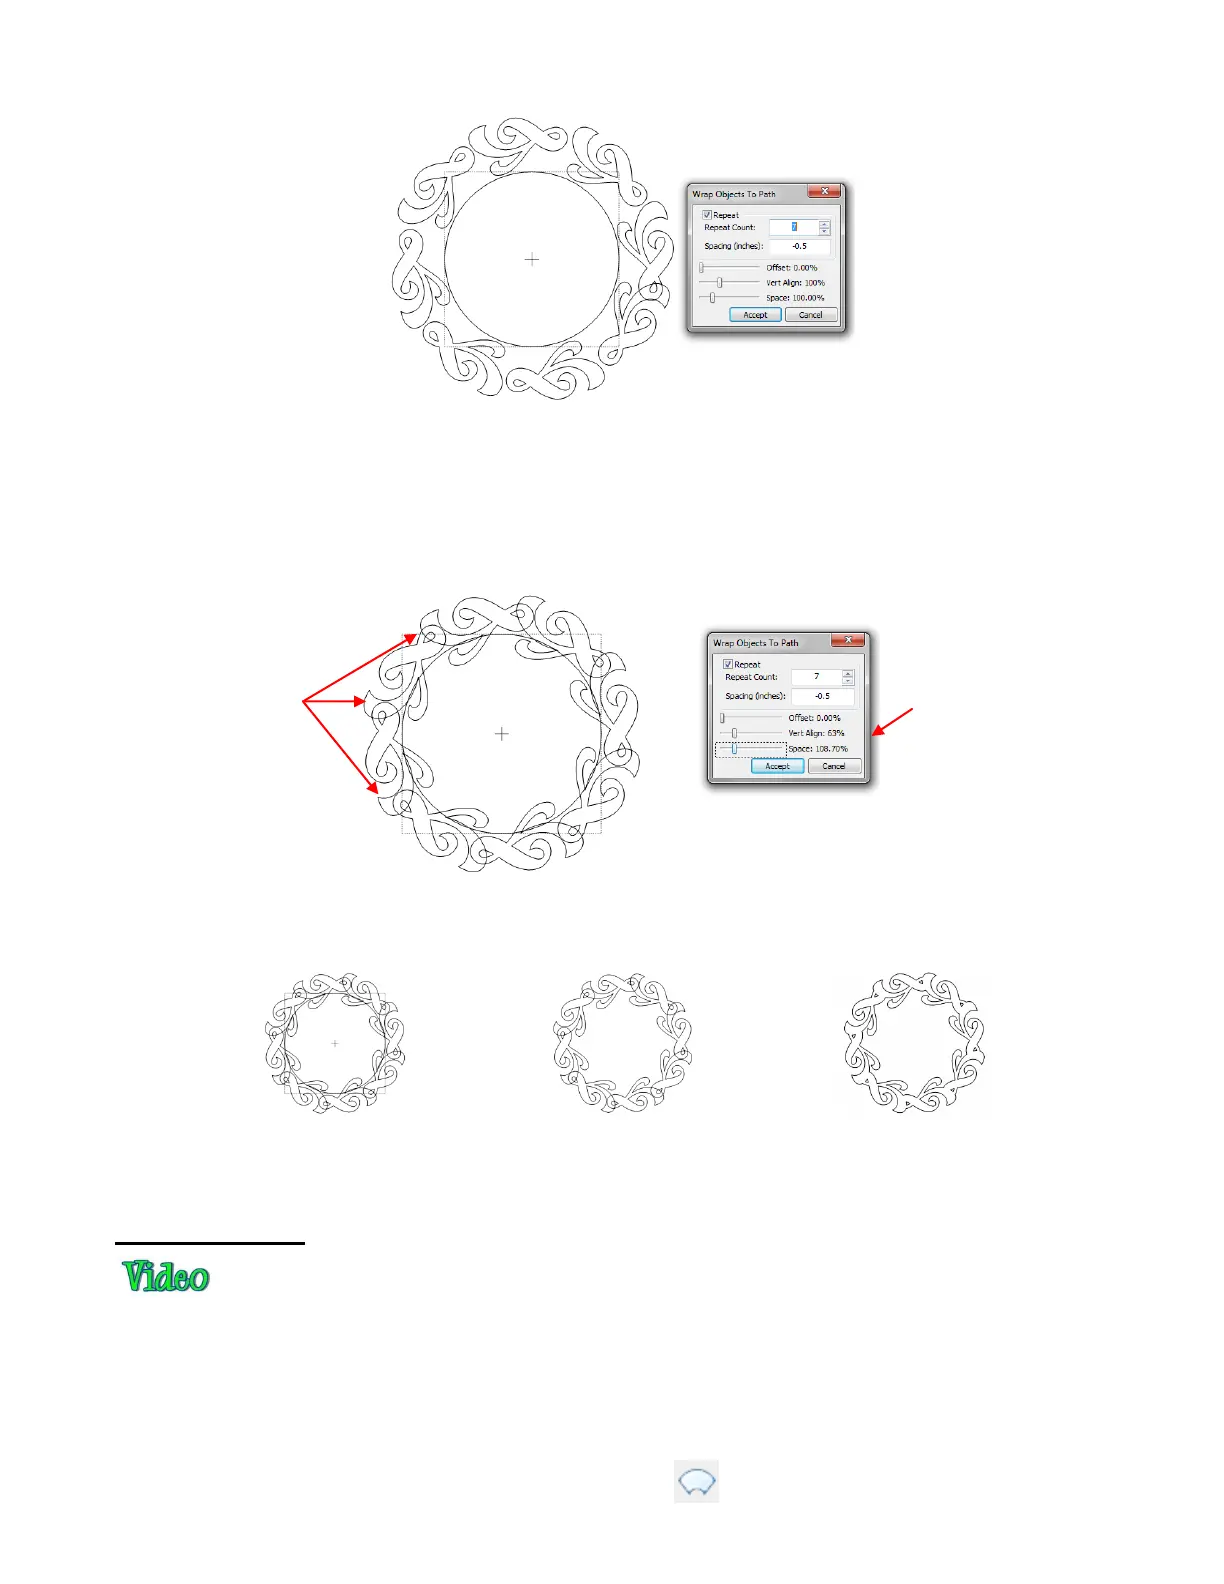
In order to get equal spacing and for the images to overlap for welding, begin tweaking the Vert. Align and
the Space settings. The Space setting is actually changing the Spacing setting you originally entered by
some percentage so that you can visually achieve equal spacing of the repeats around the circle. If the
spacing entered were positive, then a larger Space value will, logically, increase the spacing between the
objects. But with a negative Spacing, such as in this example, a larger Space value decreases the
spacing, resulting in more overlap:
Once you have the settings needed to get the desired overlap, click on Accept. Then delete the circle and
apply Weld (Ctrl+W):
8.06 Conical Warp
The Conical Warp feature can be used for shaping designs to fit around conical shapes, which are tubular
shapes in which the top is a different diameter than the bottom. What makes this feature especially fun to
use in designing is the incredible 3D simulation, as you will see in the Tumbler Wrap example which follows
below.
The Conical Warp feature is accessed in the following ways:
Click on the Conical Warp icon on the Magic Toolbar
The goal is to
achieve equal
overlap of all
shapes around
the circular path.
Adjust the settings to
achieve the goal. Use
the arrow keys on the
keyboard to change
values in smaller
increments.