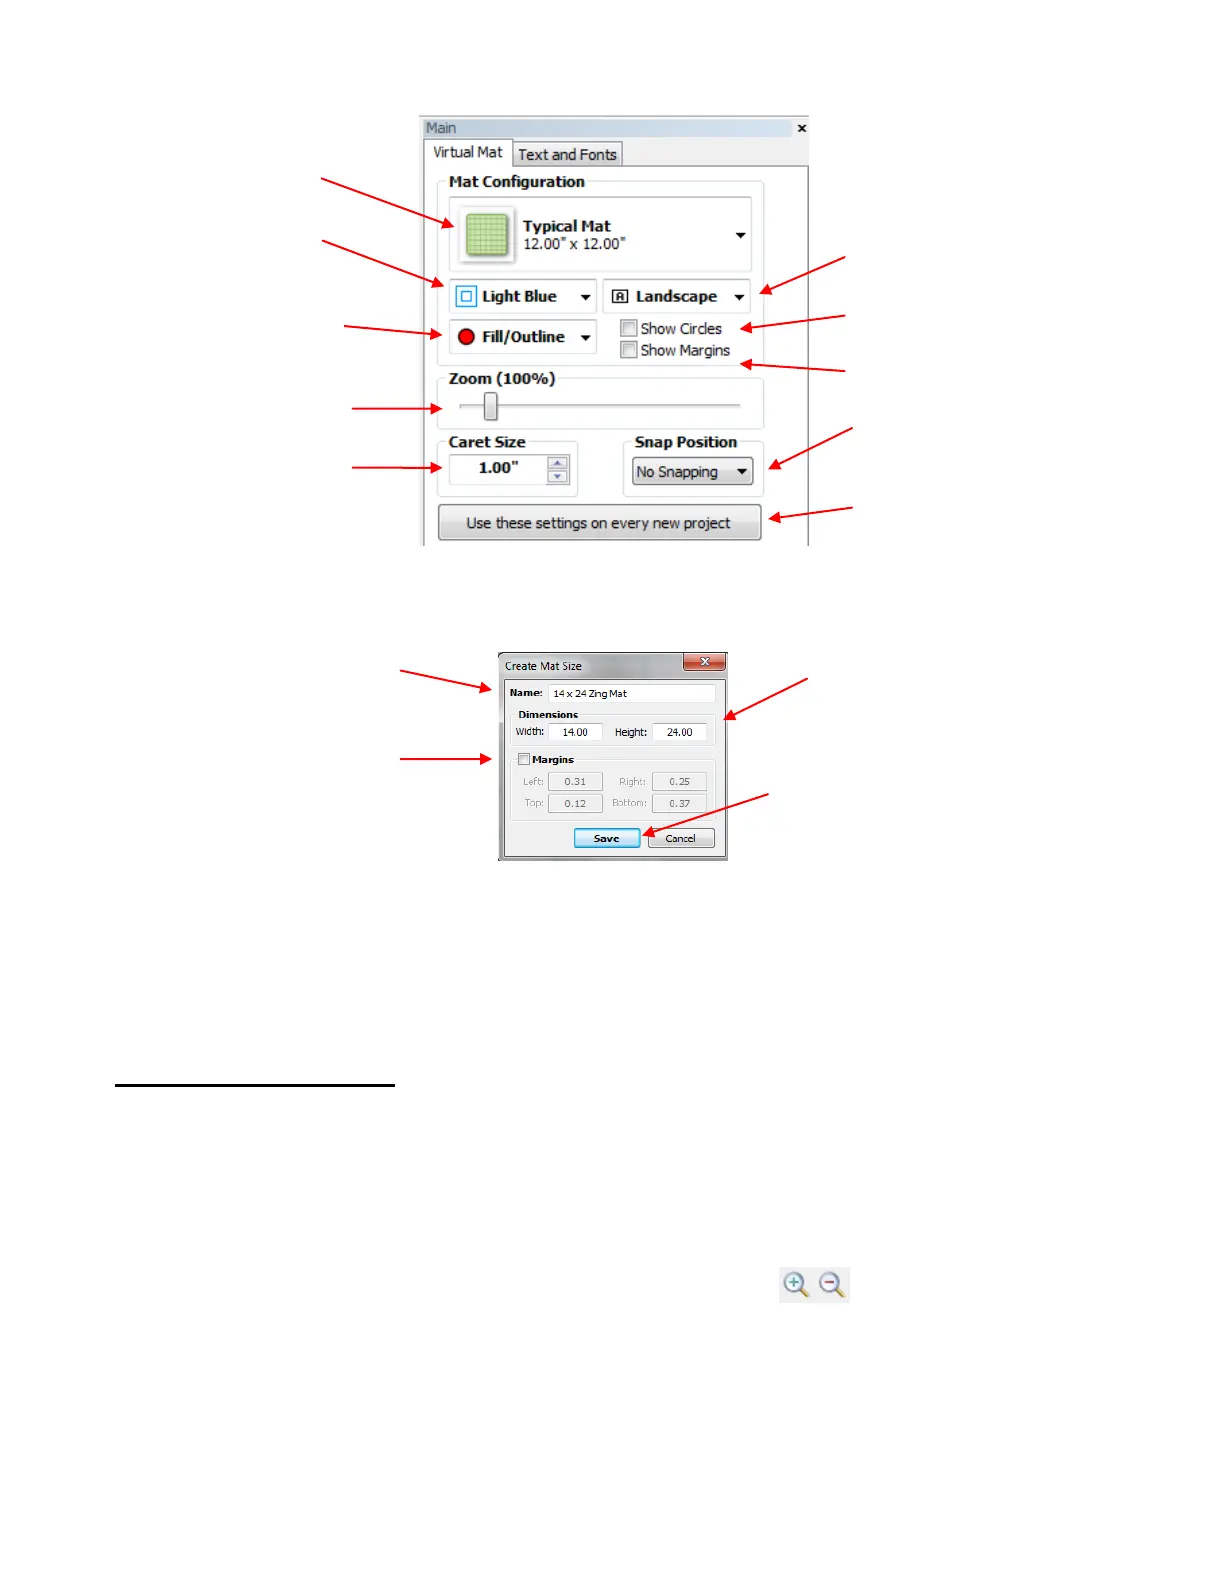
You also have the option to create your own custom mat sizes to add to the drop down list. Select Custom
Mat from the drop down menu and the following window will open:
For the Zing and other KNK cutters, having a margin isn’t necessary, thus the Margin options can be left
unchecked. For cutters that have areas of the mat that cannot be used, then enter the necessary margins.
If you wish to delete a custom mat from the dropdown menu, select it and the press the Delete key or just
right click on the mat name and an option to delete will open. If you saved a file with a custom mat and then
share the file with another MTC owner, your mat will be added to his/her dropdown menu in MTC.
3.05 Zooming and Panning
Any of the following methods will allow you to zoom in and out in 10% increments from 20% to 1000%:
Hold down the Ctrl key while rolling the mouse wheel. The zoom will center on where the mouse cursor
is currently located on the screen.
Scroll the Zoom setting on the Virtual Mat tab on the Main Bar
Press the + and – buttons on the keyboard
Click on the Zoom In and Zoom Out buttons on the File Toolbar.
Another way to zoom in and out is to use one of 4 shortcut keys (also available under View>Zoom To):
1 (or press the middle button on the mouse): Zoom to 100%
2: Zoom to 20%
3: Zoom to center of current-selected shapes using current zoom level
4: Zoom to 300%
Scroll to desired
Zoom level
Choose from 8 mat
colors.
Choose how shapes will
be displayed: Fill,
Outline or both.
Click to make current mat
settings the new default
Option for circular gridlines
Choose snap to grid
positioning
Select Portrait or
Landscape Orientation.
Choose Caret Size which
will become default size
for pasted and imported
shapes
Option to show mat margins
Enter a name for your
new mat
If desired, mark the
Margins box and enter
desired margins to be
shown on the screen
Enter the dimensions (Width and
Height) for your new mat