Modify your X and Y Offset values in the window shown at the end of Section 9.02.
Repeat this same print and cut process to further tweak your Zing’s Laser Offset values, until the arrow is
cut out precisely. Remember that you should expect to get perfect results, so keep adjusting those X and Y
values until you get there!
9.05 Print and Cut Tips
When pixel tracing imported images, the trace lines will not necessarily be perfectly aligned with the image.
This can result in tiny bits of white appearing in certain spots, suggesting the PNC wasn’t accurate. Zoom in
close on the image so that you can see the trace line following the outline of the image. Look at the same
spots where the PNC didn’t follow the image perfectly. This could be the cause of the inaccurate PNC.
There are three ways of dealing with this situation:
Retrace the imported image, increasing the Resample setting. This will result in a tighter fit of the trace
line to the original graphic.
Use Node Editing and Segment Editing to move the trace lines to more closely fit the original graphic.
This is covered in detail in the last part of Section 7.13.
Create an inset line to use for cutting instead of the original trace line. This is presented in Section 9.06
– PNC with an Inset Cut Line.
If a PNC is not precise and the cause is not the alignment of the trace lines, then try slowing down the
speed. If the mat is moving numerous times, in and out of the cutter, a slight shifting can occur, especially
at high speeds. Try reducing the Cut and Up Speeds to 9. If the problem still exists, try an Up Speed of 8.
Remember that the calibration of the Laser Offset is specific to the blade holder type being used. Thus, if
you change brands, the laser calibration will need to be modified.
If your test arrow is cutting perfect, thus indicating you have the correct calibration, but your next print and
cut is way off, then perhaps your situation is something outside of the ordinary. Please review the following
section which covers several different scenarios in which a few extra steps will be required when setting up
the layers for your print and cut.
9.06 Print and Cut Scenarios
Cutting Multiple PNC Images on the Same Page
When performing a PNC on multiple images (whether they are all the same image or different images), the
procedure is the same. One set of four registration marks will be printed along the outside edges of the
bounding area of ALL of the images on the page:
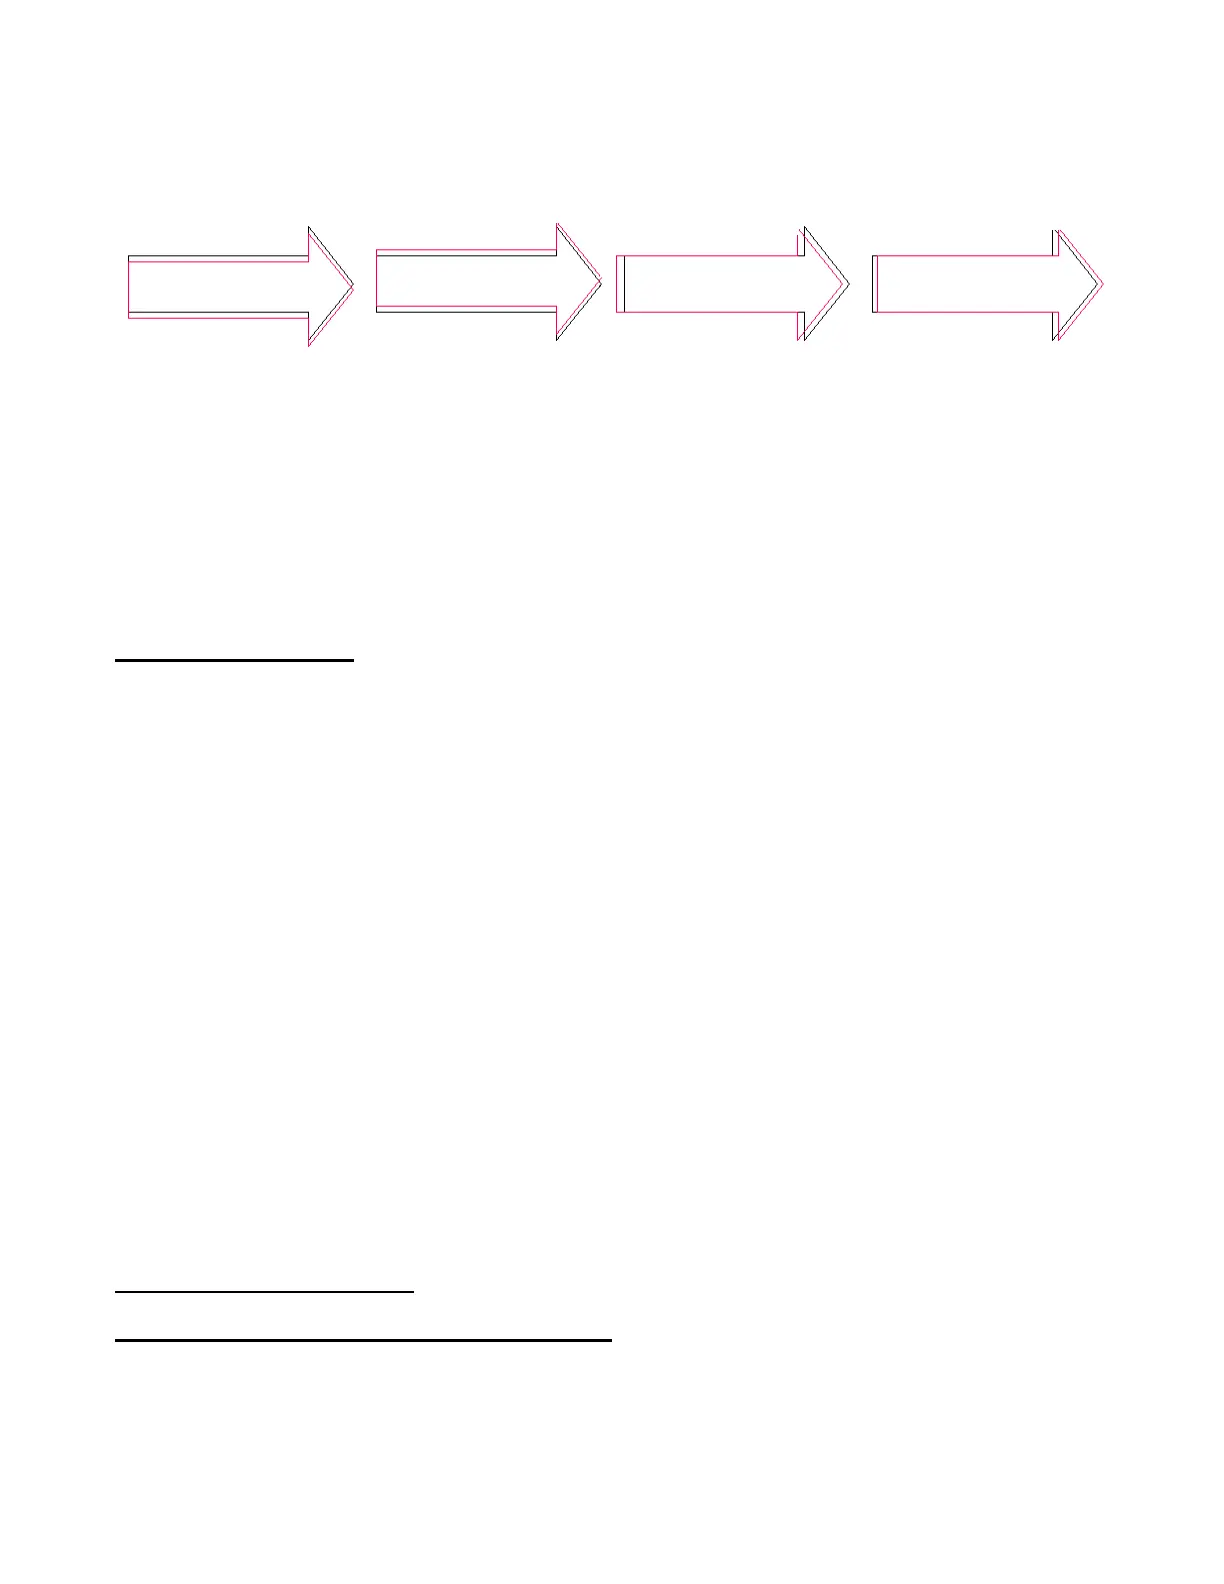
If the red cut line is
below the black print
line, then decrease the
value of X.
If the red cut line is
above the black print
line, then increase the
value of X.
If the red cut line is left
of the black print line,
then increase the
value of Y. (Note: Y is
a negative number)
If the red cut line is right
of the black print line,
then decrease the value
of Y. (Note: Y is a
negative number)
Red line is lower than
black line: change X
from 0.3 to 0.2.
Red line is higher than
black line: change X
from 0.3 to 0.4.
Red line is left of black line:
change Y from -24.0 to
-23.9 (an increase to a
negative number).
Red line is 1mm right of
black line: change Y from
-24.0 to -24.1 (a decrease
to a negative number).