When cutting most materials using the Zing blade holder, setting the perfect height for many thin materials is
not a concern. Put the blade holder into the Zing and rest the outer ridge of the blade holder on the rim of
the blade holder seat. Tighten the screw. This will provide a good height for cutting paper and vinyl.
It is only in the cutting of thicker materials, such as cardstock, chipboard, craft foam, craft plastic, stiffened
felt, etc, that the blade tip height will need to be set higher. There are two reasons for doing this:
You do not want the blade tip to be dragging across the material when moving to the point to begin the
cut.
The dropping of the blade will invoke more downward force. This can make a big difference when
cutting thicker denser materials, such as chipboard and craft plastic, which need the blade tip a little
higher, but not too high:
One recommended method for getting the same height set for all of your cuts is to use three old credit
cards. Set the three cards in a stack on top of the material you plan to cut. With the Zing turned off you can
move the blade carriage to the left until it is over the cards. Loosen the front screw and insert the blade
holder so that the tip of the blade is touching the top card. Now tighten the front screw and remove the
cards. This distance will provide the blade some “punch room” to give the extra force and more consistent
cutting of your material. You can also use a stack of 25 Post-It note sheets or even a stack of 12 squares
cut from Georgia Pacific 100# cardstock. Label these and keep next to your Zing!
Adjust the Speed, Force, and Number of Passes Based on the Material and Shapes
Using correct cut settings is equally important as the type of blade, blade length, and blade height. Refer to
Sections 2.03 - 2.05 for details. Again, some suggested settings are located at the end of this chapter and
settings for using the various Zing accessory tools are located at the end of Chapter 10.
Perform Test Cuts!
Use the test function in MTC to make test cuts. Do not proceed with your cut until the test cut is clean. When
cutting intricate shapes, a test cut of an intricate image, such as a letter or a small portion of your rhinestone
pattern, might be a better indicator of correct settings. Refer to Section 2.09.
Know Where Your Images Will Cut
Practice with the test pen until you know, with 100% confidence, where your images will be drawn. This is
important since you do not want to be guessing when you begin actually cutting with a blade. Refer to
Section 2.07 for details and videos on the options for controlling the locations of your cuts.
Adjust Blade Offset If Needed
What is the blade offset? It is the horizontal distance from the center of the blade shaft to the tip of the
blade. A pen or engraving tool has an offset of 0 because the tip is centered with the center of the
pen/engraving tool shaft. But a blade is different:
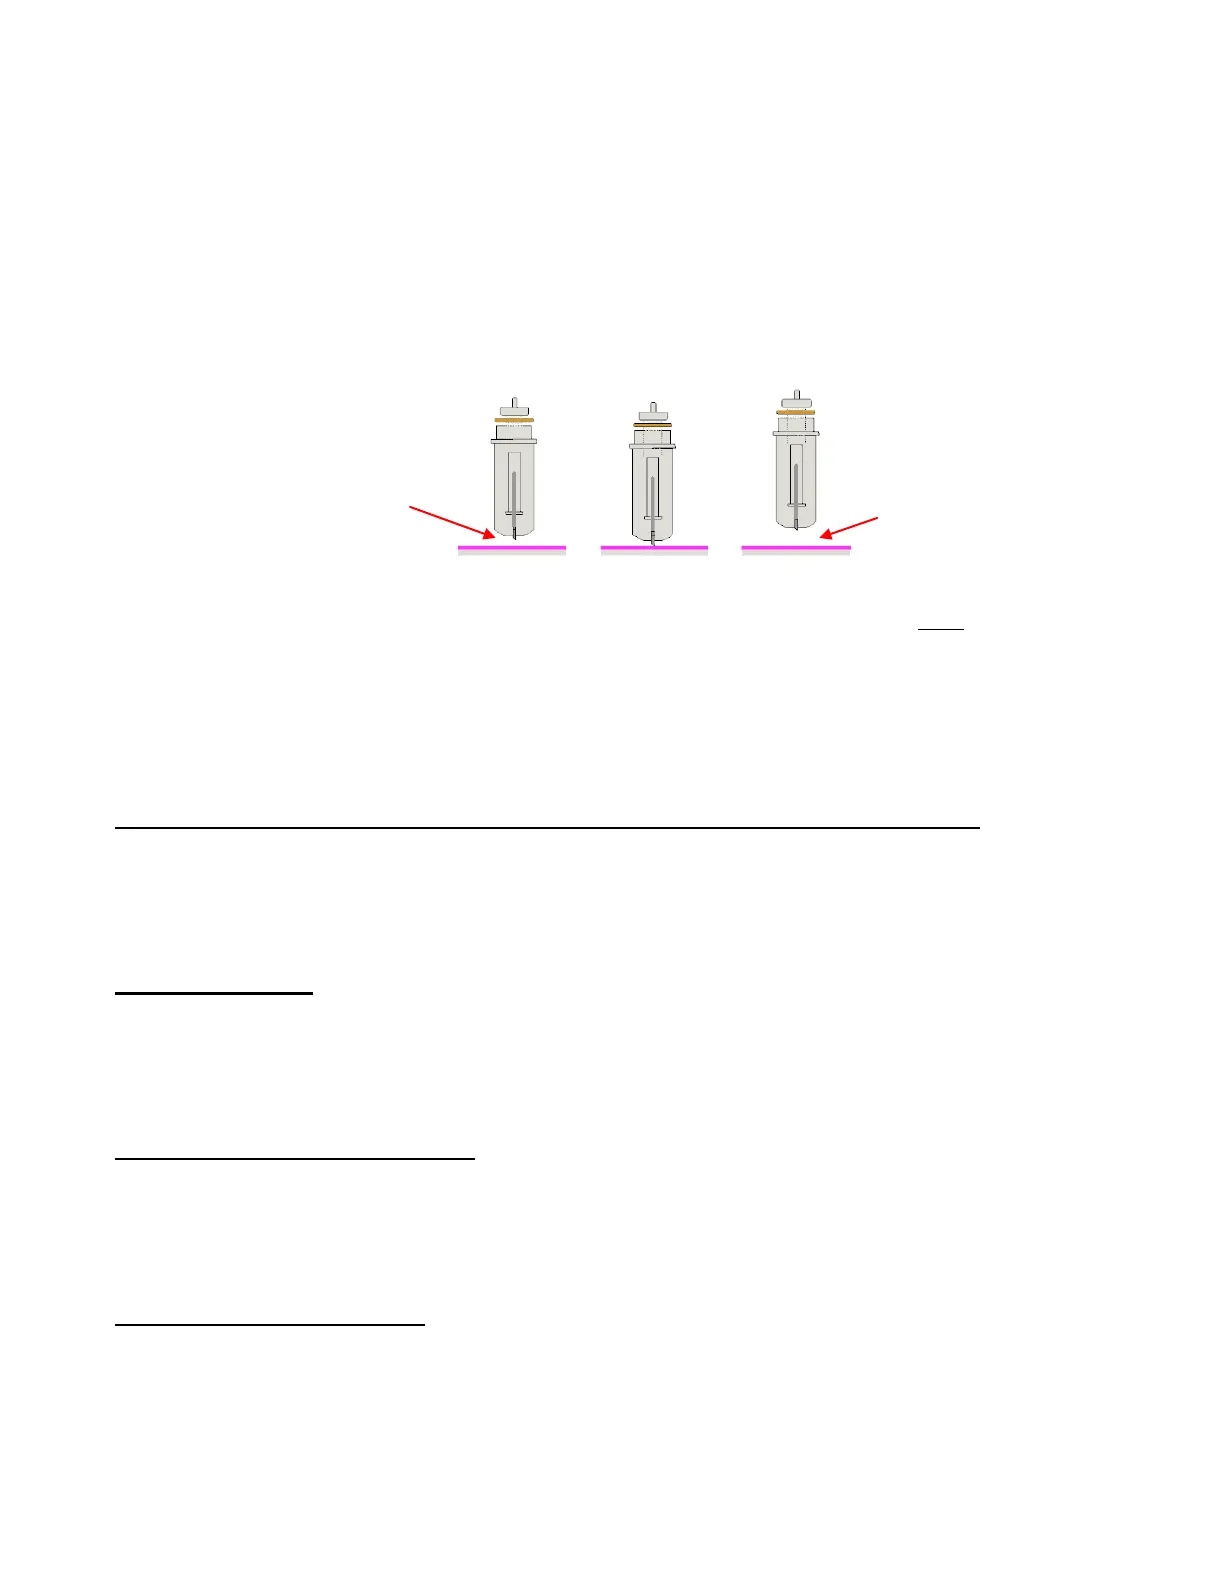
Perfect Height Too Low Too High
Blade tip
needs to be
above the
material
But not too high or
blade tip will not
reach the material
when dropped.