Now the design shown would cut exactly as shown. You would have a single cut piece. But for some lattice
designs, the opposite is wanted. For example, when cutting a design from the front of a greeting card, you
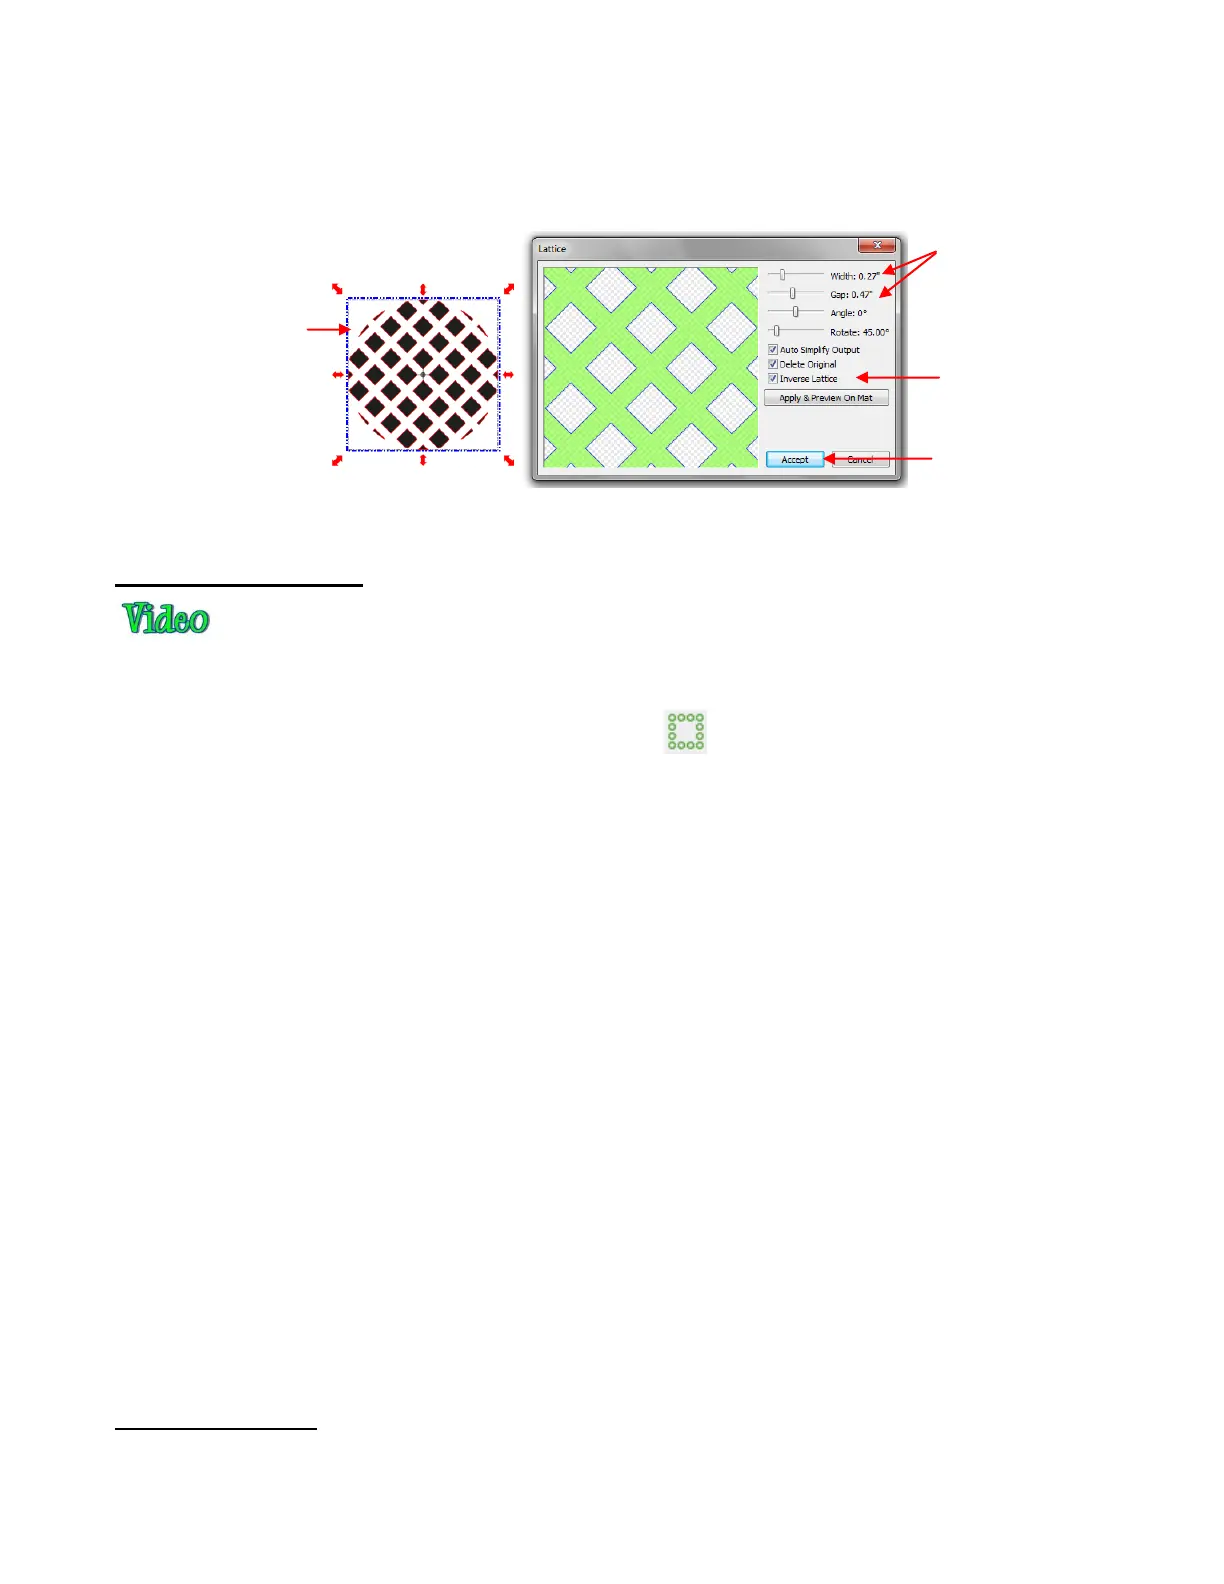
plan to keep the card and not the design itself. In this case, you would mark the Inverse Lattice option and
perhaps tweak the Width and Gap settings some more
:
8.08 Rhinestone Design
MTC’s Rhinestone feature provides both outlining and horizontal fill of shapes with the size of circles
needed for your rhinestones and the spacing desired. It can be accessed in any of the following ways:
Click on the Rhinestone icon on the Magic Toolbar
Press Ctrl+K
Right click on screen and select Shape Magic>Rhinestone
Go to Edit>Shape Magic>Rhinestone.
There are some very specific guidelines to follow when designing a rhinestone pattern:
The shape needs to be sized before applying the rhinestone circles. If you wait until afterwards and then
realize that you want your overall design to be twice as large, then resizing will make the circles twice as
large and the spacing twice as large, too! So, before accessing the Rhinestone feature, decide on the
overall size you wish to use.
The circle size selected will need to be larger than the stone size you purchased. As a general rule,
select a size three numbers larger than your stones. Thus, if you purchased 10SS stones, then in the
rhinestone design window, you will want to be selecting 13SS stones. This larger size will allow the
10SS stones to more easily brush into the holes.
When selecting a font to use, be leery of “fancy fonts”. You want the lettering to be readable after it is
converted to circles. When in doubt, have someone who doesn’t know the words you’ve typed attempt
to read the circle design on the screen. If they cannot decipher your words, then try a more basic font.
Rhinestone designs almost always need “tweaking” which involves adding, deleting, moving, or
respacing circles. You will need to apply a Break (Ctrl-B) to separate the pattern into individual circles.
To quickly add a circle, select one, click on the Copy icon and then click on the Paste in Place icon and
drag the circle to its new location. Then you can continue to just click on Paste in Place to add more.
To respace a row or column of circles, marquee-select and then use the shortcut keys, [ and ] to provide
equal vertical and equal horizontal spacing, respectively.
Rhinestone Outline
In this example, the initials from a high school will be outlined. As mentioned in the introduction to this
section, the first step is to size width and height of the lettering. Make sure there is enough space between
Notice the
difference. In this
case the lattice part
will be attached to
the cut material
Click on Inverse
Lattice to reverse
the type created
Click on Accept if
design is complete
Width and Gap
modified after
switching to Inverse
Lattice