A print preview shows that only the original graphic will be printed. Note how the registration marks are
printed based on the large white rectangle:
After printing, the original graphic layer is turned off, so that only the heart and rectangle will be cut:
PNC with an Inset Cut Line
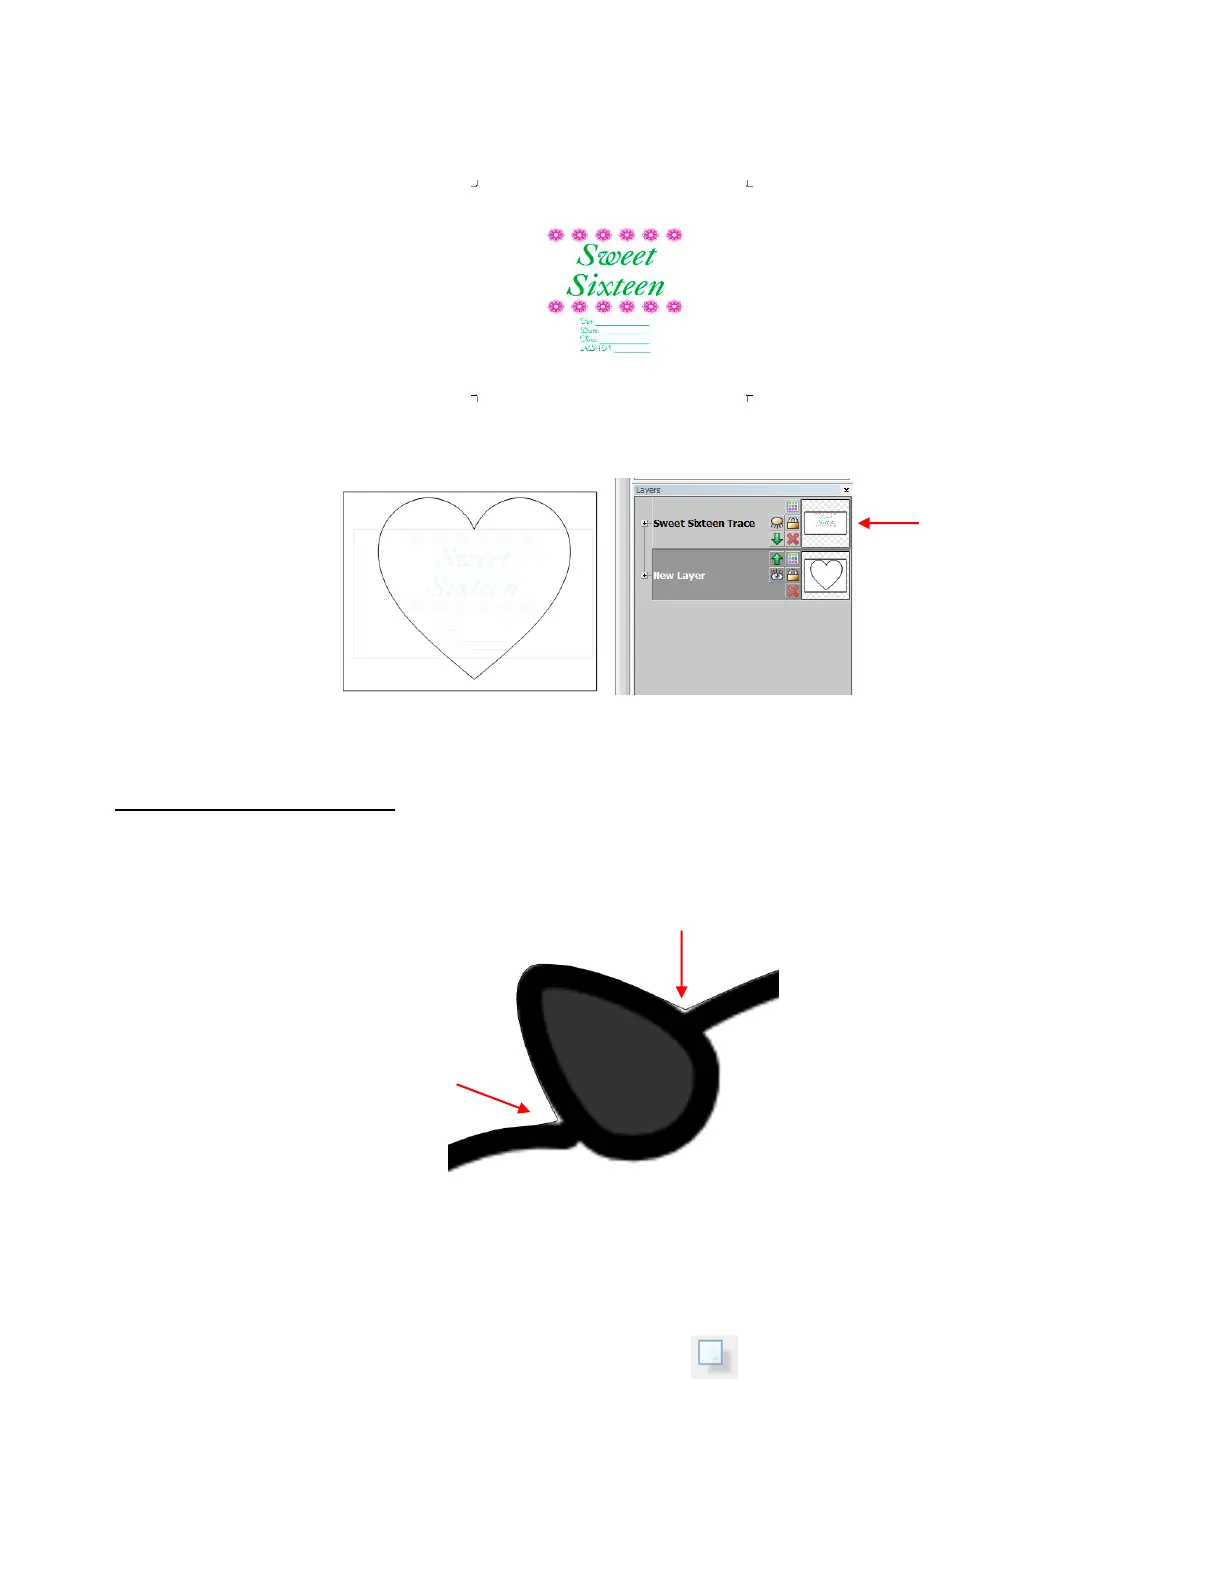
A pixel trace can often have areas where the trace line (cut line) will be outside of the original image. This is
especially true of tight interior corners or sharp turns on the image. This results in white areas appearing
around the print and cut:
At the end of Section 7.13, it was shown how to use node and segment editing to correct the trace line so
that it better fits the original image. Sometimes, however, there may be more editing needed than would be
practical to do. In these cases, an inset cut line can be created.
Select the traced image and access the Shadow Layer function in any of the following ways:
Click on the Shadow Layer icon on the Magic Toolbar
Press Ctrl+H
Right click on the screen and select Shape Magic>Shadow Layer
Go to Edit>Shape Magic>Shadow Layer.
The red arrows indicate spots around
our cow’s left ear where white areas
would show when cut. The original
trace line doesn’t quite fit the image in
those spots.
The layer with the
original graphic is
hidden before
sending the file to
cut.