This can be used to identify and trace different parts of an image, however, with the newer Alpha, Palette,
and Color options available, this feature may not ever be something you need.
Alpha Trace Method
Use the Alpha Trace for PNG files with transparent backgrounds (alpha channels). To switch to the Alpha
Trace method, click on the tab named Alpha and following will appear:
Use the Alpha Threshold in the same way that the Threshold was applied. Increase to include more You
will mostly likely discover that less adjustment is required. Both Despeck and Resample Image settings
also apply in the same way.
In this example, we are importing a PNG image of a leopard. Before importing, make the following changes
on the Virtual Mat tab of the Main Bar. These two changes will allow the image you trace to appear in full
color, on the main screen, after tracing:
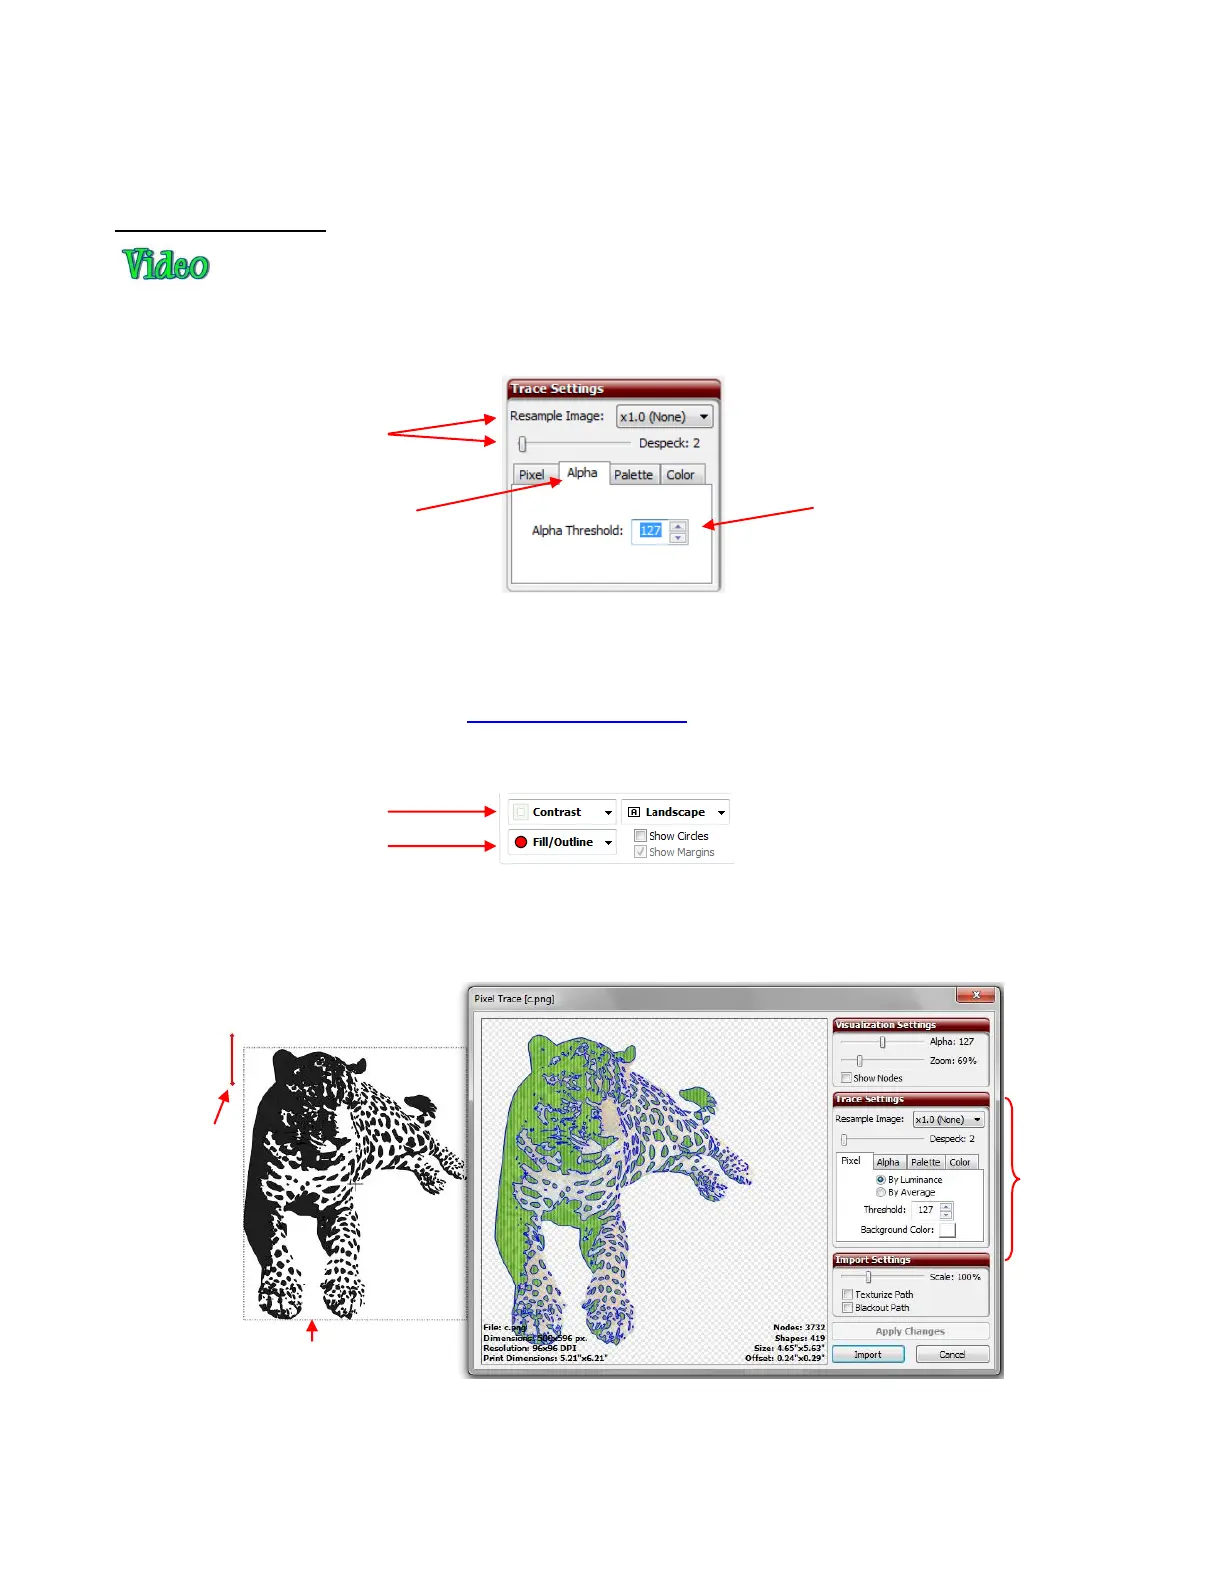
Before using the Alpha Trace feature, note how the leopard appears when the default settings in the Pixel
tab are applied. Also note that if you first double click in the top left part of the screen, you can “plant” the
Caret in a location where you can see a clearer preview of shape that will be produced with those settings:
As indicated in the screenshot, the tracing could be used for vinyl cutting, since vinyl is applied using
transfer tape. However, let’s say this is going to be a print and cut application in which the leopard will be
printed onto paper and then the outside border cut out. What is needed is a single contour line around the
leopard. By experimenting with the Threshold, it is found that a setting of 240 is needed to obtain a smooth
Resample Image and
Despeck will be used
just as they were in Pixel
Trace.
Alpha Threshold will be
used just as it was in
Pixel Trace, but probably
won’t require as much
change.
This might be exactly what
you want for a vinyl cut!
Default Pixel
Trace settings
when image is
first imported.
Caret placed
here before
going to Pixel
Trace so that
a true preview
of the shape
can be
viewed.