Print and Cut
This is the mode recommended when you want to print images on your printer and then have the Zing cut
them out.
It is similar to WYSIWYG because shapes will be cut where they are located on the Virtual Mat. However,
in the Print and Cut process, three printed registration marks are printed along with your images. The laser
light is then set at each mark and the Zing will then cut out your shapes based on triangulation. This is far
more precise than WYSIWYG because it takes into account not only any misalignment of your printout on
the mat, but also any errors in the printing. Most printers do not print images precisely in the location on the
paper as they are located on the screen.
Note that raster images (.JPG, .BMP, .PNG etc) will need to be pixel traced first so that cut lines are
created. Refer to Chapter 6 for tutorials on how to do the pixel tracing (also called vectorizing).
Refer to Chapter 9 for tutorials on the print and cut process, including calibrating the laser.
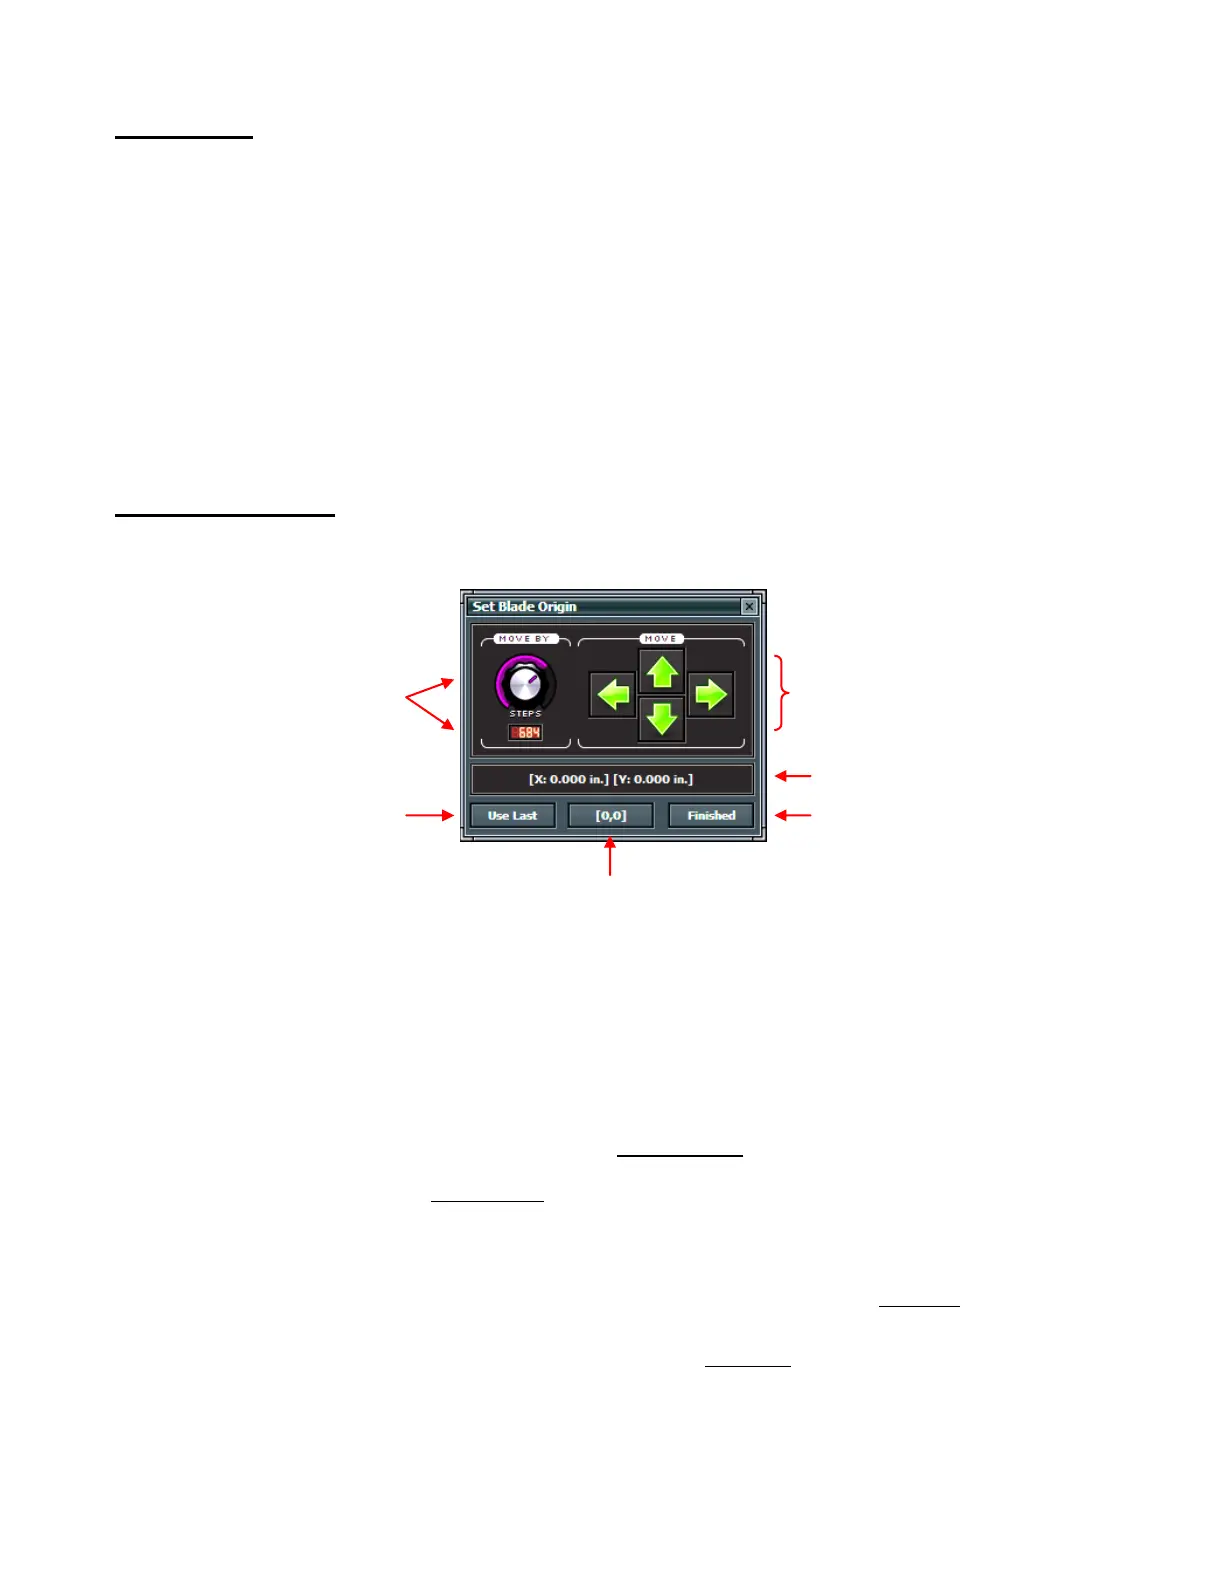
2.08 Set Blade Origin
Clicking on the Set Blade Origin button opens the Set Blade Origin window:
Every time you turn on the Zing, the blade carriage will be moved to the same spot. This is called the Home
Origin or [0,0]. Now, you can always use that spot to start your cuts and never set a new origin, however it
limits you, somewhat, in situations where you may be performing your test cut at that location but will need
to move over to a new location to cut out your shapes. Also, you may want to cut shapes from several
scraps of material and would like to place those scraps on your mat prior to cutting.
The Set Blade Origin window allows you to move the blade carriage to a new location and define that
location as the new origin for that cut:
Click on the green arrows to move the carriage left and right and the mat in and out of the Zing until the
blade carriage is in the location you wish to use. IMPORTANT: At the current time of this writing, there
is a software bug which will be invoked if you use the Up arrow (either in the software or on your
keyboard) to move the mat more than 1” in that direction. If you do move more than 1” in that direction,
and then press the Cut Project button, the blade carriage will return to the Home Position instead of
cutting. So, before setting the origin, lift the pinch rollers on the Zing and slide the mat towards the back
to better approximate the front-to-back location of your first cut.
In Knife Point mode you will be setting the origin based on the location of the blade tip (or other tool
tip).
In WYSIWYG or Print and Cut modes, you’ll be using the laser light to set your origin.
Note that you can also use the arrow keys on your keyboard instead of clicking on the green arrows on
the screen. This is actually a great alternative since you can then keep your eyes on the blade tip or the
laser instead of constantly looking back at the screen to click in the correct spot.
The Move By dial determines how far the blade carriage moves with each click of an arrow:
Move By dial and current
setting. Range is from 4
to 1016.
Arrows used to move the blade
carriage and laser light
Click here to set the origin
at the same location as
used during the last cut.
Current location relative to [0,0]
Click here to set new origin and
close this window.