Open Path in Bézier Warp
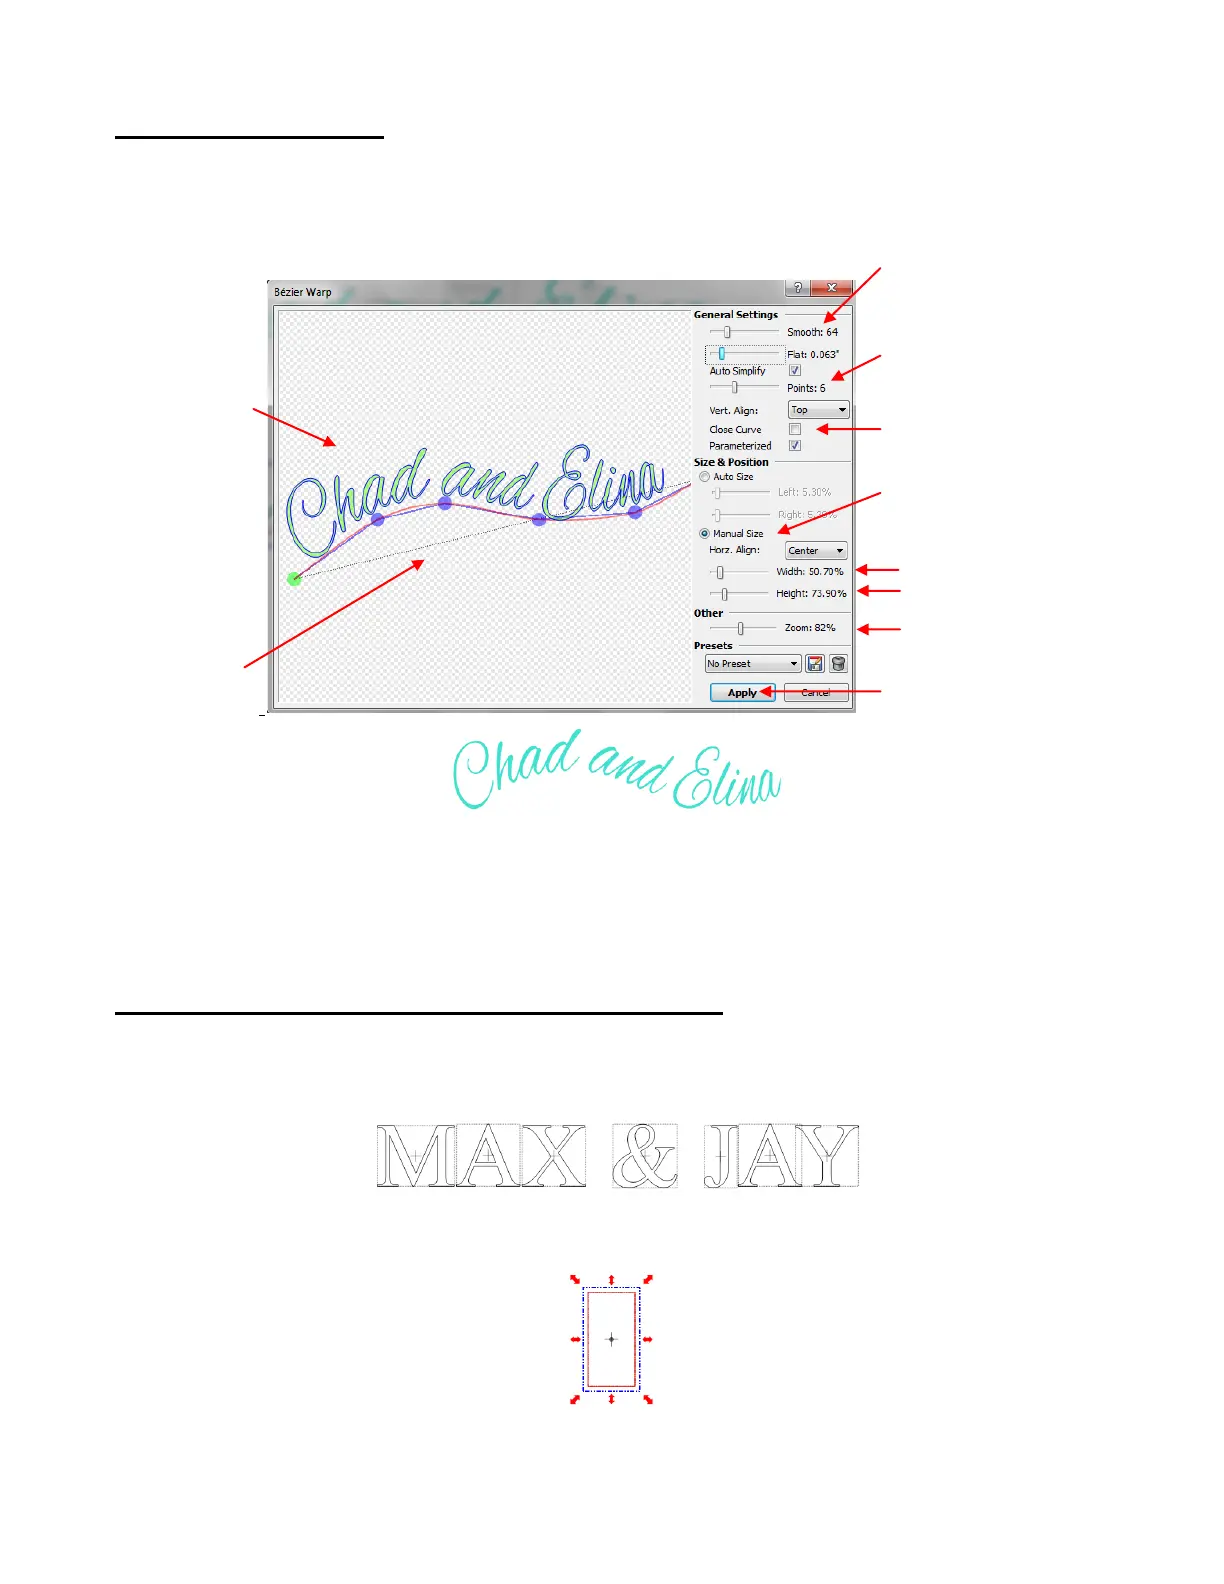
To use an open path, the Close Curve option is unchecked, so that the path is a line instead of a circle.
Next, more Points are added and then the points are dragged to create the desired path. Use the Zoom
setting if you cannot see your entire text.
In this example, Manual Size was selected but you can also try Auto Size again, too! The Bézier Warp
process is about experimenting and having fun with it! Take notes if you like on certain settings that worked
well for you. And remember that the option to save settings is available.
5.09 Creating an Overlay Title and Welding Text to Frames
Creating a frame for welding single letters or images is very easy. Using the steps in Section 5.03, create a
title. The font chosen for this example is Times New Roman. Also, Split By Glyphs is selected so that
individual letters can be resized, if needed, to overlap the frame:
Click on the Import Basic Shapes icon on the Import Toobar and select Polygons. Scroll to locate the
Rectangle shape and double click to add to the screen:
On the Virtual Mat settings tab on the Main Bar (refer to Section 4.04), make sure you have Outline mode
selected so that you will be able to see the rectangle and the letters clearly. Also, change to No Snapping
under Snap Position so that you can resize the rectangle and letters with precision.
Click on Apply when
done.
Scroll Smooth setting
to make curve more
rounded
Text falls
along
custom
design path
Path can be
modified by
dragging
green and
blue points
Increase Points to add
more changes in the
curve
Uncheck Close Curve
to create an open path.
Check the Manual
Size box.
Adjust Width and
Height to create
desired look.