Do you have the pinch wheel levers raised in the front (so that the pinch wheels are down)?
Have you set the blade length based on the thickness of the material you are cutting?
Do you have the blade holder firmly mounted in the blade holder seat and the blade tip at the correct height
above the material?
Have you set the Origin at the bottom right corner of your material (or wherever you need the origin to be)?
Have you set the Force? And the Speed?
Have you selected the correct Offset?
Do you need to turn on Multi-cut for this material?
Have you selected the Cut Type you wish to use? Do you know, with confidence, where your shapes are
going to cut?
2.12 Resolution Calibration
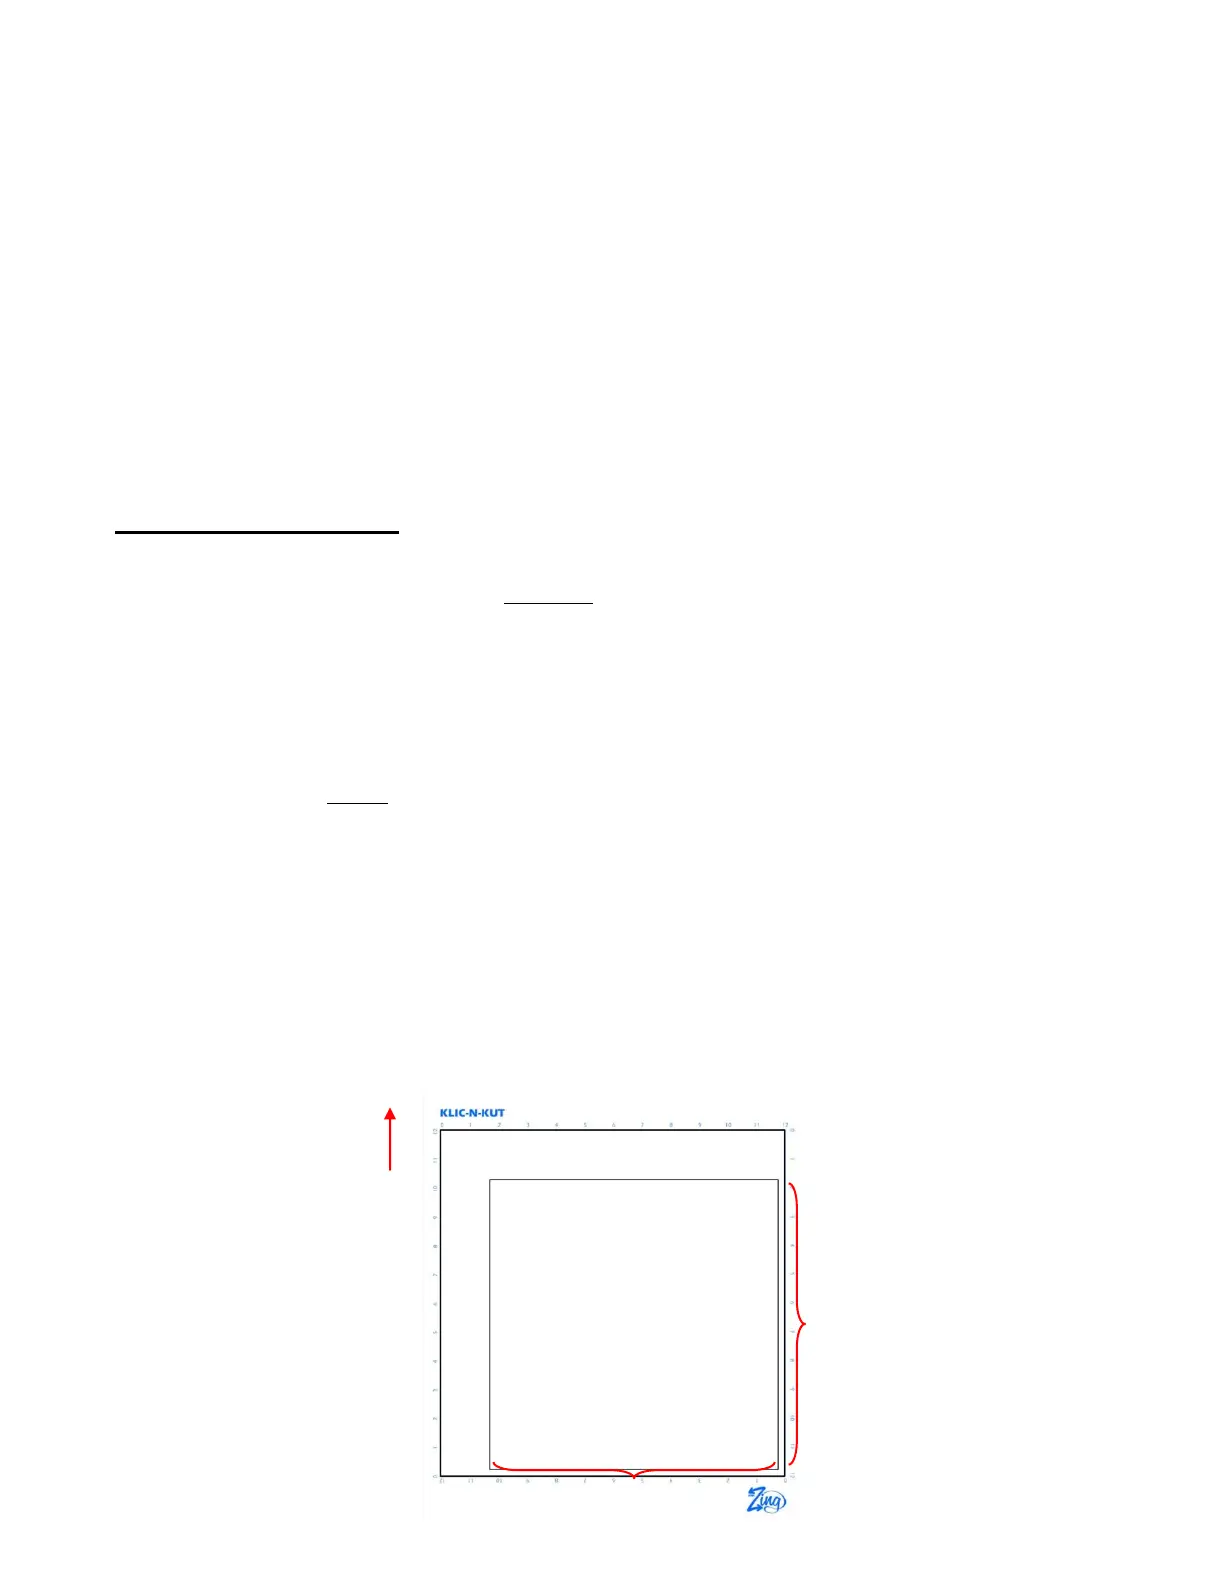
If you were to cut out any particular shape, for example, a 10” x 10” square, you might find that it actually
measures 9-15/16” x 10-1/32”. It will be very close to 10” x 10” but perhaps just slightly smaller or larger in
either or both dimensions. Thus, one of the available calibrations involves inputting a width and a height
resolution that will be used to adjust all of your cutting so that shapes will cut at exactly the same sizes as
the width and the height dimensions of shapes in the software.
Note that this Resolution only applies to Knife Point and WYSIWYG cutting modes. For Print and Cut
applications, Resolution is determined automatically based on where the registration marks are set with the
laser light during the print and cut process.
Begin by drawing a square in MTC. Double click on the screen to set a location for the square. Note that the
larger the square, the more accurate your calibration will be, thus it is highly recommended that you use at
least a 10” square, if you have paper large enough for drawing. If not, then use letter size paper and make
the square 8” in size. If needed, refer to Section 3.13 for directions on resizing shapes.
It is recommended that you use the test pen for drawing versus the blade. This will allow you to reuse the
same sheet of paper for several tests, during the calibration process. You will also need a ruler.
Click on the Cut Project With icon and, under Cut Type, choose Knife Point. Set the origin and click on
Cut Project to have the square drawn on the piece of paper.
Slide the mat out but leave the paper on the mat. Note that regardless of having your Virtual Mat set to
Landscape or Portrait, the Width of the square is the left-to-right dimension as you face the Zing. The
Height of the square is the front to back dimension:
Feed the mat this direction
into the Zing