Go to Edit>Shape Magic>Boolean Join.
The following popup menu will appear and as you move your mouse over the various options, you will see
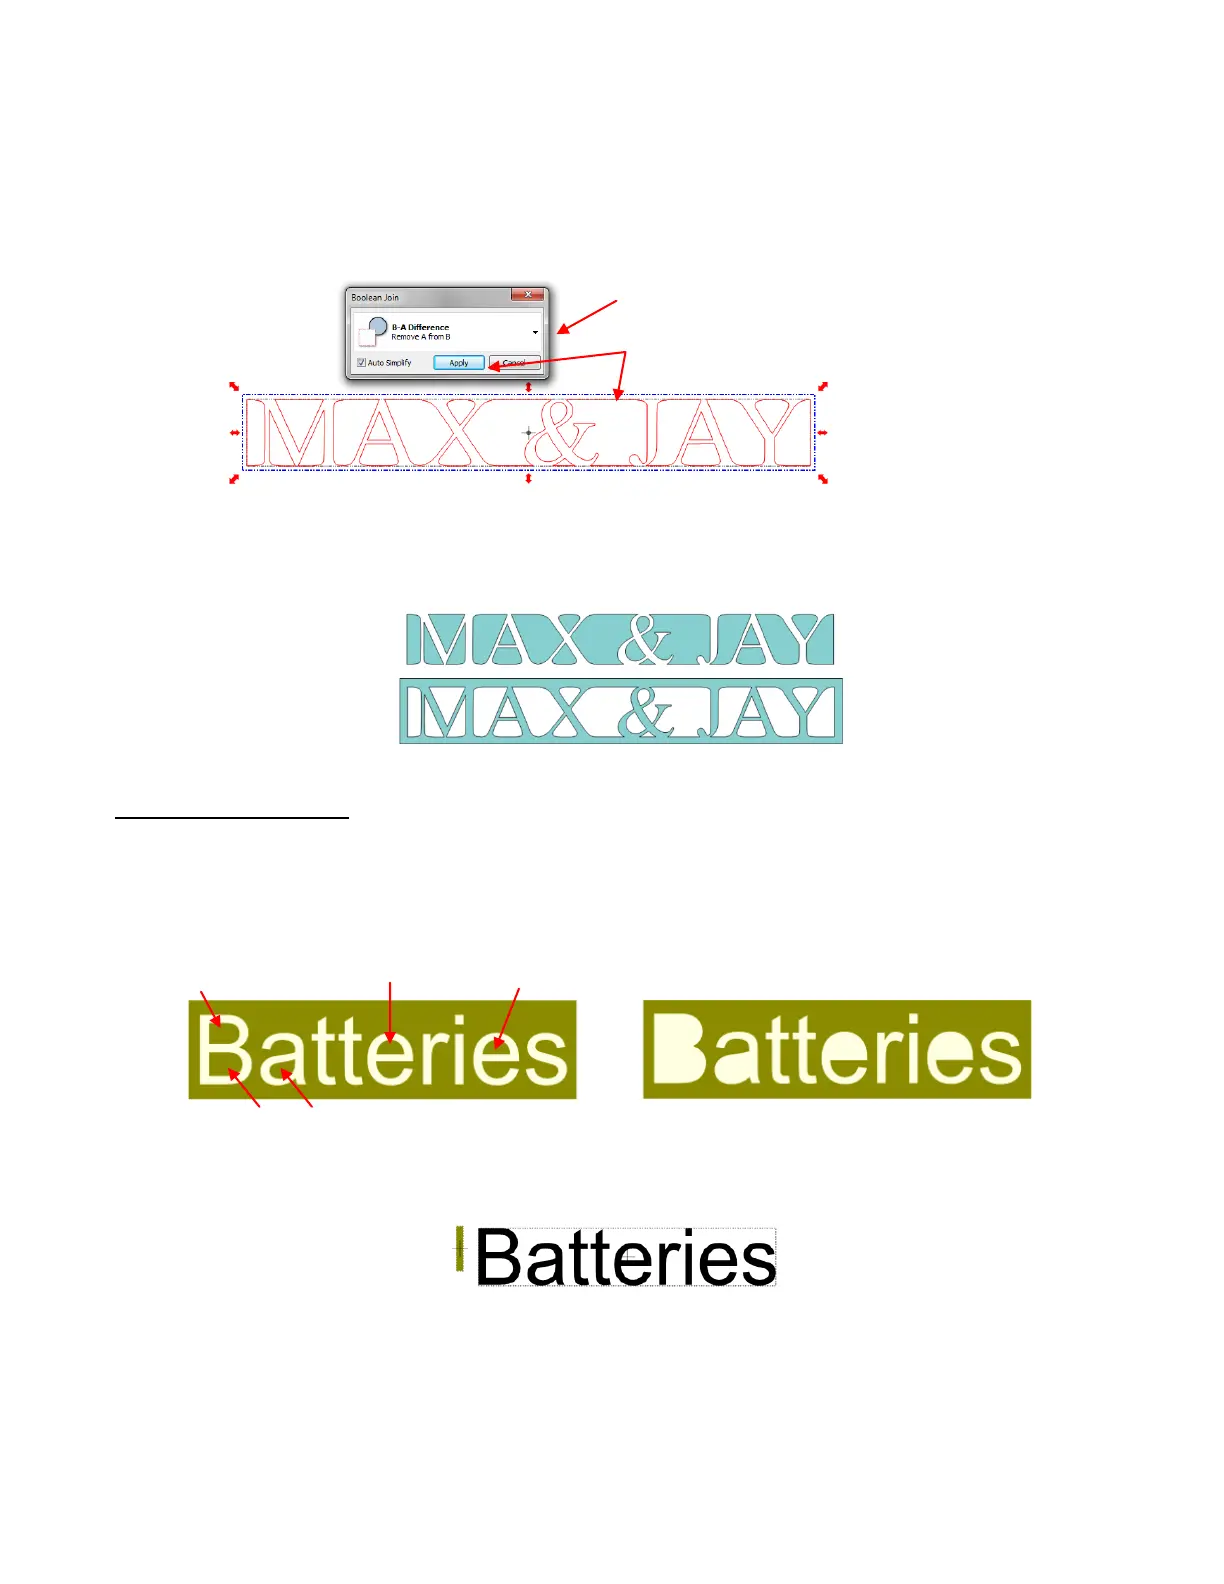
your image change on the screen. The option called B-A Difference shows the rectangle outline
disappearing where the letters overlap, which is what you want in this case:
Now, this resulting weld would work fine for an overlay where the negative part of the image is what you
want to keep. To have an actual frame, add a rectangle to the outside and then select all, apply Stack
Ctrl+S (which will center the two shapes) and perform a Join (Ctrl+J). Here are the two results:
5.10 Stenciling Letters
When creating a stencil, you will want to keep the “waste” or “negative” of a cut. When using regular fonts,
such as Arial, some of the letters, such as a “B”, “a”, and “e”, will not work because they have interior paths
called child shapes. Those child shapes are not connected to the waste portion of the material and will be
lost from the stencil as shown below. The red arrows indicate the child shapes inside parent shapes for the
letters “B”,”a”, and “e”:
To avoid this, a procedure called stenciling can be used to connect the child shapes to the area outside of
the letters, essential eliminating them. Type your text using No Splitting so that the letters are all one
shape. Then create a tall thin rectangle the width of which will be the stencil size you wish to use:
Place the rectangle on its own layer as you did in Section 5.08. Use Ctrl+D to duplicate the rectangles and
create as many as will be needed to overlap onto the child shapes. In this example, a total of 5 are needed.
Then arrange these rectangles so that they overlap each child shape:
Click on drop down menu to select one of
the five choices.
When the image shows the weld you
want, click on Apply.