Right click on the screen and choose Next Shape (or choose Previous Shape)
Press Shift+Tab (or press Shift+Esc)
Go to Edit>Next Shape (or go to Edit>Previous Shape).
To unselect all shapes, use one of the following two ways:
Press the Esc key
Go to Edit>Select None.
Moving
To move a selected shape, hold down the left mouse button anywhere within the bounding area and drag to
another location.
You can also move a selected shape in small increments by pressing the arrow keys on the keyboard.
Further, if you hold down the Ctrl key while pressing these arrows keys, the shape will move in larger
increments with each keystroke.
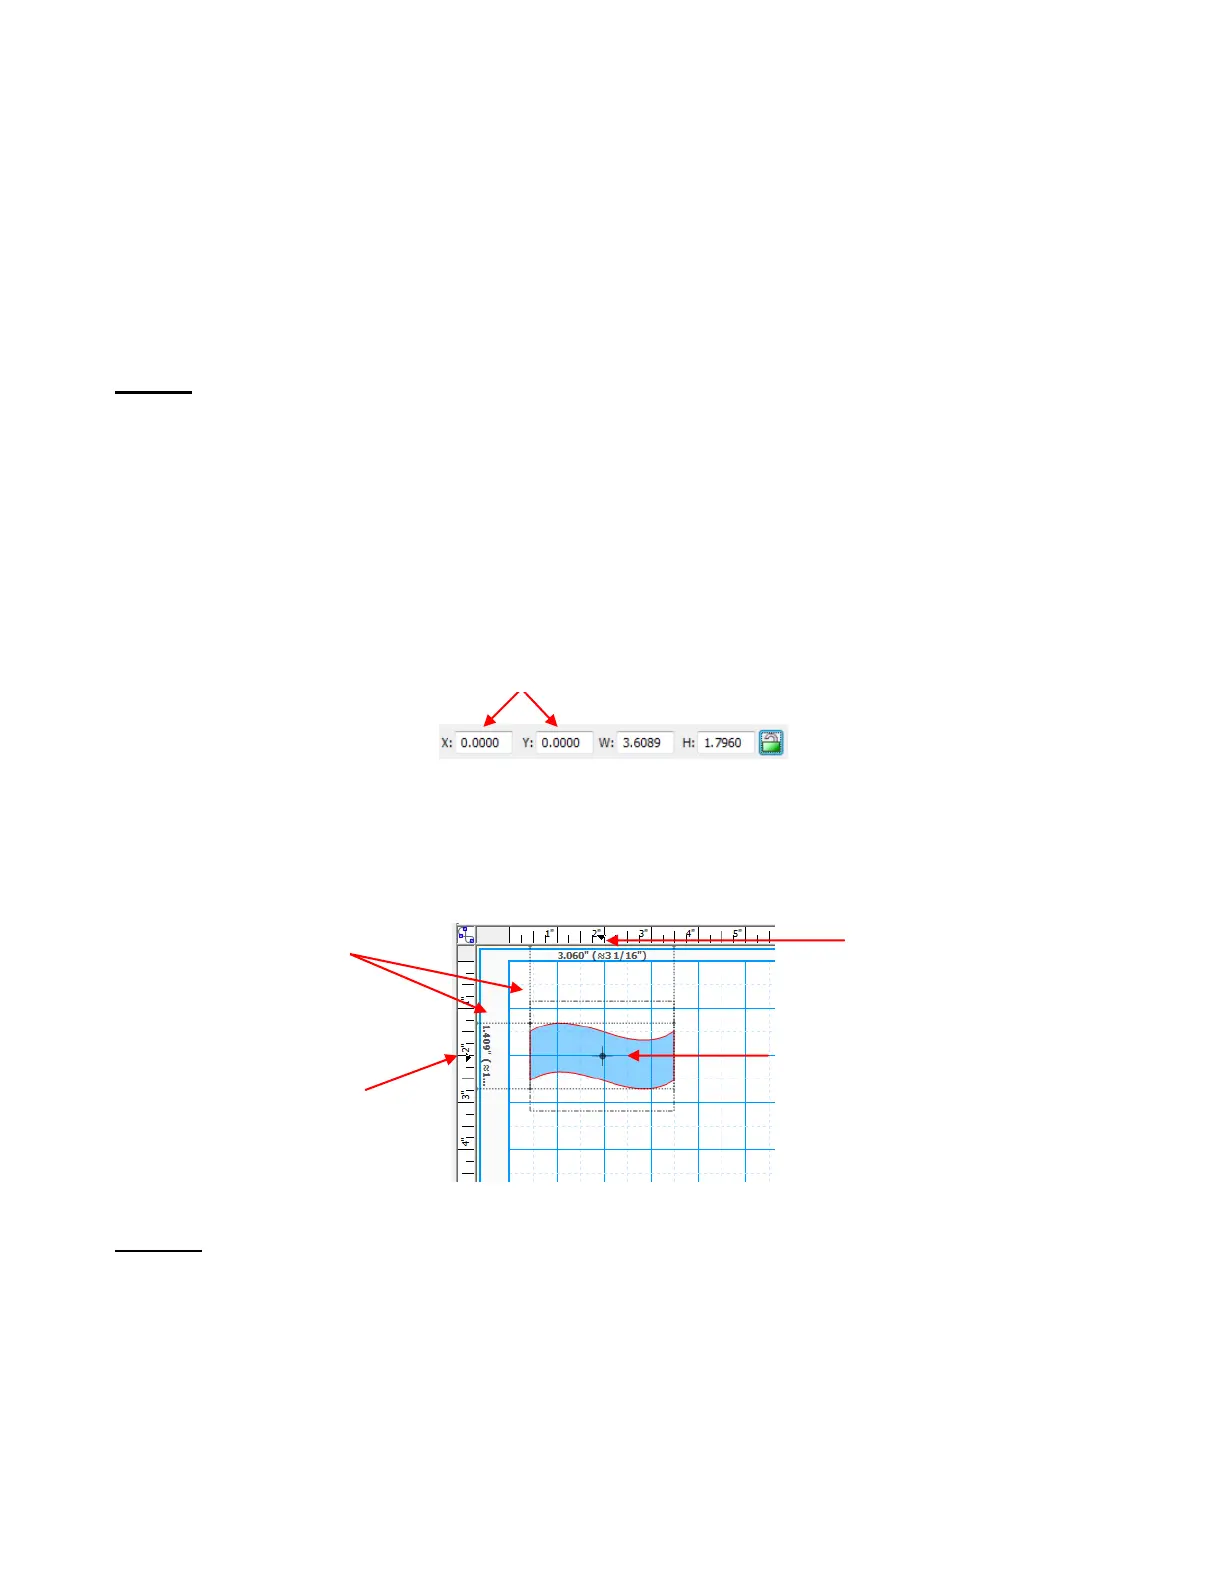
With a shape selected, the Sel. Properties Bar indicates the exact location of the top left corner of the
bounding area of your shape under X: and Y: (Note that the 0,0 location is at the top left corner of the
gridded part of the mat). You can enter values into either or both of the X: and Y: windows to move the
shape to a new location.
You can also use the Rulers to indentify where a shape is located, as well as the dimensions of the shape.
In this case, small black arrows on the Rulers show the current location of the mouse cursor. Thus, if you
want to know, for example, the center location of a shape, place your mouse on the center icon of the
shape:
Deleting
To delete a selected shape, use any of the following options:
Press the Delete key
Press Ctrl-X
Right click on the screen and choose Delete from the menu
Go to Edit>Delete.
To delete all of the shapes in the current project, use any of the following options:
Right click on the screen and choose Delete All from the menu
X,Y location of top left corner of selected shape
X location of
center of selected
shape
Y location of
center of selected
shape
Place mouse cursor
in center of shape to
determine center
location of the shape
along the Rulers
Vertical and
horizontal guides also
appear on a selected
shape and can aid in
aligning to other
shapes