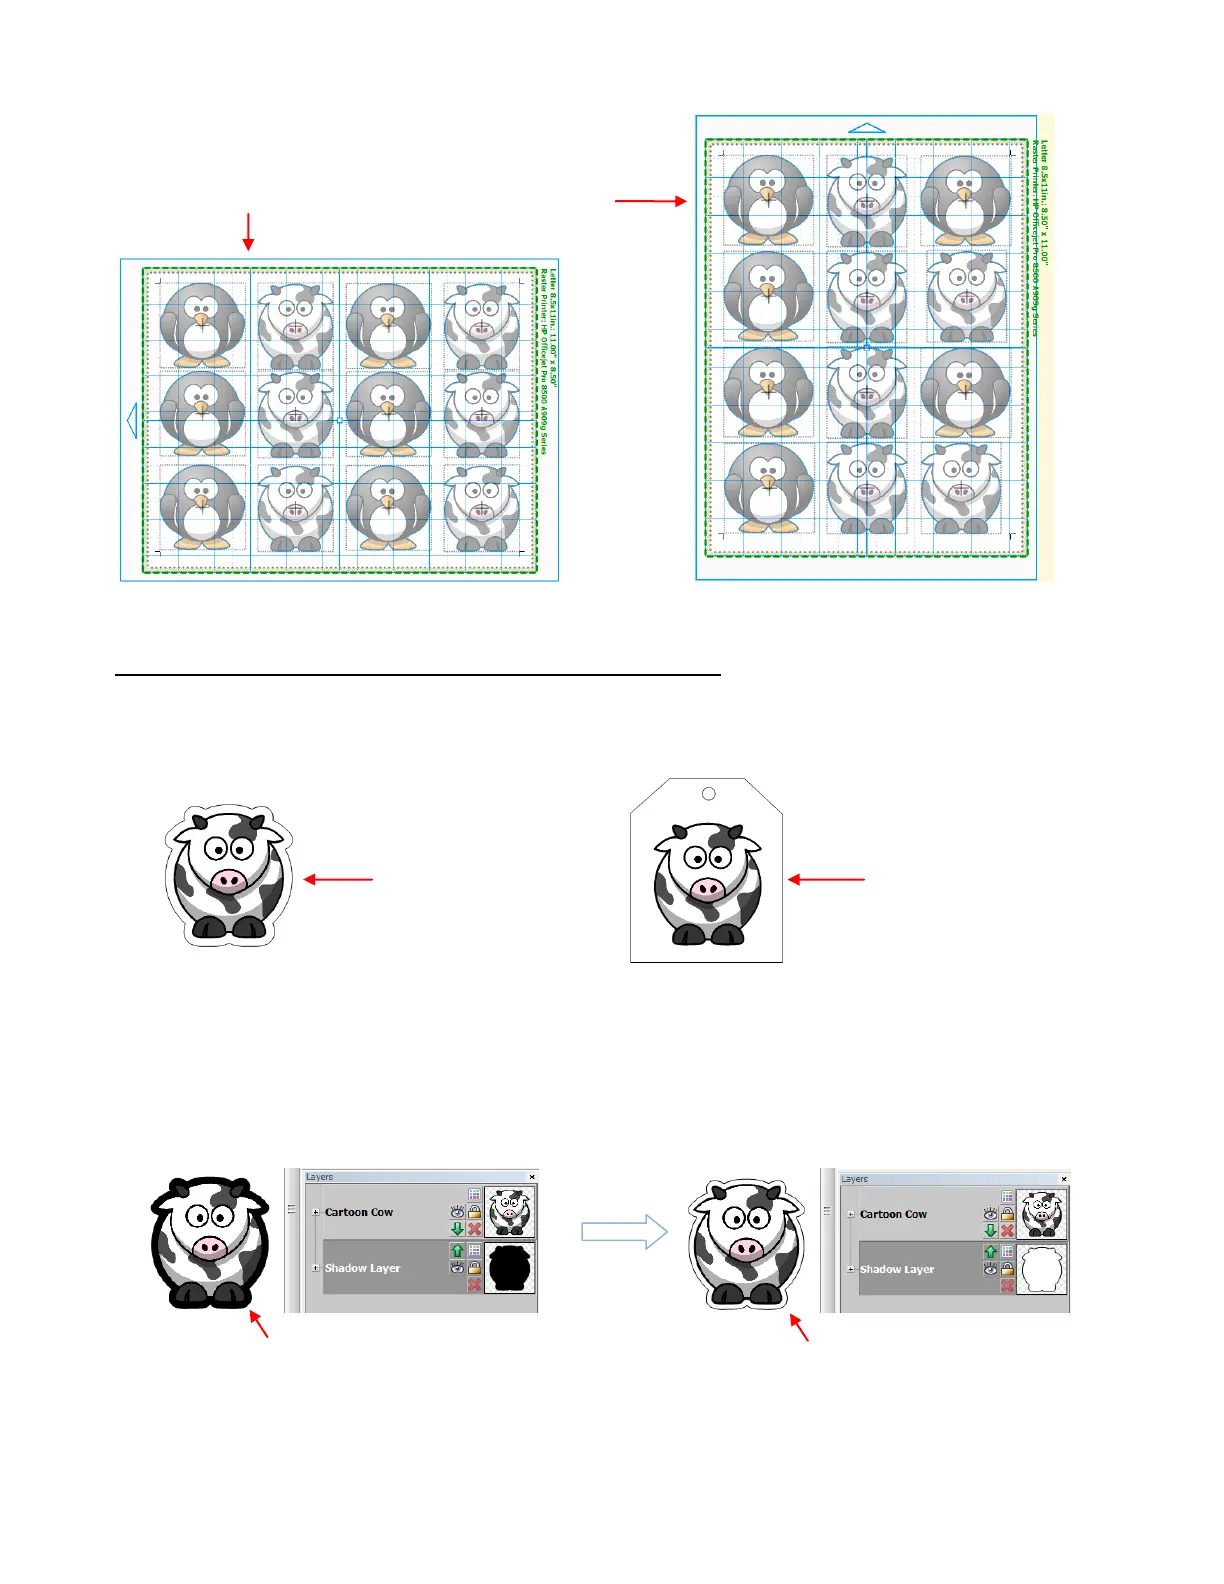
PNC With a Contour Shape Larger Than the Printed Image
In Section 9.01, two other PNC applications were shown. In one case, an outside contour will be cut. In the
other, an alternative shape is added, such as the tag shape shown below.
In both cases, you need to include the outside shape in the printing process. This is because the outside
shape determines where the registration marks are printed and then used for the PNC process. If the
outside shapes are not printed, then the printed registration marks will be based on the original trace lines
which will then later result in the outside cuts being misaligned.
Since you do not want to see the outside shape printed, you need to change the color of that shape to white
and move it behind the printed shape by making it the lowest layer:
The print preview shows that only the original image will be printed, along with the registration marks. The
contour is white and will not appear on the white printout:
Contour is added
using Shadow Layer
Contour (Shadow Layer) is
black and appears behind cow.
Contour (Shadow Layer) is
re-colored to white.
Multi-image PNC in
Landscape mode
Multi-image PNC in
Portrait mode