With or without a stabilizer, it is highly recommend that a clean and sticky mat be used. If a stabilizer has
been applied, then peel off the backing sheet and press the sticky side of the fabric to the sticky side of the
mat. If no stabilizer has been applied, then brayer the fabric evenly to the mat. With some fabrics it may be
necessary to use stickier mats that normal and tape the outside edges of the fabric to the mat.
The best unstiffened (soft) felt to use is 100% wool. It cuts cleaner than other types. If the felt is pre-
stiffened, then it should cut fine using the blue capped thick materials blade versus the fabric blade.
Because of the thickness, you may need to tape the felt to the mat to prevent slippage during cutting.
In general you will need to use 2 or 3 passes when cutting some fabrics and felts. It is necessary so that all
fibers will be cleanly cut. Only simple shapes from thin fabrics will cut in one pass.
For cutting force, it will depend on the fabric. Try your test cut at a setting of 75 and increase, as needed.
10.05 Iron-On Transfer
Cutting Iron-On
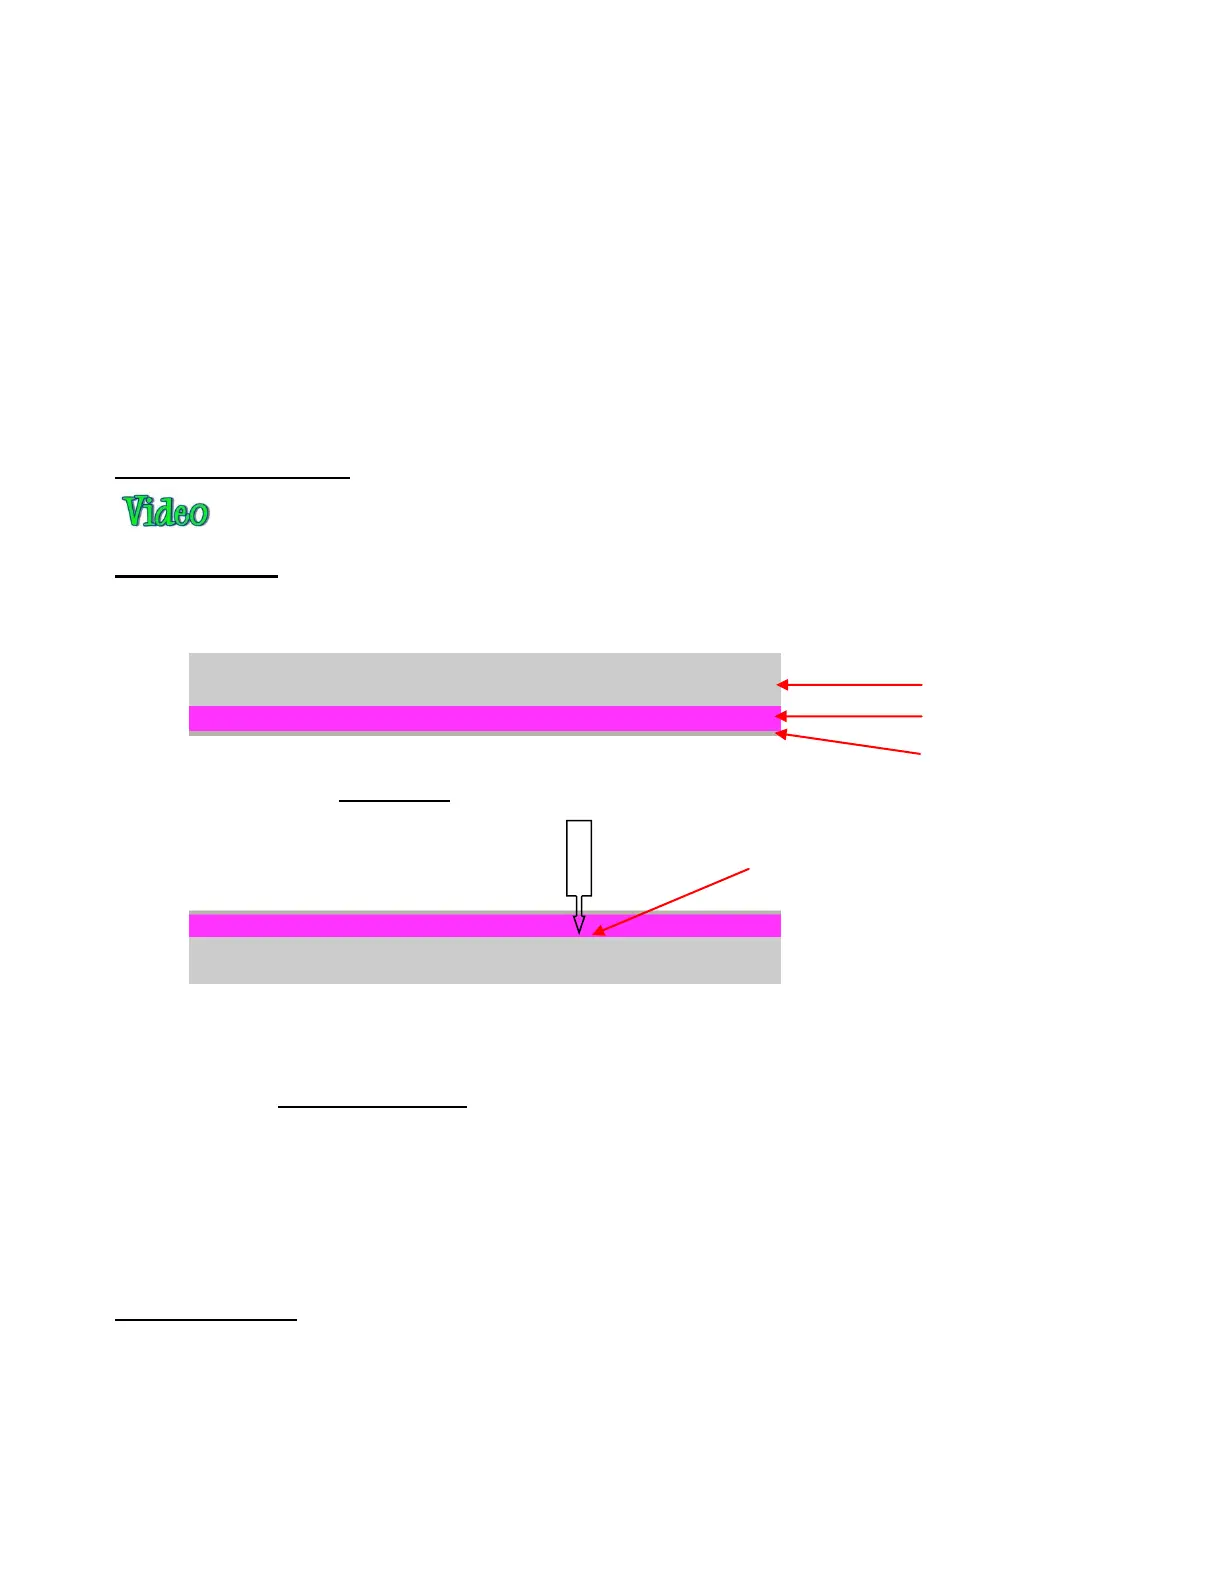
Iron-on transfer vinyl and flock consists of three layers:
For cutting, have the dull side up (adhesive side up):
The force required is ~20 - 30. Be sure to do a test cut first and then see if the vinyl layer will peel away
from backing. You should be able to cut at a speed of 10.
Remember to reverse your image before cutting! Because you are cutting with the adhesive side up, you’ll
be flipping the material over, after weeding, but before pressing. To mirror your image, select it and then
apply the Mirror function.
Cut around your image with scissors before weeding. Note that it’s really hard to see the cut image, so be
careful!
Use a paper piercer or craft knife to grab onto a piece of the waste vinyl and then pull to remove. Remember
to weed small internal parts, as well.
Adhering Iron-On
Use a hot dry iron (cotton setting) and with steam turned off.
Use a fairly firm surface…. Not a highly cushioned ironing board.
Insert a cloth between the layers of a shirt in case adhesive melts through to other side
Press shirt first to create a smooth flat dry surface.
Arrange pattern on shirt, carefully centering.
Heat-resistant layer
(shiny side)
Blade only cuts through adhesive and vinyl and
not through the thicker heat resistant layer