Because the Zings are so very close to being perfectly accurate, only take note if the sides are slightly larger
than 10” or slightly smaller than 10” because it will probably be so close that you cannot even measure the
distance from 10” with a ruler! Instead, let’s say the Height is just the tiniest bit over 10”. Mark that side as
being 10.01”. Let’s say the Width is under 10”, more so than the Height was below. Mark that side as
9.98”. Now, if you feel you can measure accurately, with a ruler, then do so. But just estimating should work
fine, too.
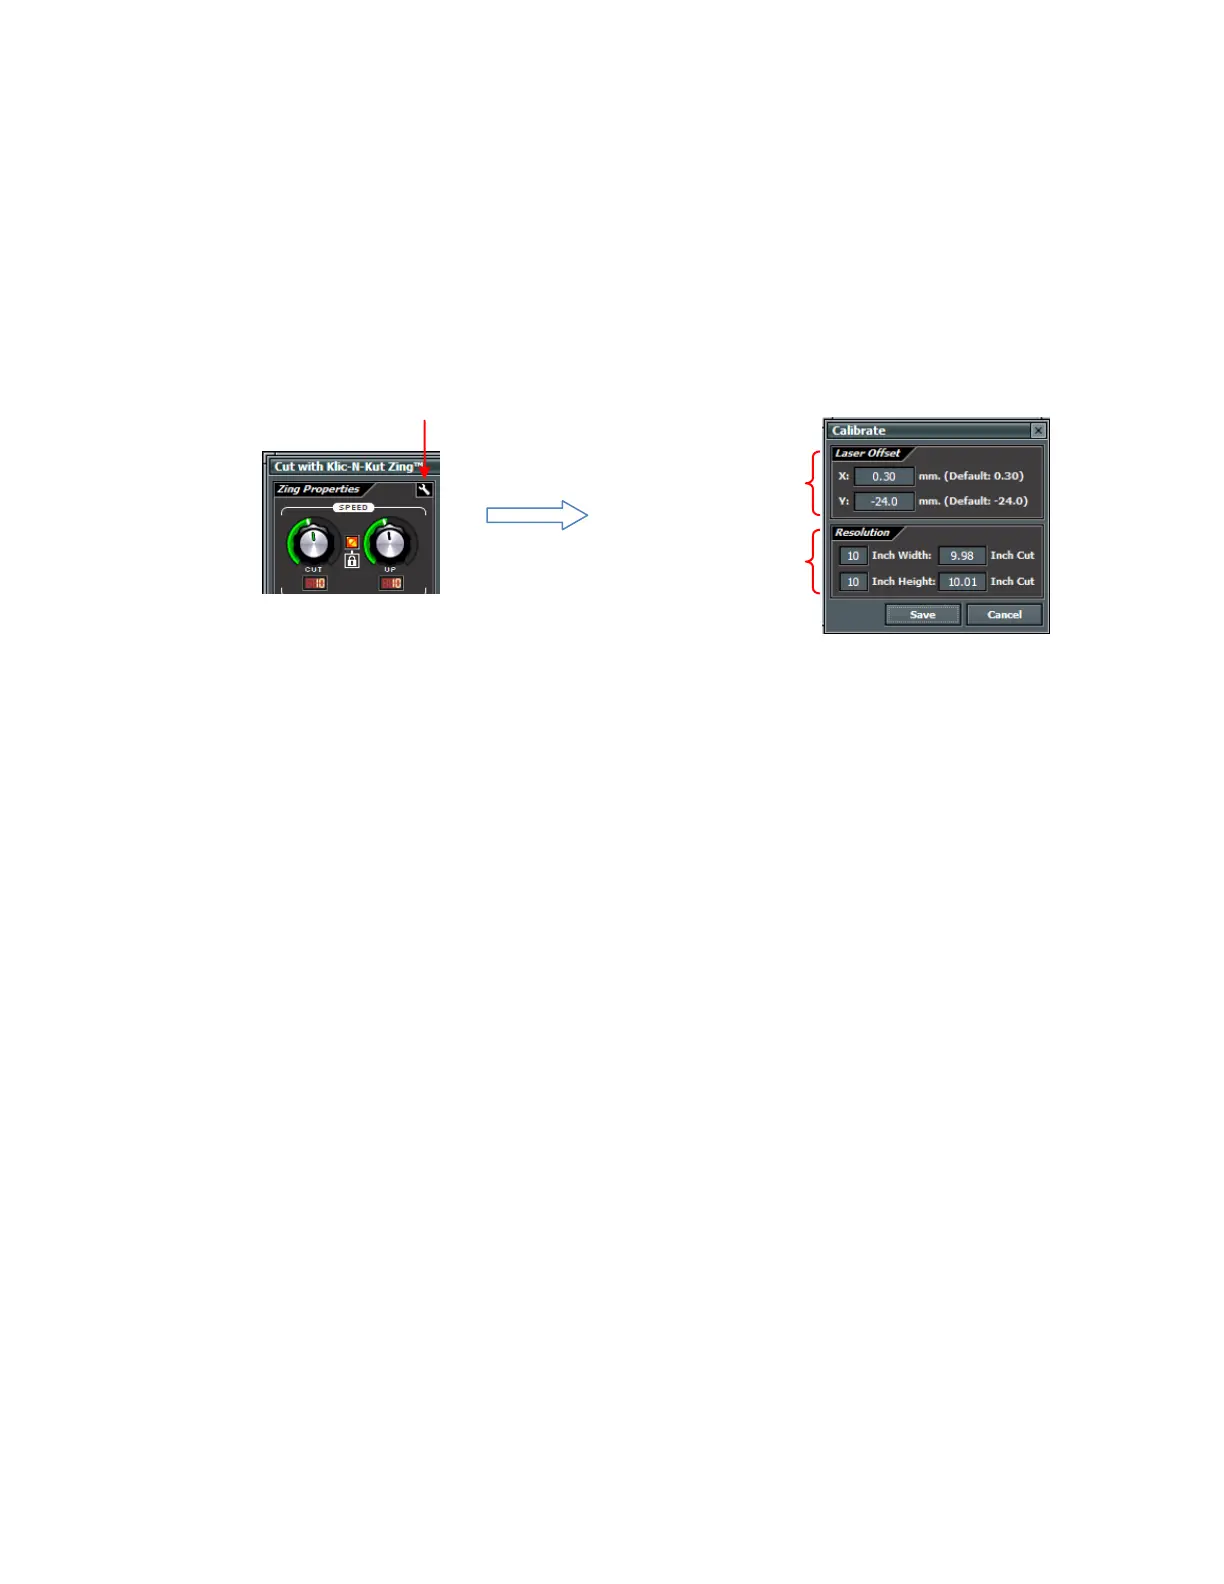
Click on the Cut Project With icon again, and click on the tiny wrench icon. The Calibrate window will open
where you can input your measurements. Note that if you used a square that was either larger or smaller
than 10”, then be sure to change those numbers on the left, as well as inputting the numbers on the right:
Click on Save.
Now, you’ll want to repeat the drawing of the square and you can use the same paper as long as you move
the origin to a new location and you make sure your new square will fit on the same sheet.
After drawing the new square, again, align with a ruler to see how closely the square matches 10” x 10”. If
you overcorrected then go back and input a smaller correction. If you didn’t correct by enough, then input a
larger correction.
Click on the wrench to open
the Calibrate window
Laser Offset: Refer
to Section 9.02
Resolution: enter size
on screen and actual
size drawn or cut