Back to our prior example, the gray path around that last yellow petal represents the black shadow layer that
was hidden during the erasing process. Notice how it becomes very thin in that area where the last petal
was smoothed:
This is a perfect application for the Inverse Eraser. If there were many areas around the image where the
shadow layer needed correcting, it would probably be faster to delete the shadow layer that was pixel traced
from the original and then use the Shadow Layer function in MTC to create a new one (refer to Section
8.02). But in this case, only that one spot seems too thin.
Several things need to be done before using the tool. If you plan to use it for a number of spots around the
shape, then again turn off Auto Simplify Welds (refer to Section 7.02). Note that if you are still in the
Eraser Tool function, you’ll need to click on the Select Tool to return to normal MTC mode.
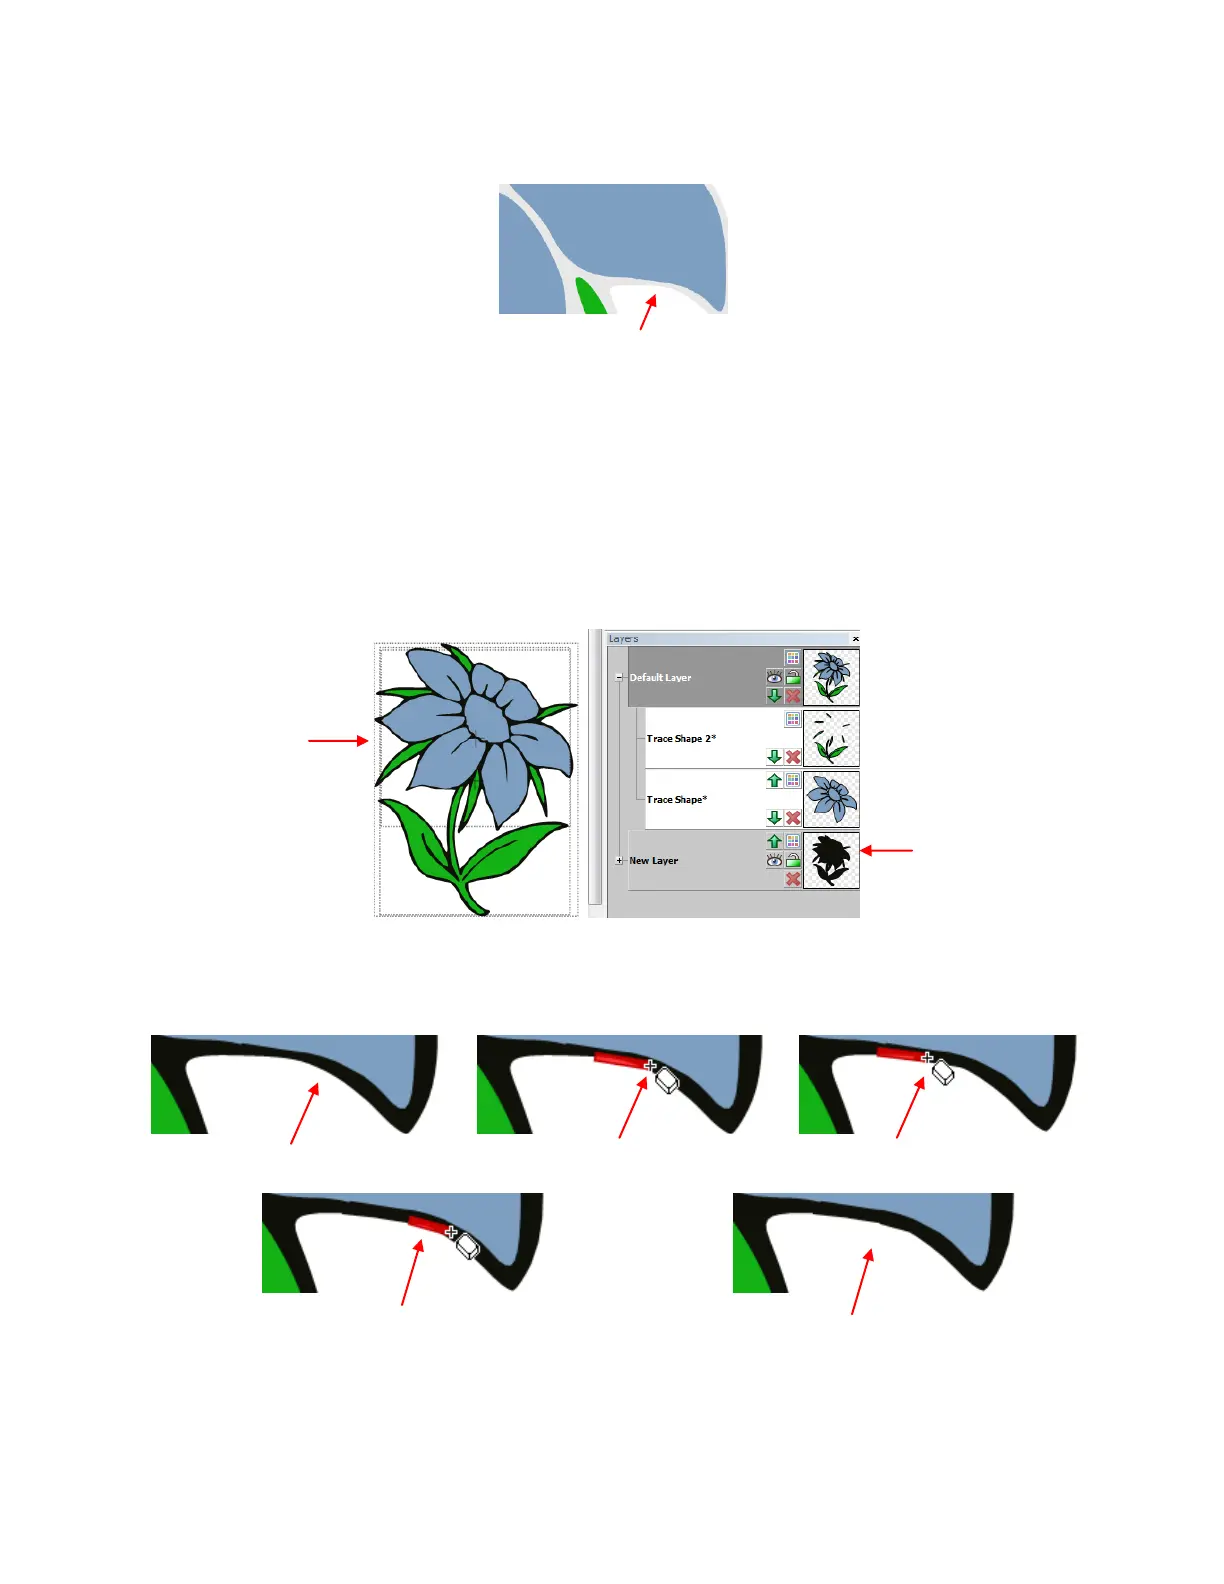
Next, unhide the black layer and move it down on the Layer Bar so that it is now behind the petals.
Activate the Eraser Tool, again confirming that the Inverse Eraser box is marked. Then zoom in on the
area where the black shadow was very close to the petal. Drag the left mouse button to extend that border
around the flower:
As with the erasing process, apply the Auto Simplify Path function, if you turned off the Auto Simplify
Welds before using this tool. Then turn on Auto Simplify Welds. Refer to Section 7.02.
Shadow layer is very
thin at this point.
Black layer
moved to the
bottom.
Black layer
moved to the
bottom so that it
is now behind the
blue petals and
green leaves.
Black border is too thin.
First path is added,
overlapping with thick area.
Another path is added,
overlapping with first.
More is added, again
overlapping with first path.