Create a color validation test
You can create your own VarioPrint i-series color validation test to check the color reproduction
on selected media. Then you create a custom test printing condition. (
Learn about color
validation tests
on page 247,
Learn about color differences
on page 250)
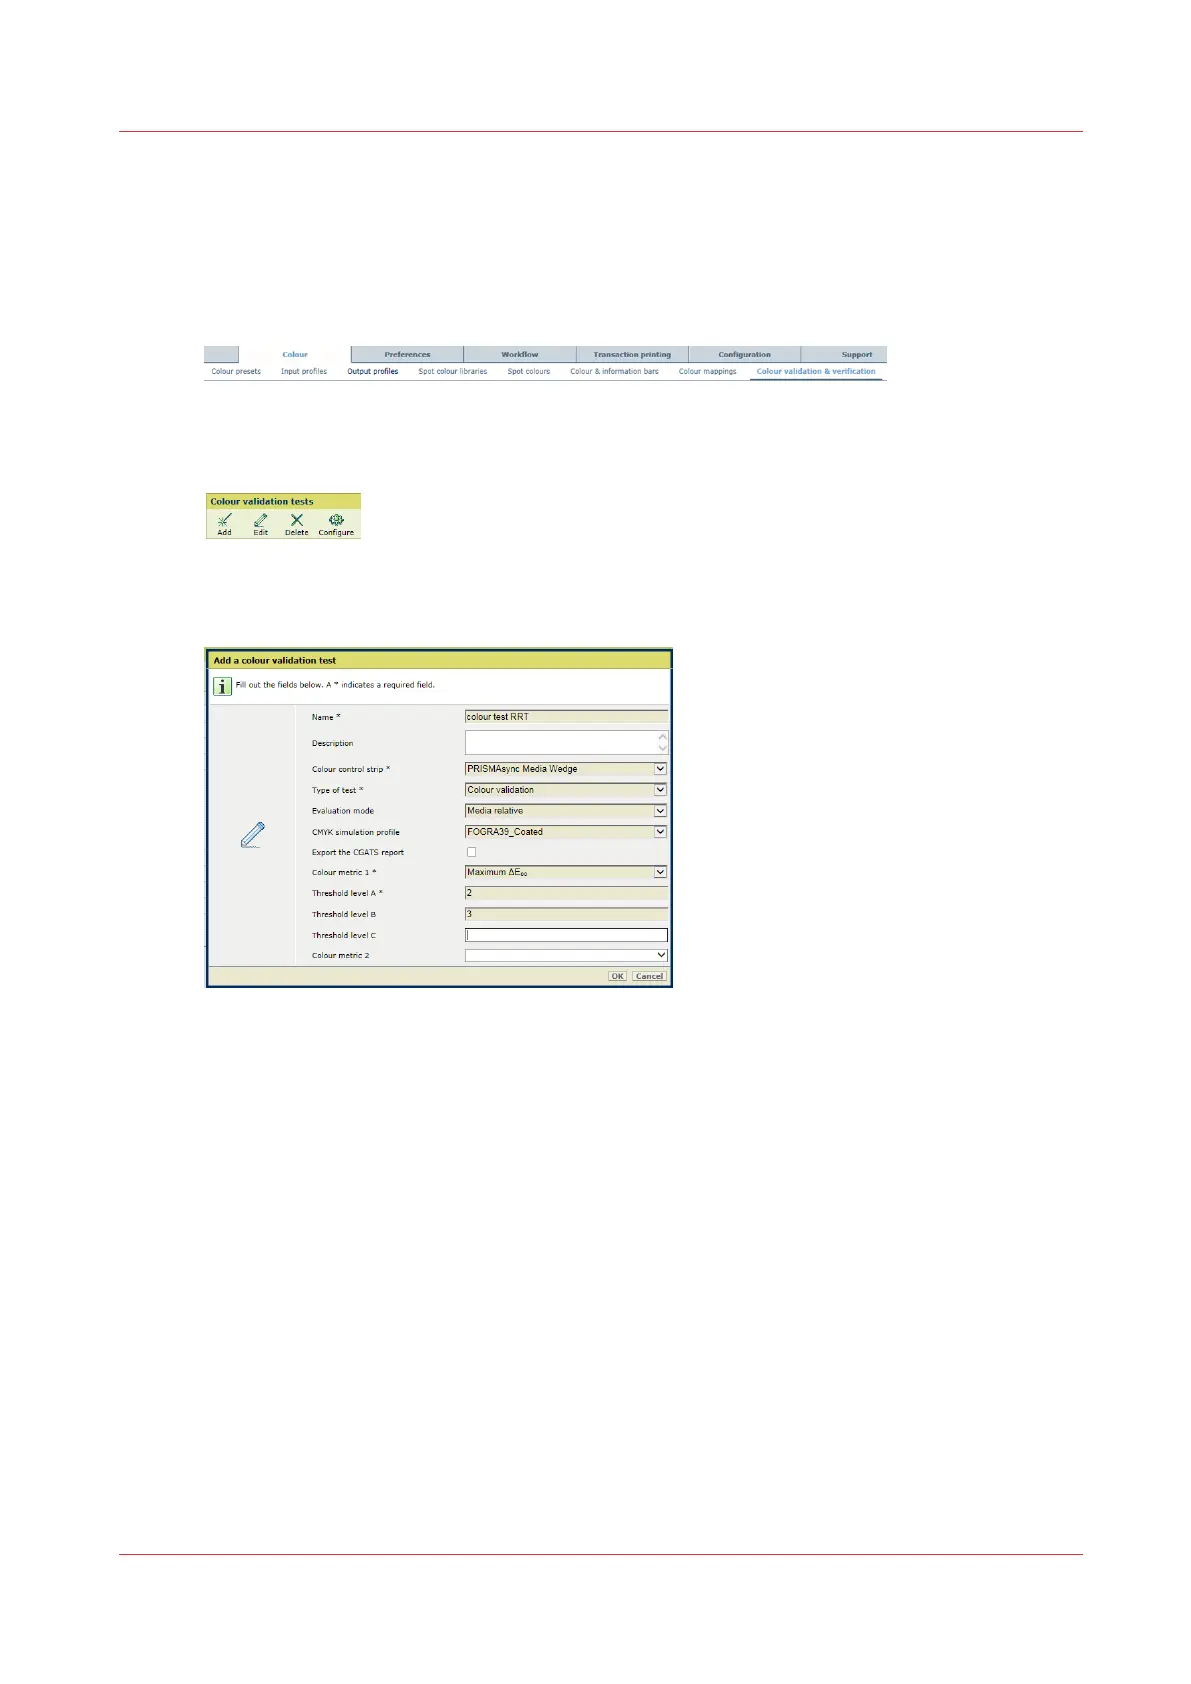
1. Open the Settings Editor and go to: [Color]→[Color validation & verification].
[321] [Color validation & verification] tab
2. Click [Add].
[322] [Color validation tests] menu
3. Select the target chart from the [Color control strip] drop-down list.
[323] Add a color validation test
4. Select the evaluation mode from the [Evaluation mode] drop-down list. (
Evaluation methods
on page 248)
5. Select the simulation profile from the [CMYK simulation profile] drop-down list.
Choose the profile that specifies a standard condition or a printer you want to simulate.
6. Use the [Export the CGATS report] check box to indicate if you want to export the results in a
CGATS report.
7. Select the first metric from the [Color metric 1] drop-down list. (
Overview of color validation
metrics
on page 437)
8. Determine how many quality levels you want to use for the metric.
9. Use the following fields to enter the tolerance level (in ΔE) that defines each quality level:
[Threshold level A], [Threshold level B],[Threshold level C],[Threshold level D],[Threshold
level E].
10. Follow the previous steps to define the other metrics and quality levels you want to add to the
test.
11. Click [OK].
Create a color validation test
Chapter 9 - Print what you expect
257
 Loading...