Installing Memory Modules
007-4486-001 35
• Install the DIMMs in groups of two, with DIMMs of the same capacity in each
bank of two. You cannot mix capacities in one bank.
• In a bank of two slots, both slots must have a DIMM or both slots must be
empty (except for slots 1 and 2, which must always be populated). For example,
you can install a 128-MB module in slot 3, a 128-MB module in slot 4, a 64-MB
module in slot 5 and a 64-MB module in slot 6. But you cannot install a 128-MB
module in slot 3 and a 64-MB module in slot 4.
Note: If you need to remove a DIMM, see “Removing Memory Modules.”
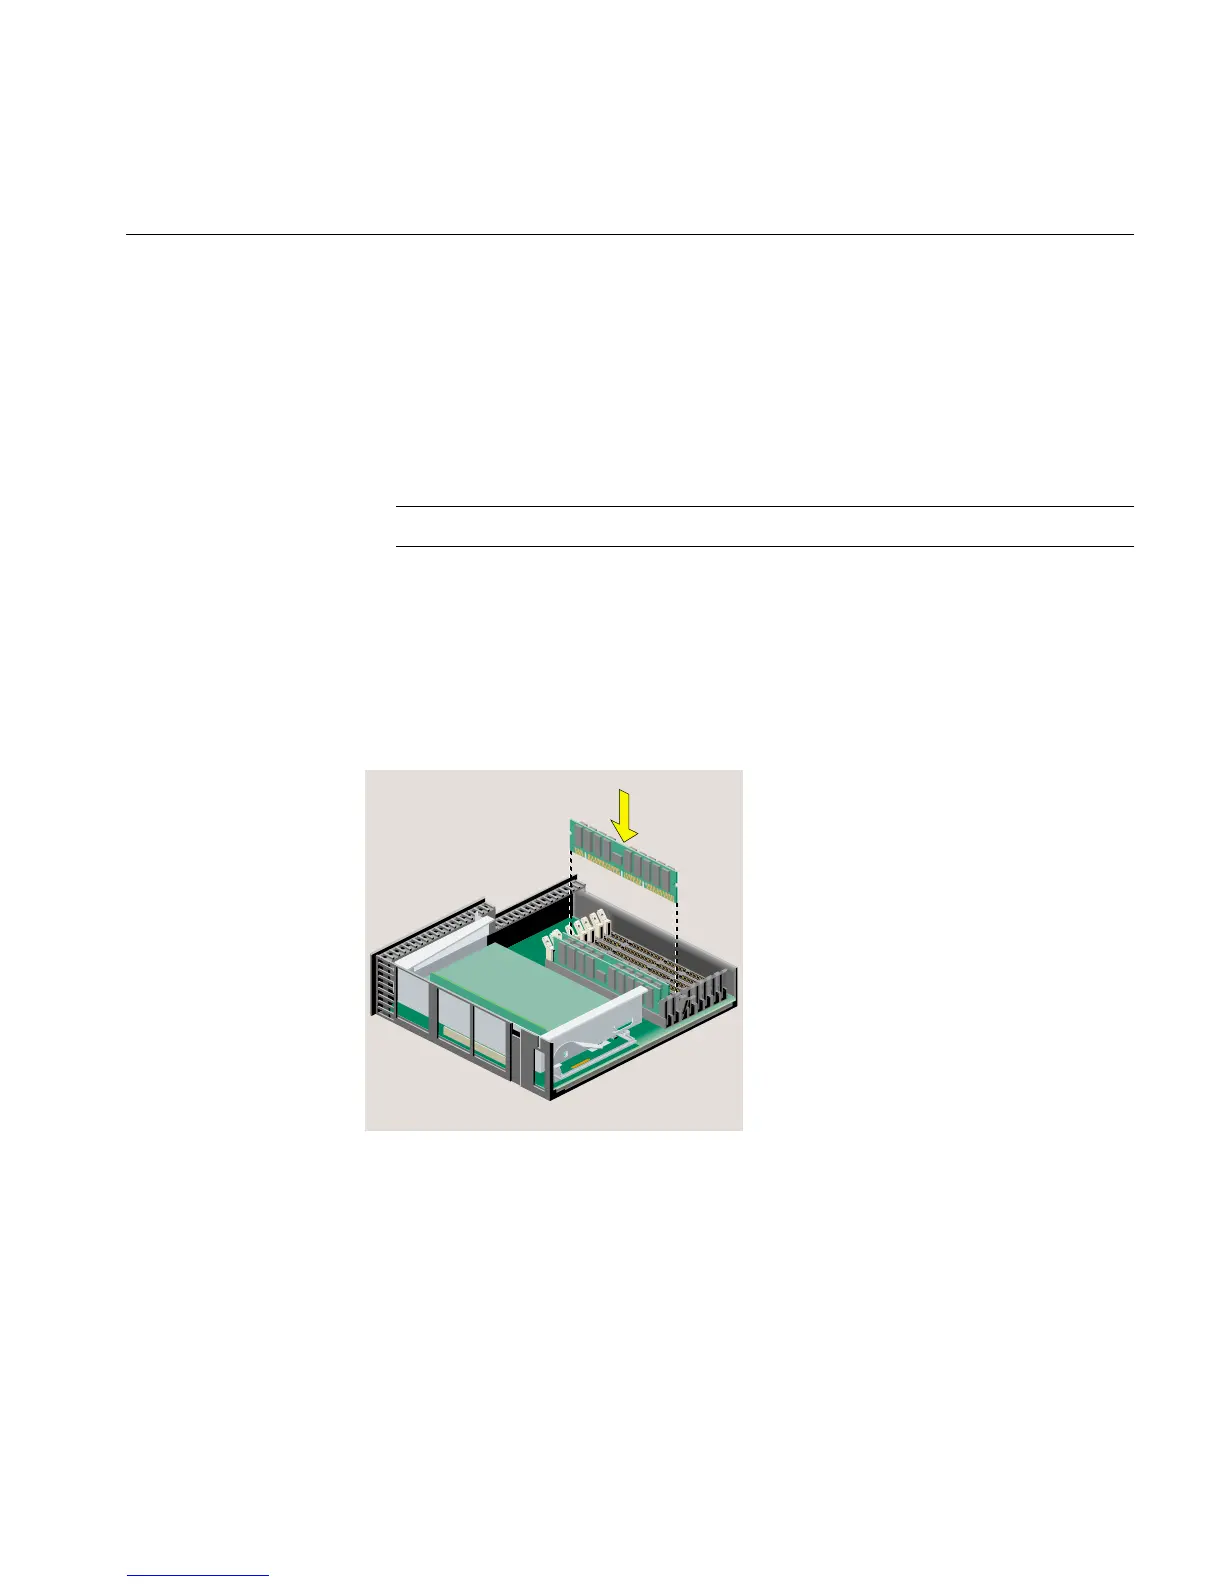
5. Install the DIMMs consecutively in groups of two, beginning with the lowest open
slot (Figure 2-9), as follows:
• Hold the DIMM over the socket without tilting it.
• Lower the DIMM, pushing it straight down into the socket gently but firmly.
You hear a click as it is seated and the latches on each side of the module snap
up.
Figure 2-9 Installing the Memory Modules
6. Check the DIMMs visually to make sure they are installed correctly (Figure 2-10), as
follows:
• The tops of the DIMMs of the same capacity should be even.