If your hammer taps consistently result in overloads, increase the input ranges in step 3
until overloads no longer occur. Specifying a trigger delay in step 4 allows you to see
the leading edge of the hammer tap.
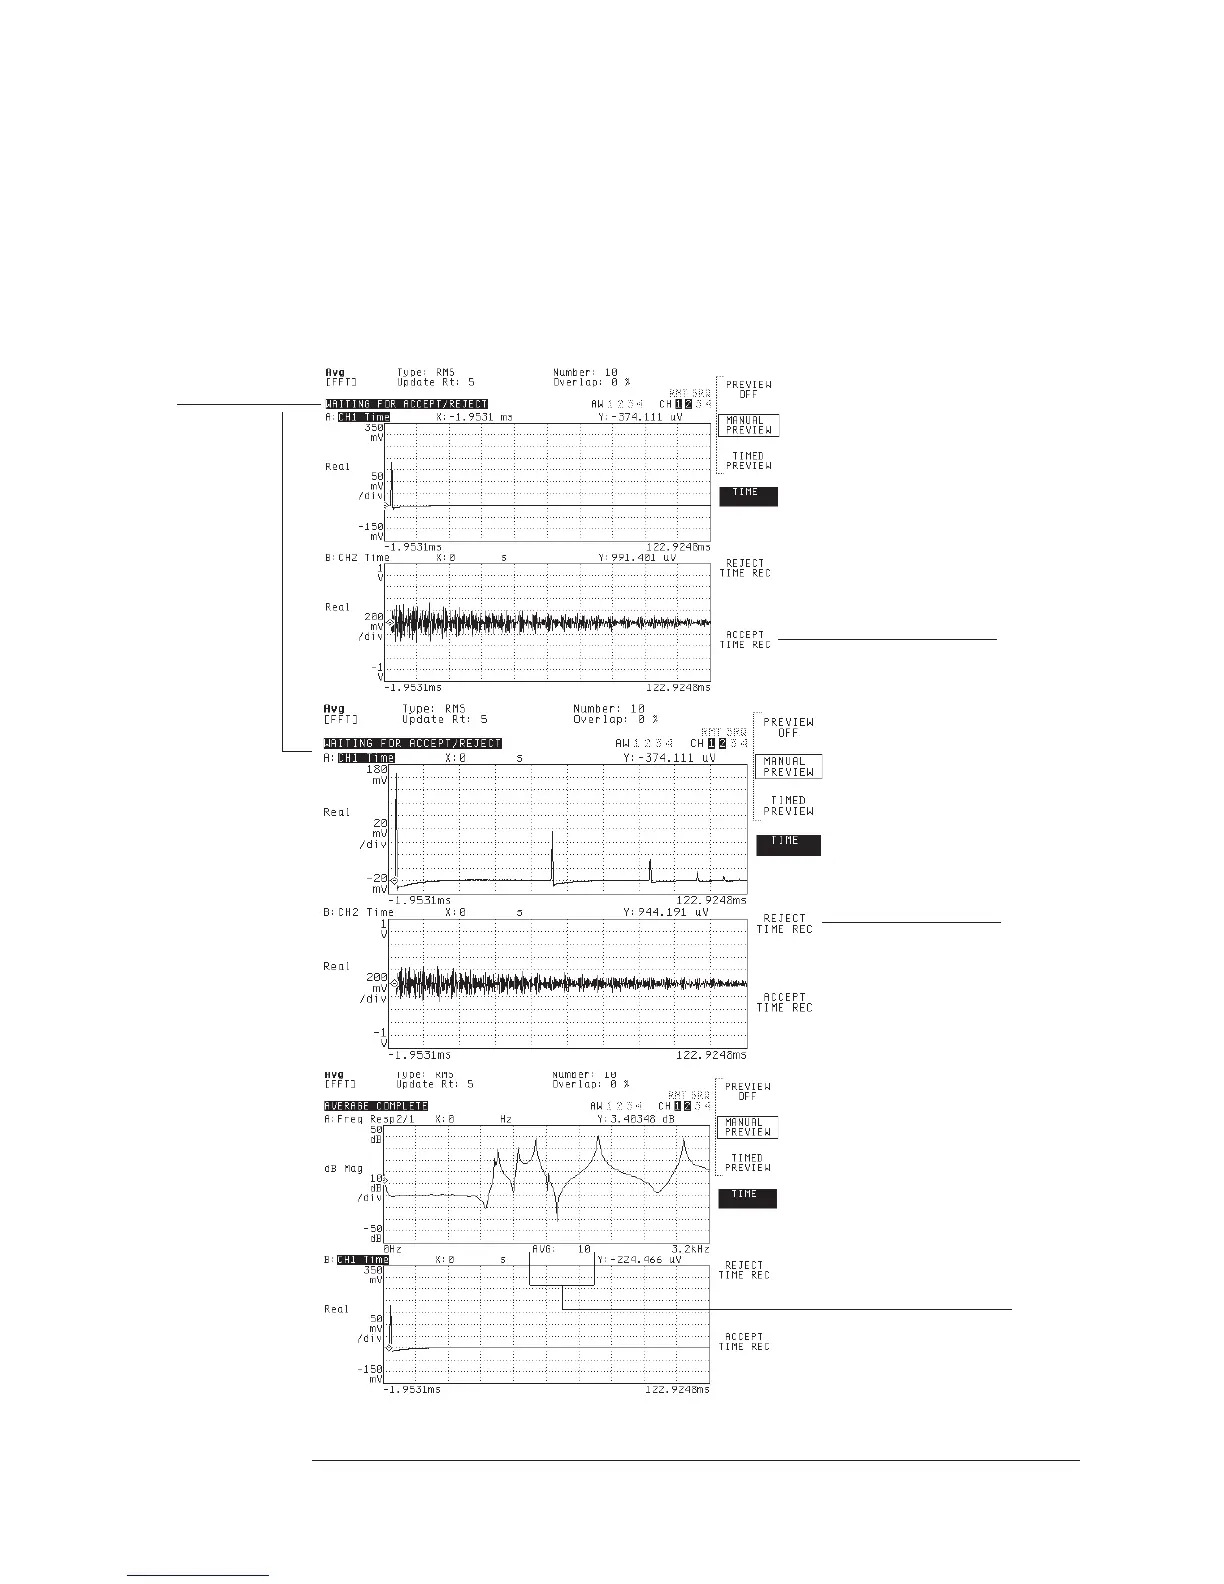
When the analyzer receives a trigger, it displays the time record for channel 1 on trace
A and the time record for channel 2 on trace B. After you accept the data, the analyzer
displays the frequency response on trace A and time channel 1 on trace B.
Analyzer is
waiting for a
response.
Pressthiskeyto
reject the
measurement.
Press this key to
accept the
measurement.
Indicates total number of
averages.
Agilent 35670A
Measuring Structures Operator's Guide
2-16