Chapter 13 427
Setting and Using the Control and Management Functions
Setting the GPIB
13.Setting and Using the
Control and Management
Functions
Step 2. Confirm that VISA Interface Name is set to GPIB0 (1 in Figure 13-1) and SICL Interface
Name is set to hpib7 (2 in Figure 13-1) and then click the Accept button (3 in Figure 13-1).
If the setting is correct, the procedure is complete. If the setting is different, click the Edit
button (4 in
Figure 13-1).
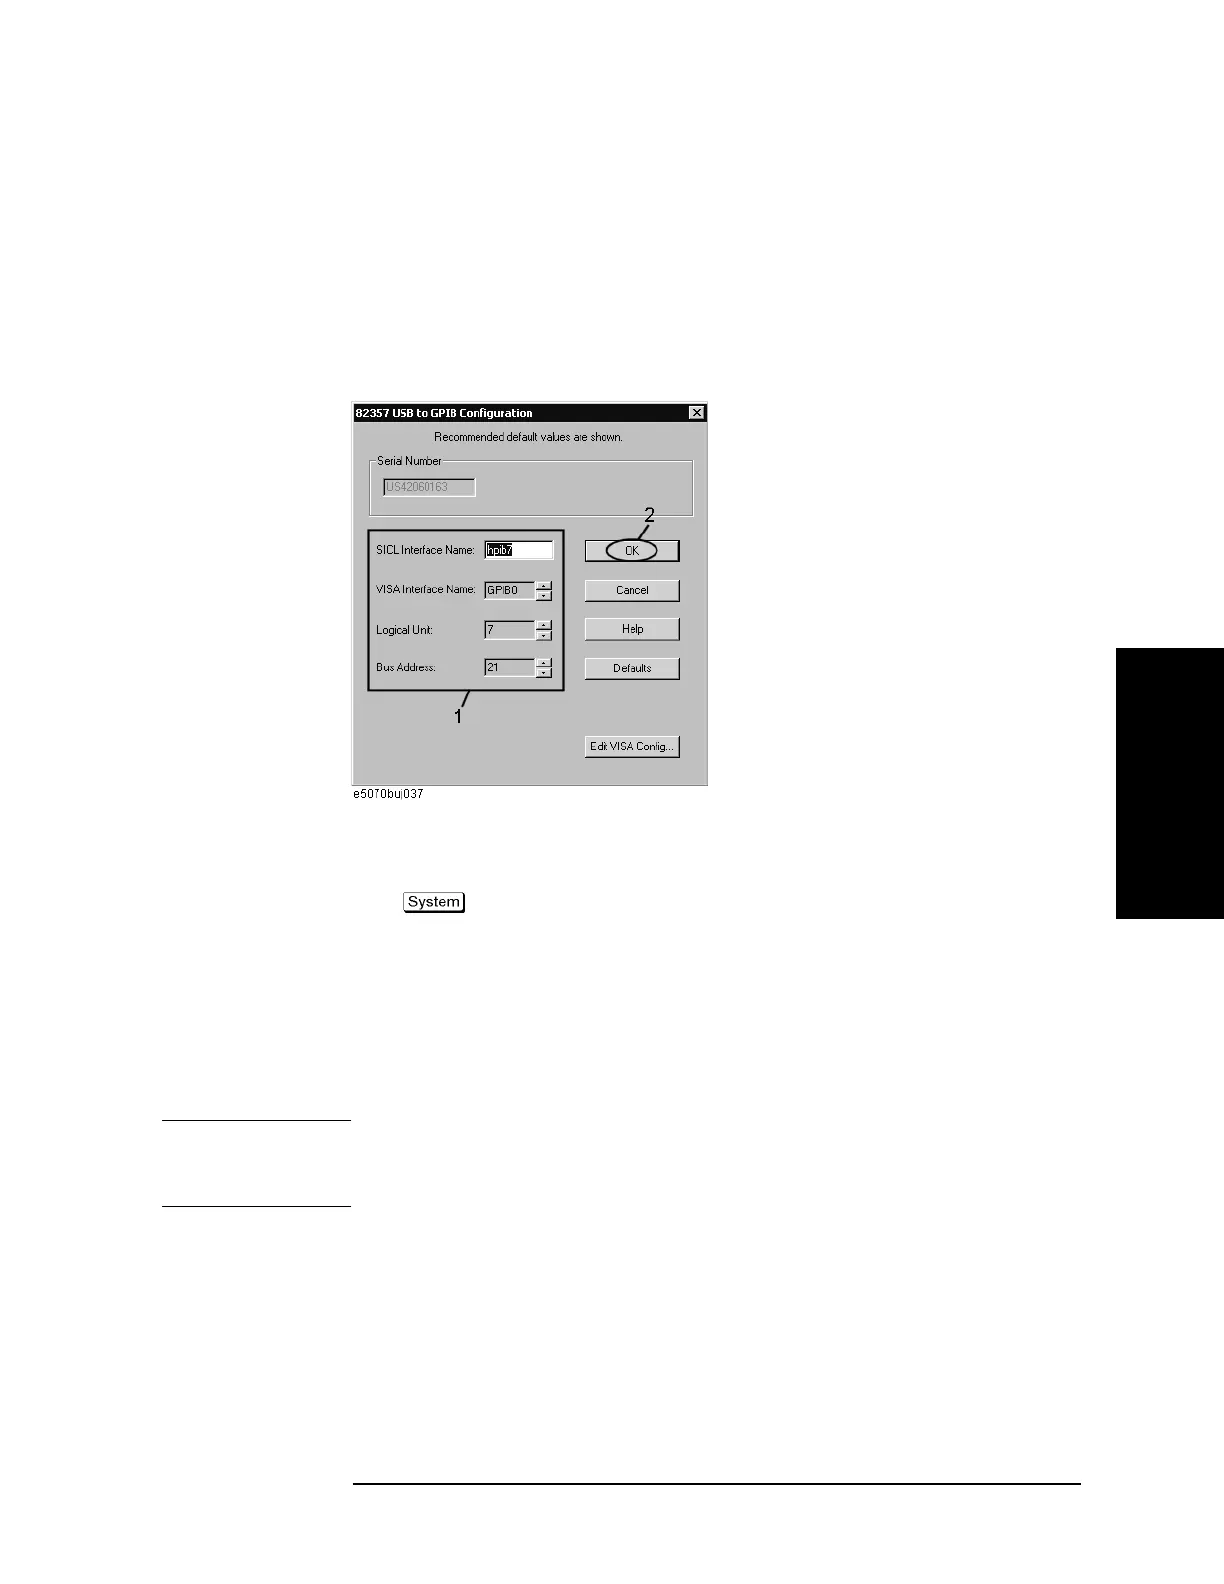
Step 3. The USB to GPIB Configuration dialog box (Figure 13-2) appears. Make the setting
enclosed in the thick lines in Figure 13-2 (1 in Figure 13-2) according to the figure and then
click the OK button (2 in Figure 13-2).
Figure 13-2 USB to GPIB Configuration dialog box
If you need to check/change the setting of the USB/GPIB interface after connecting the
USB/GPIB interface, follow these steps:
Step 1. Press .
Step 2. Press Misc Setup.
Step 3. Press GPIB Setup.
Step 4. Press System Controller Configuration.
Step 5. The IO Config dialog box (Figure 13-3) appears. Select (highlight) GPIB0 hpib7 (1 in
Figure 13-3) and then click the Edit button (2 in Figure 13-3).
NOTE In the IO Config dialog box, do not click buttons other than specified here or do not change
other settings because doing so may cause serious damage to the functions of the
E5070B/E5071B.
 Loading...