The Lynx unit may be positioned to either side. Verify any clearance or rear-access
concerns in your equipment rack when considering placement for a single unit.
• Position one SHCS to the upper screw hole and one SHCS to the lower screw
hole from inside the half-filler piece, and into the Lynx main unit. Tighten the
screws until snug with your Allen wrench; do not over-tighten the screws.
•
You will use two provided flat-head Phillips screws, provided in the kit, to
attach each of the rack bracket/handles to the side of the joined units. Position
the handles to the forward-most holes on the side of the Lynx unit.
After the components are assembled, it should be sturdy and without flexing or move
-
ment.
•
Remove and discard the rubber feet from the bottom of the Lynx unit.
•
Install the joined components in any 2U (3.5 inch) opening into the front of
your equipment rack, using your Rack's mounting screws.
Finally, connect the power, network, antenna and Acquisition device cables as usual.
User’s Manual 195
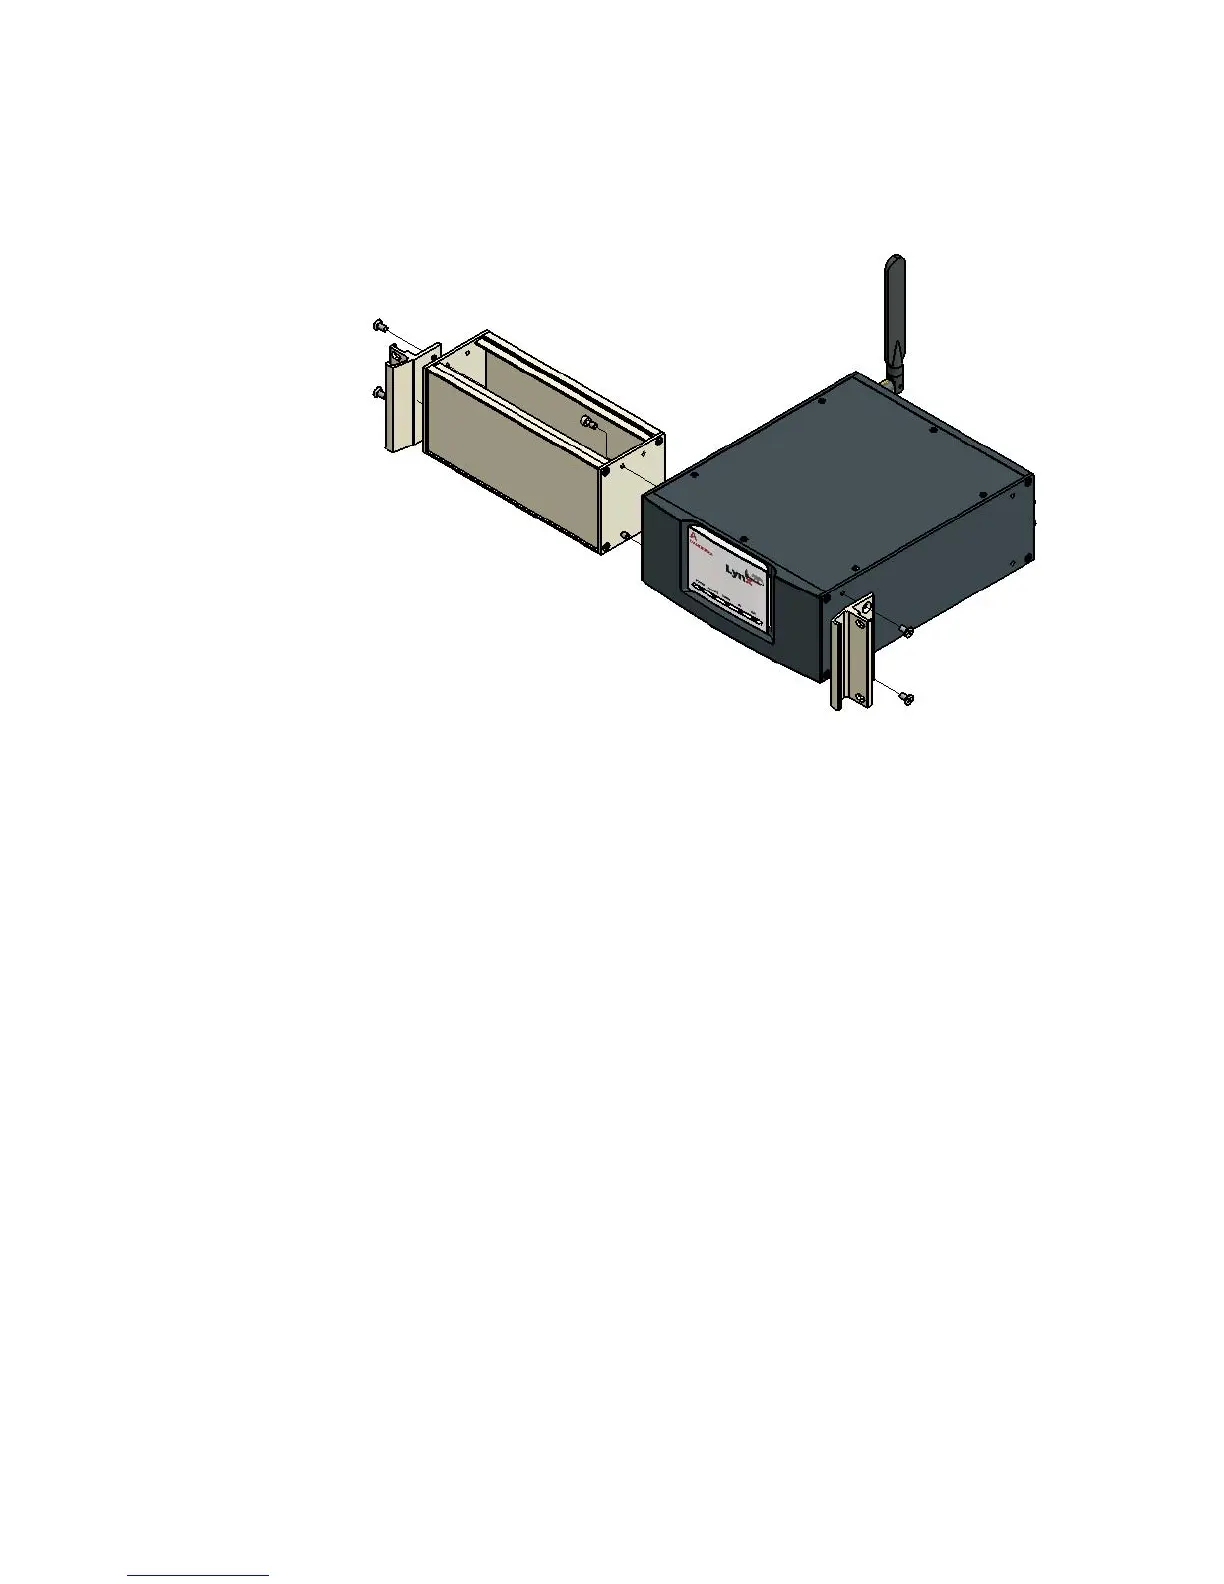
Rack-mounting a Single Unit
Figure 140 - Rack Mounting a Single Lynx, showing the half-rack filler piece