469 • DM NAX® Product Manual — Doc. 9045M
Once the group is added, all members of that group will have access to the DM-NAX-AMP-X300.
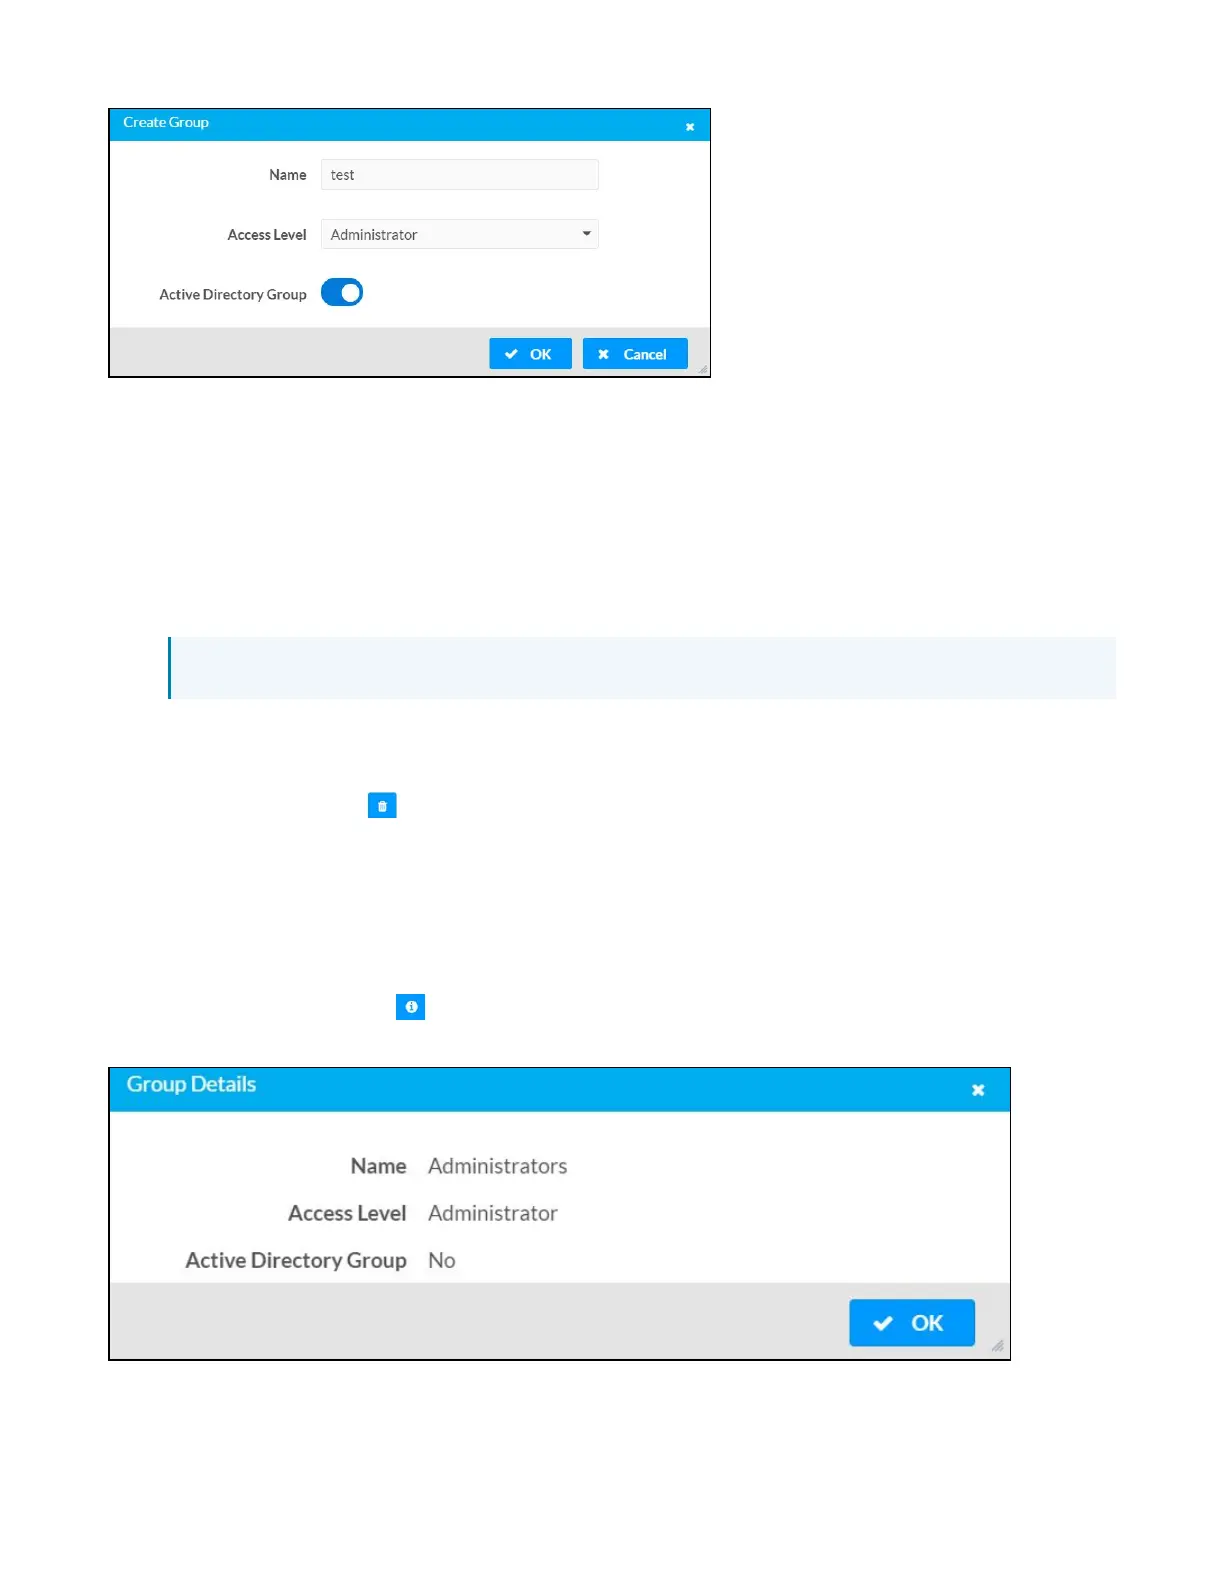
1. Click the Create Group button.
2. In the Create Group dialog enter the following:
a. Enter the group name in the Name field, for example “Engineering Group”. Note that group
names are case sensitive; a space is a valid character that can be used in group names.
3. Assign the group access level by selecting a predefined access level (Administrator, Connect,
Operator, Programmer, User) from the Access Level drop-down list.
NOTE: Make sure that the Active Directory Group toggle is enabled.
4. Click OK to save. Click Cancel to cancel the changes.
Delete a Group
Click the trashcan button ( ) in the Actions column to delete a group. Click Yes when prompted to
delete the group or No to cancel the deletion.
When a group is deleted, users in the group are not removed from the device or Active Directory server.
However, because a user’s access level is inherited from a group(s), users within the deleted group will
lose access rights associated with the group.
View Group Details
Click the information button ( ) in the Actions column to view information for the selected group. The
Group Details dialog lists the following information for the selected group.

 Loading...