Chapter 4 Disassembly / Assembly and Adjustment
4.2 Removal / Replacement
4-73
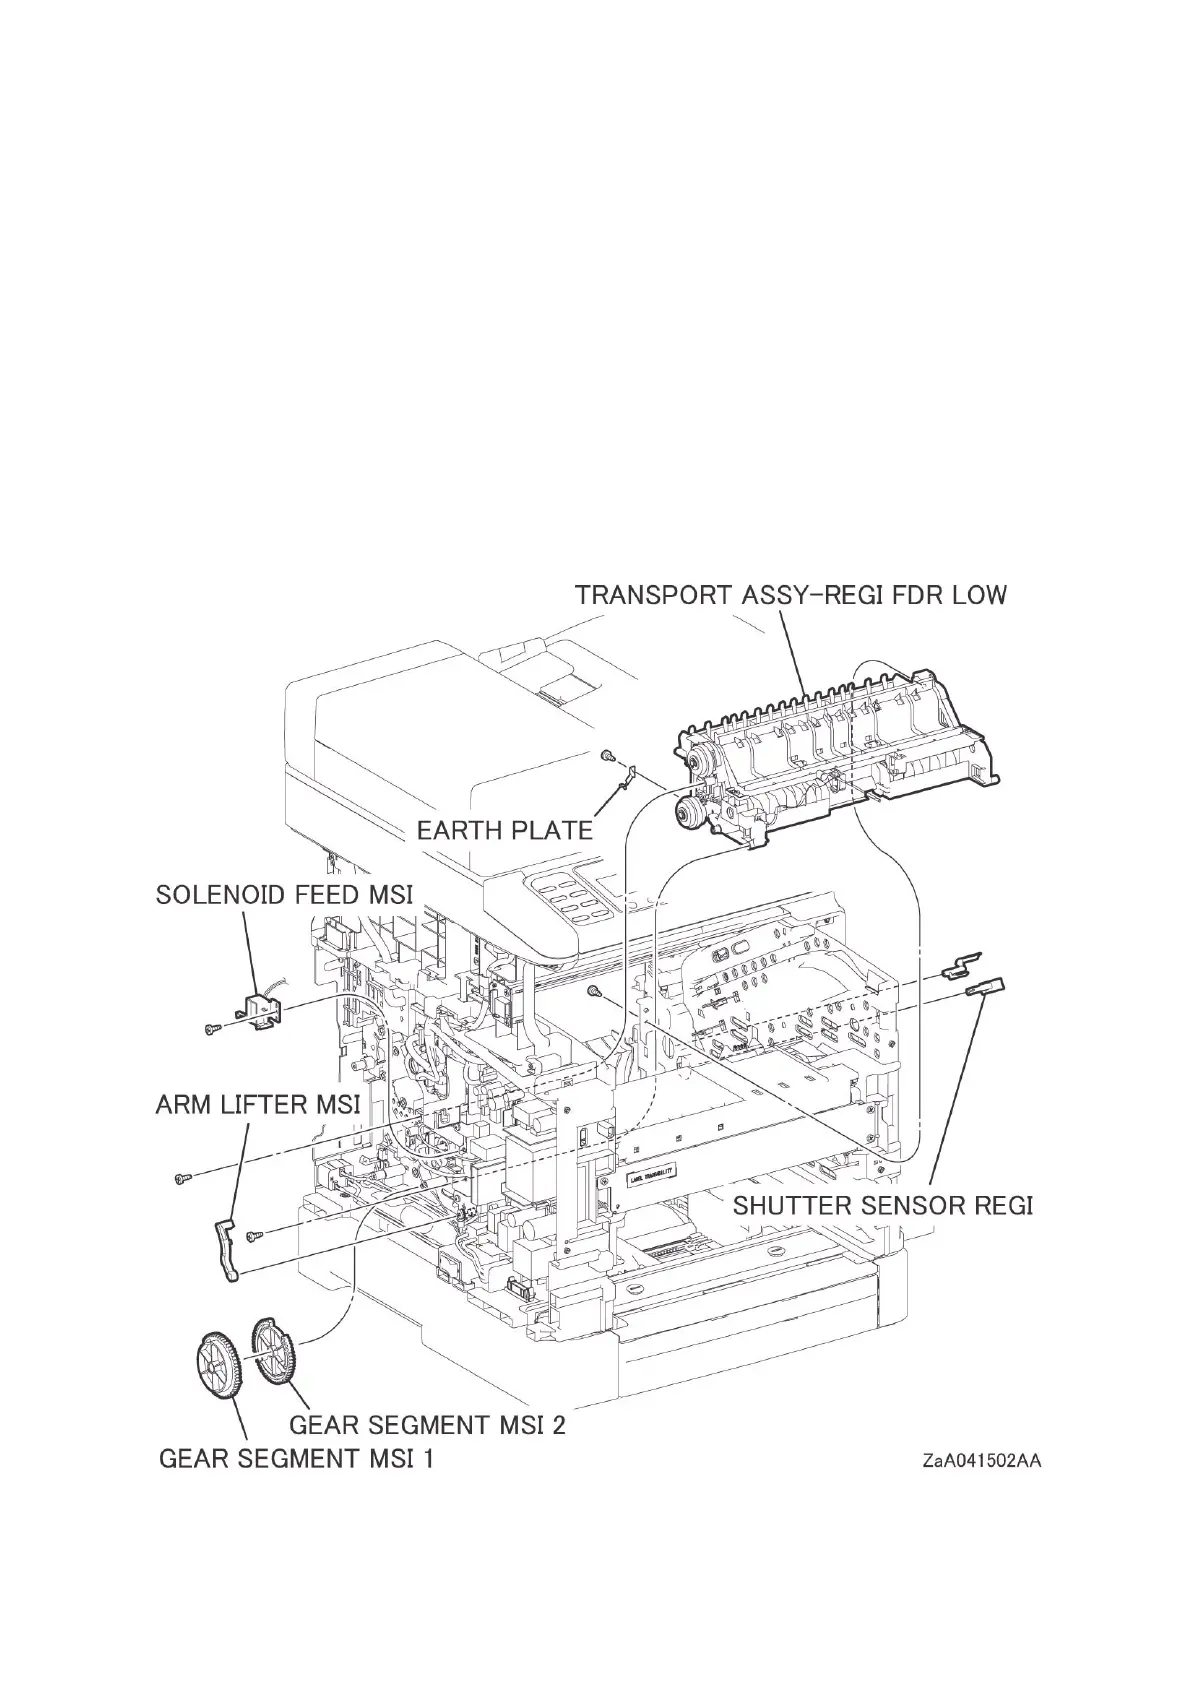
17 Remove the one screw (silver, tapping, 8mm) that fixes the SOLENOID FEED MSI (PL13.1.5),
and then remove the SOLENOID FEED MSI.
18 Remove the GEAR SEGMENT MSI 1 (PL13.1.6) and GEAR SEGMENT MSI 2 (PL13.1.7).
19 Release the SPRING FEED MSI (PL13.1.11) from the ARM LIFTER MSI (PL13.1.9), and then
remove the ARM LIFTER MSI.
20 Release the hook that fixes the SHUTTER SENSOR REGI (PL15.1.14), and then remove the
SHUTTER SENSOR REGI (PL15.1.14).
21 Release the one screw (silver, tapping, 8mm) that fixes the EARTH PLATE, and then remove the
EARTH PLATE.
22 Remove the three screws (silver, tapping, 8mm) that fix the TRANSPORT ASSY-REGI FDR
LOW, and then remove the TRANSPORT ASSY-REGI FDR LOW from the printer.

 Loading...


