What’s the best image to use for the Laser Offset calibration? An arrow is ideal because you’ll be able to
quickly verify if you have the printout correctly placed on the cutting mat. Also, it’s a great shape for seeing
how to adjust your X and Y calibration numbers. You can use most any image, but to follow the rest of the
tutorial more easily, an arrow from the Basic Shapes library is highly recommended:
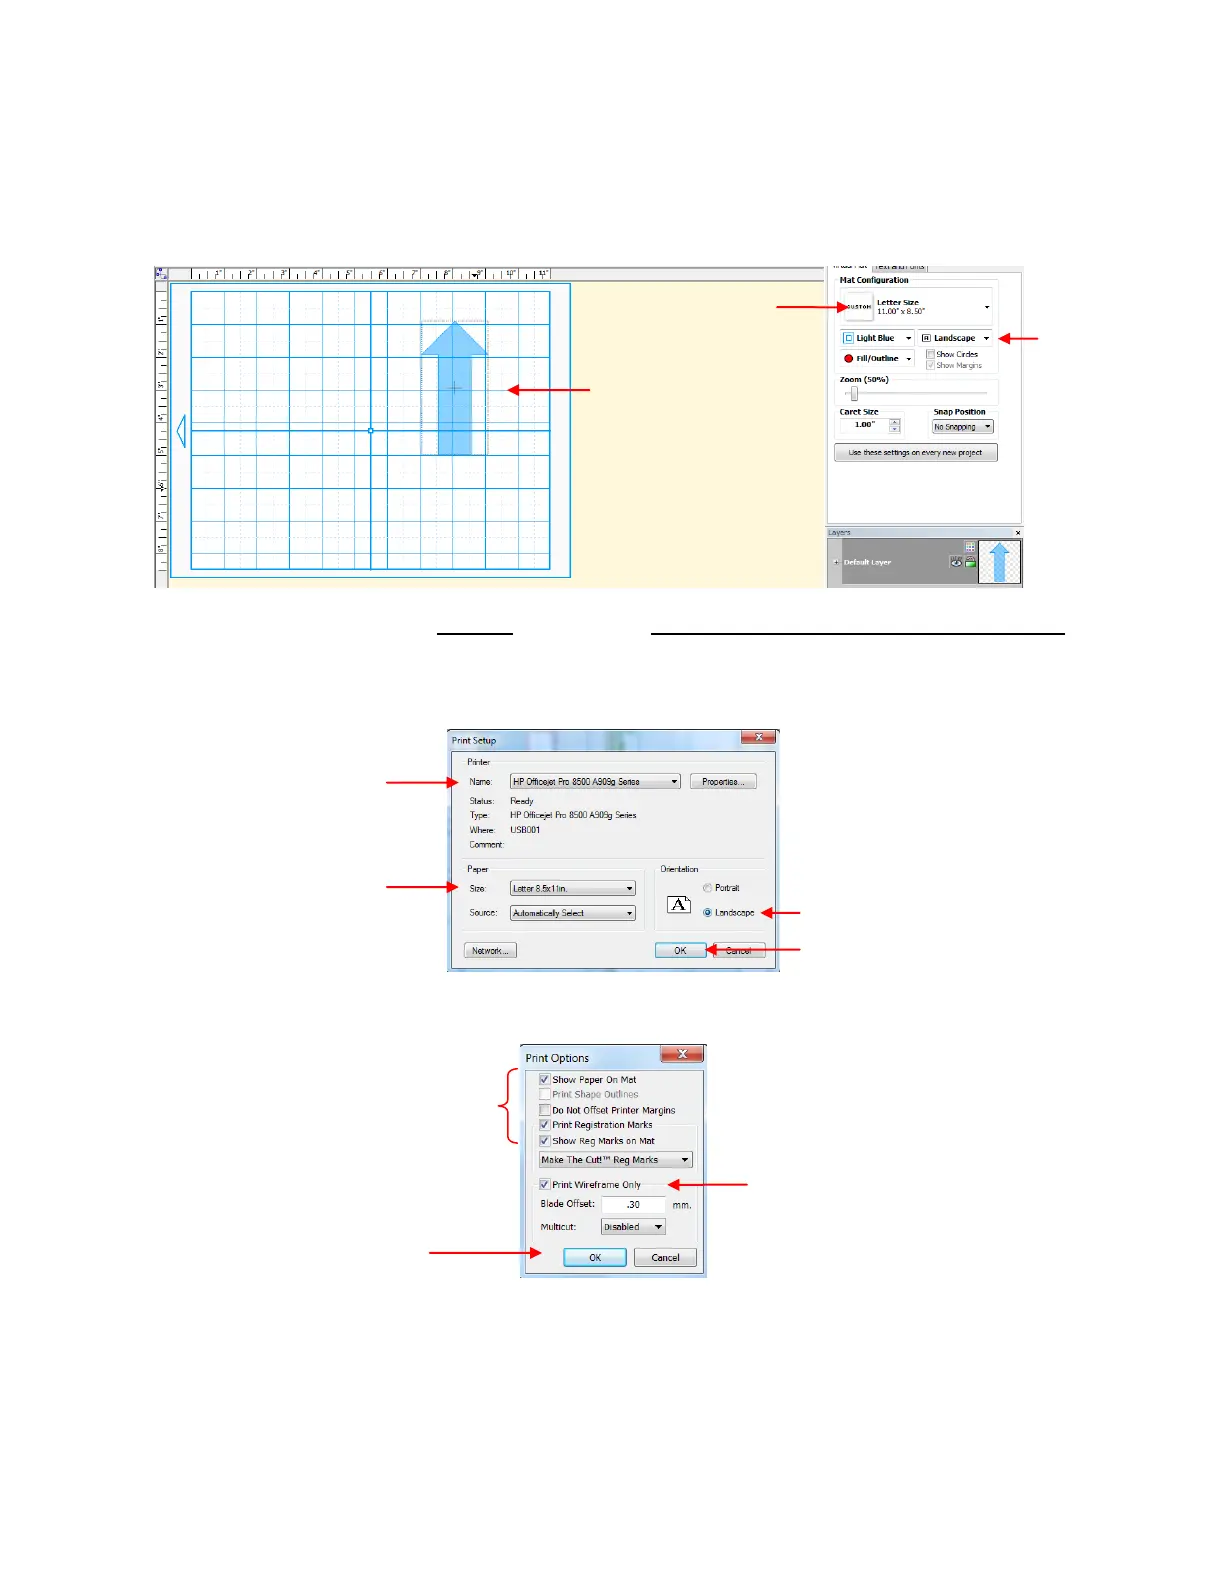
Notice that the arrow is pointing upwards on the screen. Make sure your arrow is also pointed upwards!
Later, when you print the arrow and place the paper on the mat, the arrow will be pointing to the right as you
insert the mat into the Zing.
Next, go to File>Print Setup, select the printer you plan to use, and set the Orientation to Landscape:
Next, go to File>Print Options and mark the following boxes:
After clicking on OK, you should see the green borders on the Virtual Mat, indicating how the printout will
be placed on the mat and where the arrow will be printed. If the arrow is outside the green borders, move it
so that it falls within the boundaries:
Mat dimensions should
match printout
Import an arrow and
rotate to face upwards
Check this option if you want
an outline only of the arrow
printed (to save on ink!)