Image in Pixel Trace window:
Resulting trace after import
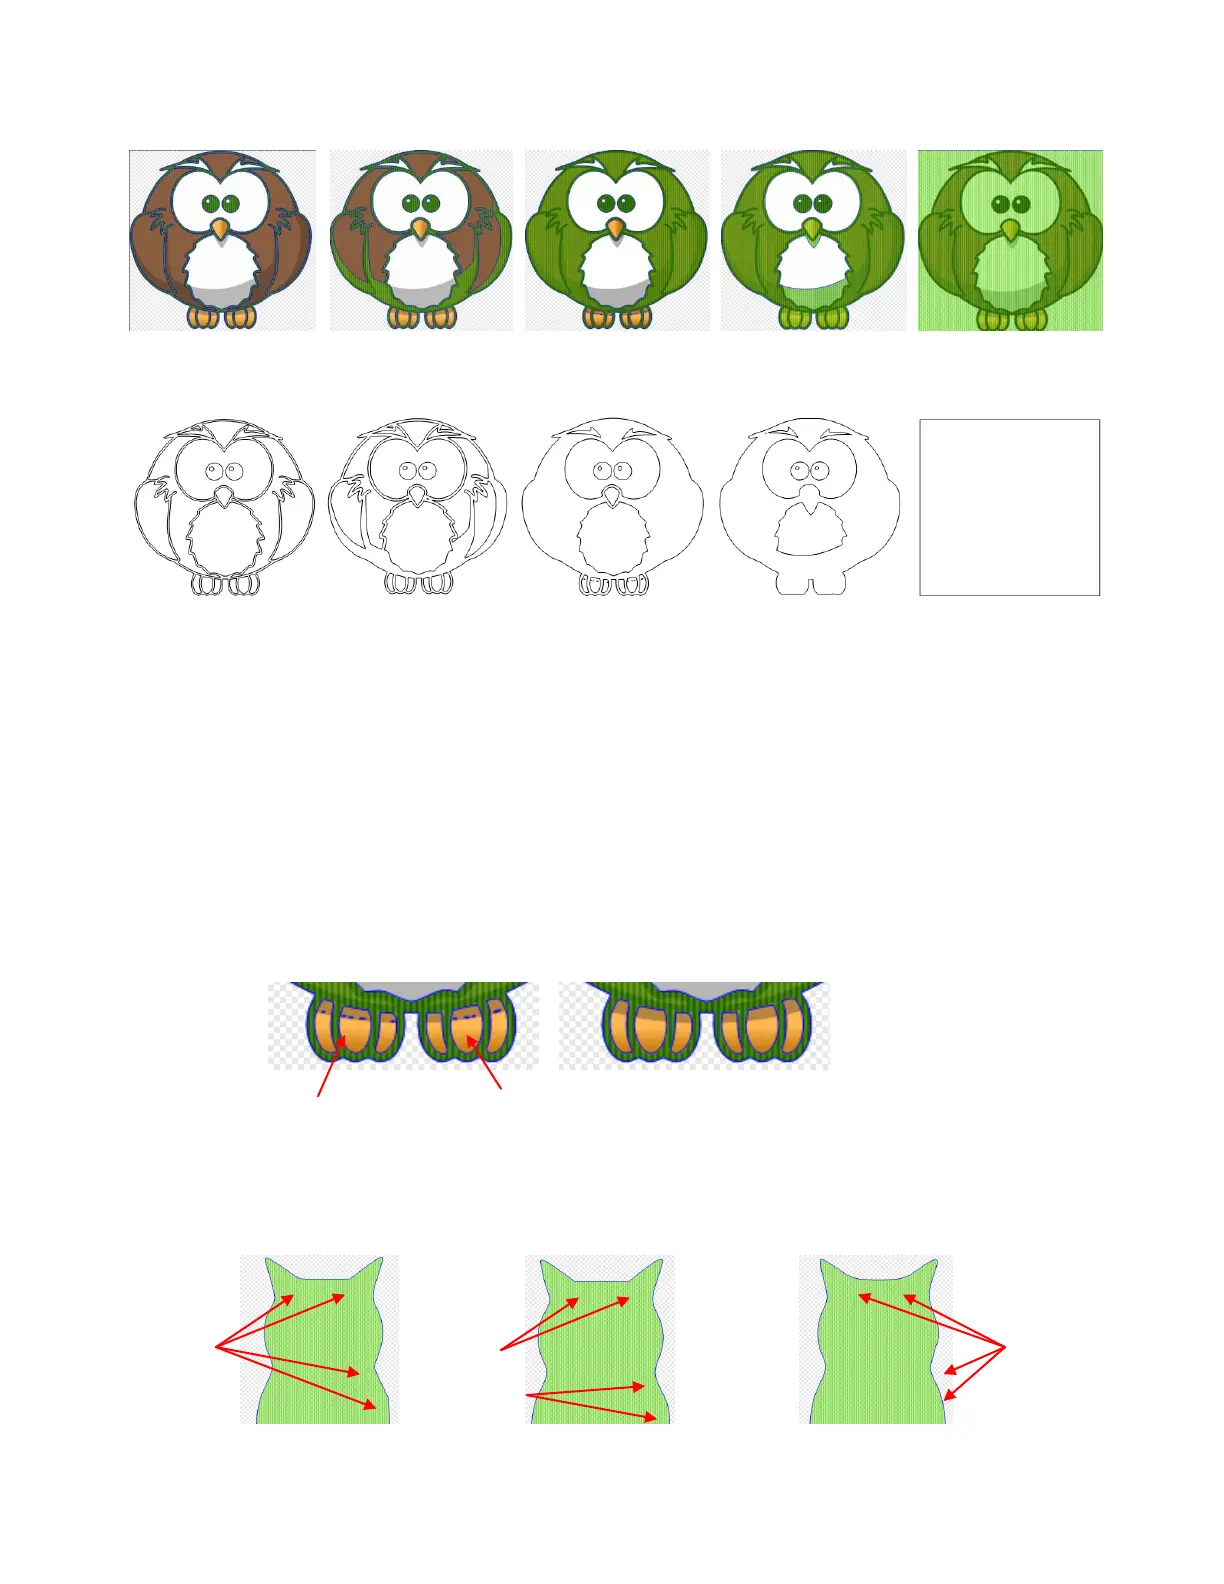
As shown in the above example, the most detail was obtained with the lowest Threshold. Typically, this is
not necessarily what you want in your tracing. The point is to experiment freely over the entire range of
Threshold settings to see the effects of changing this important setting. At the same time, test the other
available settings.
Choosing By Luminance versus By Average can give different results. Start with By Luminance and
switch if you are having problems getting a good trace. Refer to Appendix B Terminology for definitions of
these two terms.
The Despeck setting will filter out small paths that you may not want to be traced. Increase to remove these
tiny paths from your tracing. However, if you see parts disappearing that you need, then decrease. You can
also apply a Break to your tracing and then manually delete parts you do not want.
The Resample Image setting can be used to increase or decrease how tightly an image is traced. Lower it
to decrease the number of nodes and “loosen” the fit of the tracing. Increase it to increase the nodes and
create a more precise fit. This can also be used to soften angular tracings, as shown in this trace of a cat:
Threshold: 1
Lots of detail
Threshold: 75
Losing wing detail
Threshold: 127
Wings missing
Threshold: 250
Detail in claws missing
Threshold: 255
Border only traced
Despeck set to 0:
Tiny specks in owl’s claws
Despeck set to 15:
Tiny specks removed
Resample Image: x1.0
Cat image is too
angular
Resample Image: x0.75
Improved, but the cat’s
head is still angular
Resample Image: x0.5
All parts are much
smoother now