12E5119 Instruction Manual QuickTOC
®
ultra
IECEx 243
9 Accessories and Options
9.11 Auto-TIC-Port
LAR | PROCESS ANALYSERS AG
9.11.4 Perform Visual Inspections (Auto-TIC-Port)
Procedure for visual inspections:
1. Use a visual inspection log (Auto-TIC-Port) (Chapter 13.13 on page 278) for documentation.
2. Follow the instructions below for visual inspections of individual components.
3. Carry out care and/or maintenance actions when test criteria are not observed, and document
them in the care and/or maintenance log (Auto-TIC-Port).
4. After the check and any care and/or maintenance actions, conclude the documentation of the
log(s).
9.11.4.1 Microswitch on Auto-TIC-Port (6 Months)
1. Stop the Measruement Mode of the Analyser with the Oflline-Button.
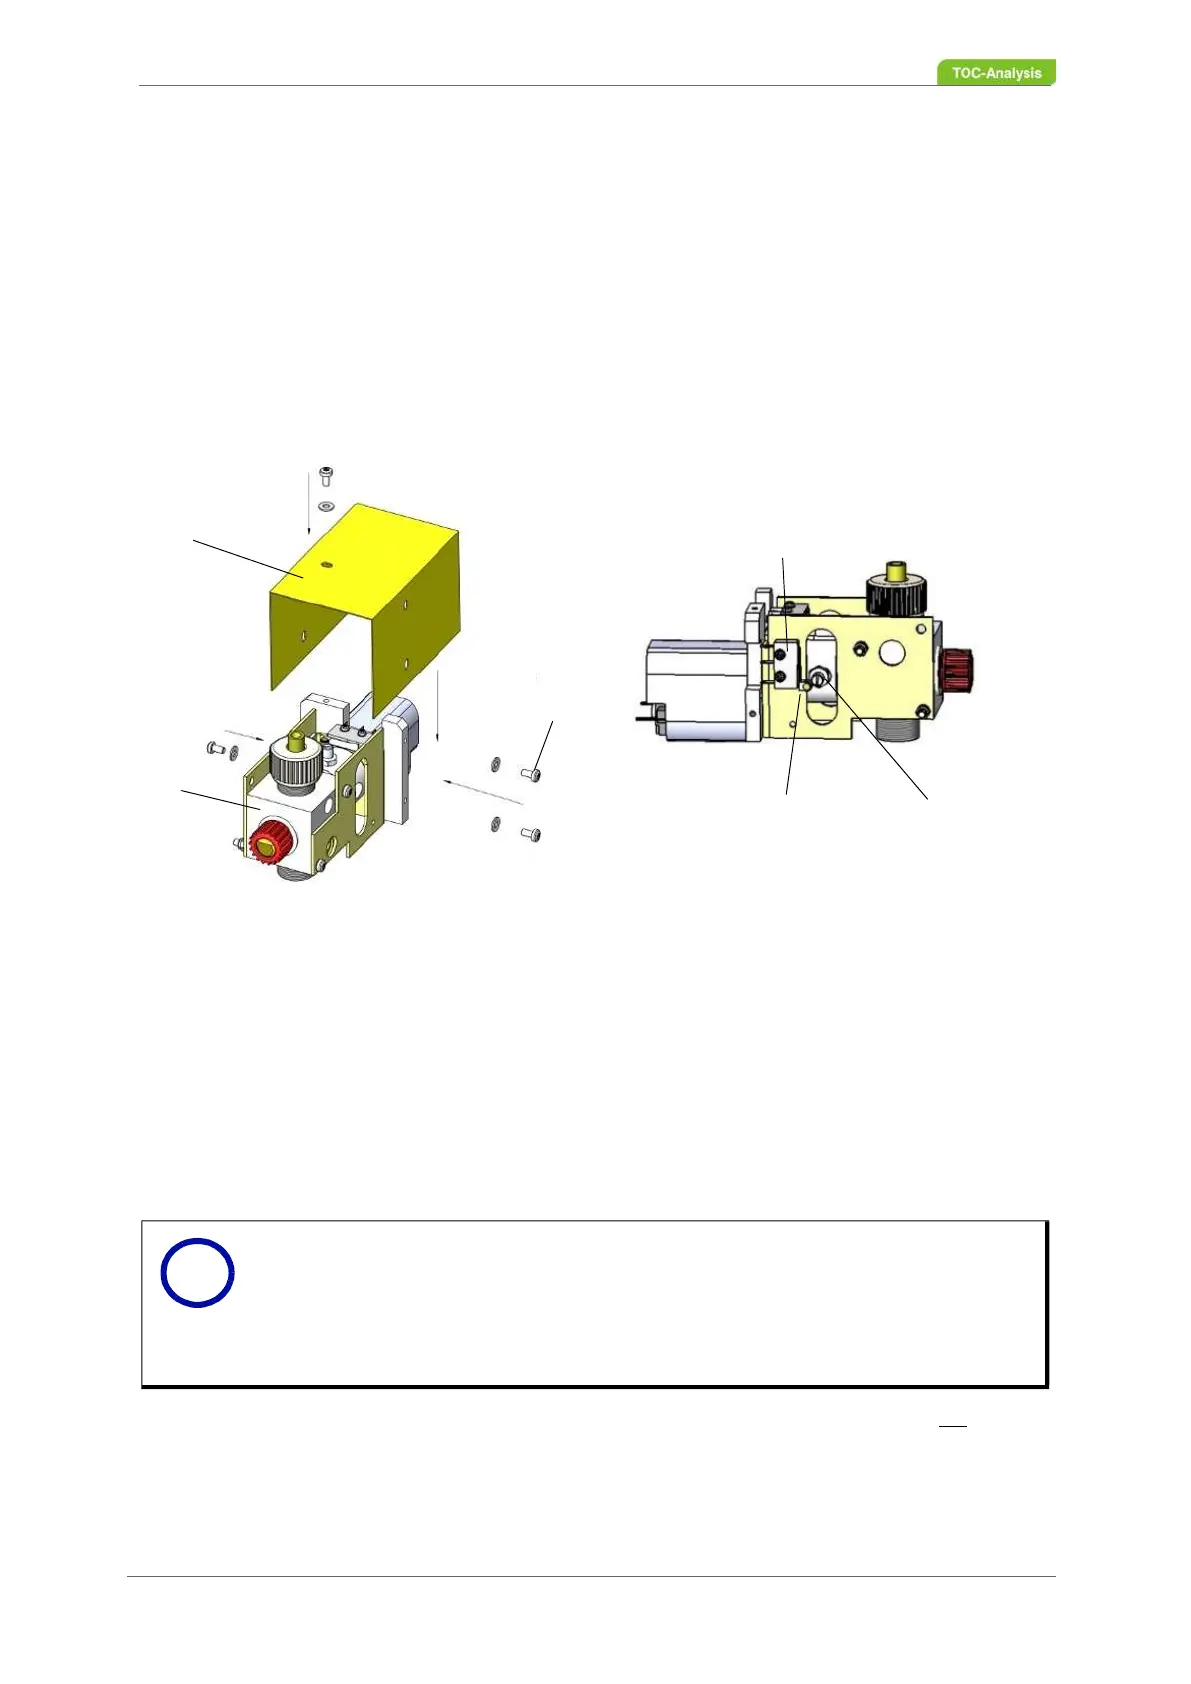
2. Undo the two Torx screws (No. 3 in Fig. 153, page 243) with spring washers on the cover cap.
3. Pull the cover cap upwards.
4. Access the “Service actions” display.
5. Close and open the injection port to test the ease of movement of the closing and opening
functions for the injection port (rotation test).
6. When turning the valve cock plug, check that the switch levers of the micro-switch are not pressed
down onto the micro-switch housing by the switch knob of the valve cock plug.
7. Ensure that a minimum distance of 1 mm between the switch levers of the micro-switches and the
respective micro-switch housing is not dropping below.
8. If the test criteria are not met, please contact your local partner or the Technical Support of LAR
1 Cover Cap
2 Injection Valve
3 4x Screws M3x6, 4x Washers M3
4 Micro-switch housing
5 Switch lever of micro-switch
6 Switch knob on valve cock plug
Fig. 153: Injection valve
Notice
Closing and opening effects rotation of the valve cock plug.
There is a switch knob on the valve cock plug (No. 6 in Fig. 153, page 243).
When the valve is closed, the valve cock plug turns until the switch knob on
the next switch lever of a micro-switch triggers the switch process and ends
rotation of the valve.
1
2
3
4
5
6
i