12E5119 Instruction Manual QuickTOC
®
ultra
IECEx 245
9 Accessories and Options
9.11 Auto-TIC-Port
LAR | PROCESS ANALYSERS AG
9.11.5.2 Clean Needle Guide (Auto-TIC-Port) (1 Month)
Recommendation: - Clean the needle guide every month.
1. Detach the Auto-TIC-Port from the TIC stripping vessel.
2. Unscrew the cover cap.
3. Unscrew the union nut and the attachment of the needle guides (1, 2).
4. Use a moist paper towel and rinsing water (Chapter 6.1.2 on page 79) to clean the needle guides
and all individual parts.
5. If the level of contamination is high, first clean the needle guides mechanically and then in a bath
(with 1% phosphoric acid).
6. After the cleaning process, refit all individual parts for the complete injection port.
7. Screw the needle guides and union nut back onto the Auto-TIC-Port.
8. Fix the cover cap (handtightened).
9. Check the position. If necessary adjust (Auto-TIC-Port should point to the front left at angle).
10. Perform a test run (Chapter 7.8.3 from page 120).
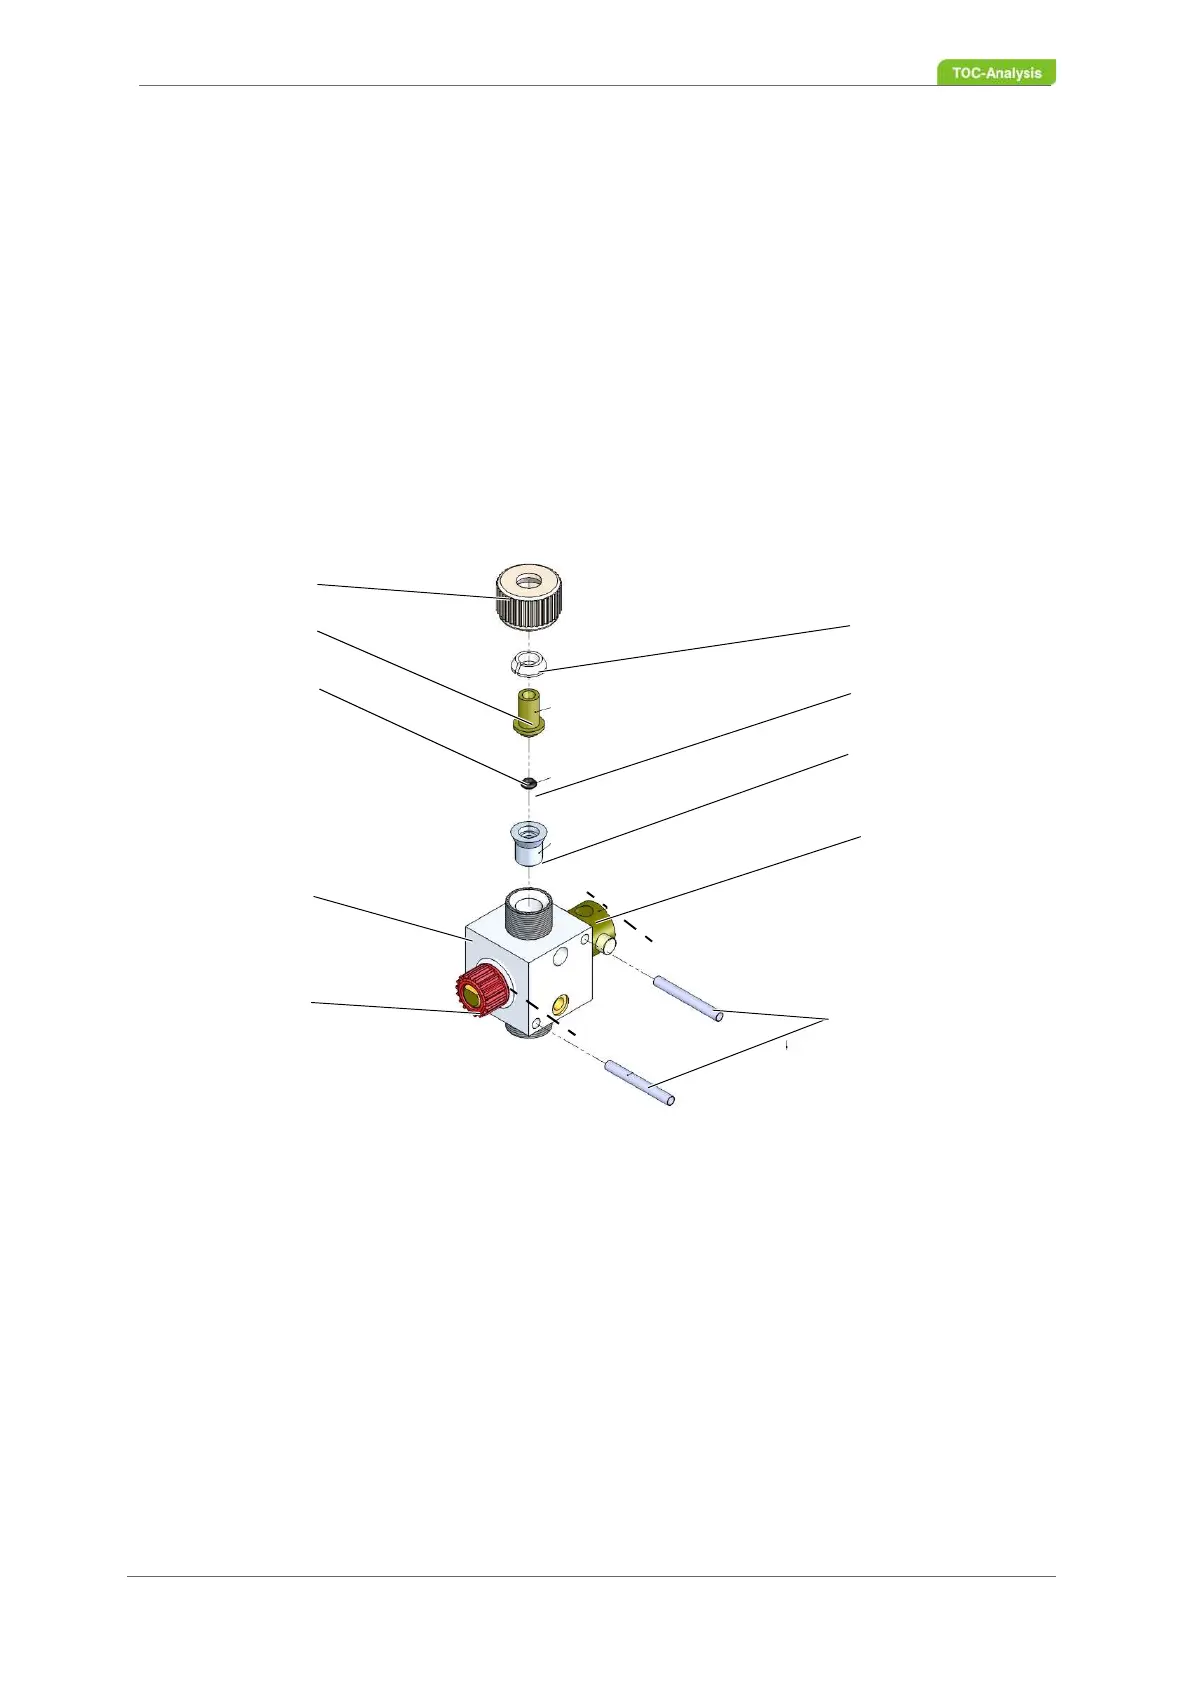
Fig. 154: Injection valve (Auto-TIC-Port)
1 Union Nut
2 Attachment for upper needle guide
3 Upper needle guide
4 Needle guide seal
5 Lower needle guide
6 Cock plug
7 Spacer sleeves
8 Union nut for cock plug
9 Injection valve (Auto-TIC-Port)
Nadelführung unten
6
8
5
9
7
4
2
1
5
3