OPERATION
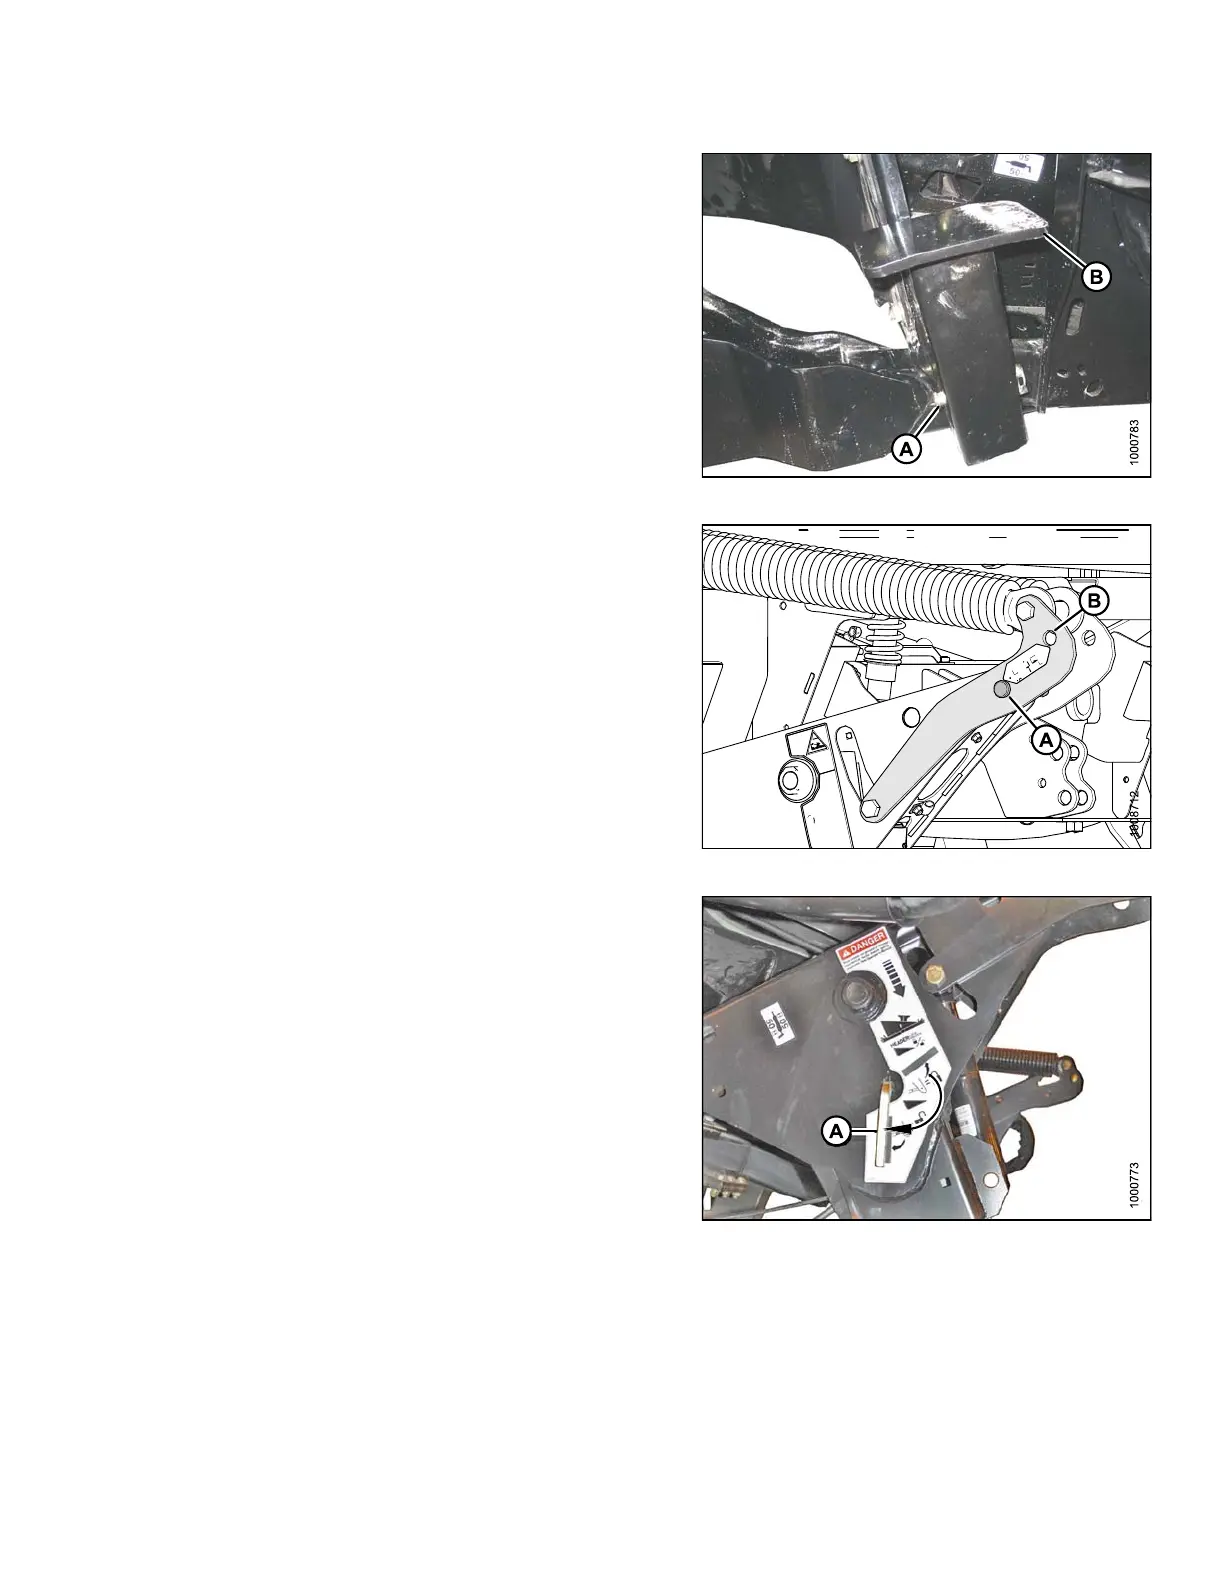
12. Remove lynch pin from clevis pin (A) in stand (B).
13. Hold stand (B) and remove pin (A).
14. Position stand to storage position by inverting stand
and relocating on bracket as shown. Reinsert clevis
pin (A) and secure with lynch pin.
Figure 4.133: Header Stand
15. Remove c levis pin from stora ge position (B) in linkage,
and insert in hole (A) to engage fl oat springs. Secure
with hairpin.
Figure 4.134: H eader Lift Linkage
16. Disengage safety prop by turning lever (A) downward
to rele ase and lower safety prop until lev er locks into
vertical position.
17. Repeat for opposite safety prop.
Figure 4.135: Safety Prop
169890 153 Revision A