MAINTENANCE AND SERVICING
3. Remove filler c ap (A) by turning it counterclockwise.
4. Carefully pour the oil. A funnel is recommended to
avoid spillage. Refer to Lubricants, Fluids, and System
Capacities, pa ge 1 99 for oil spec ifications.
CAUTION
Do NOT fill above the HIGH mark.
5. Replace oil filler cap (A) and turn it clockwise until snug.
6. Check the oil level. Refer to Checkin g Engine Oil Level,
page 227.
7. Close the hood. Refer to 5.4.2 Closing Hood (Lower
Position), page 203.
Figure 5.64: Oil Filler Cap
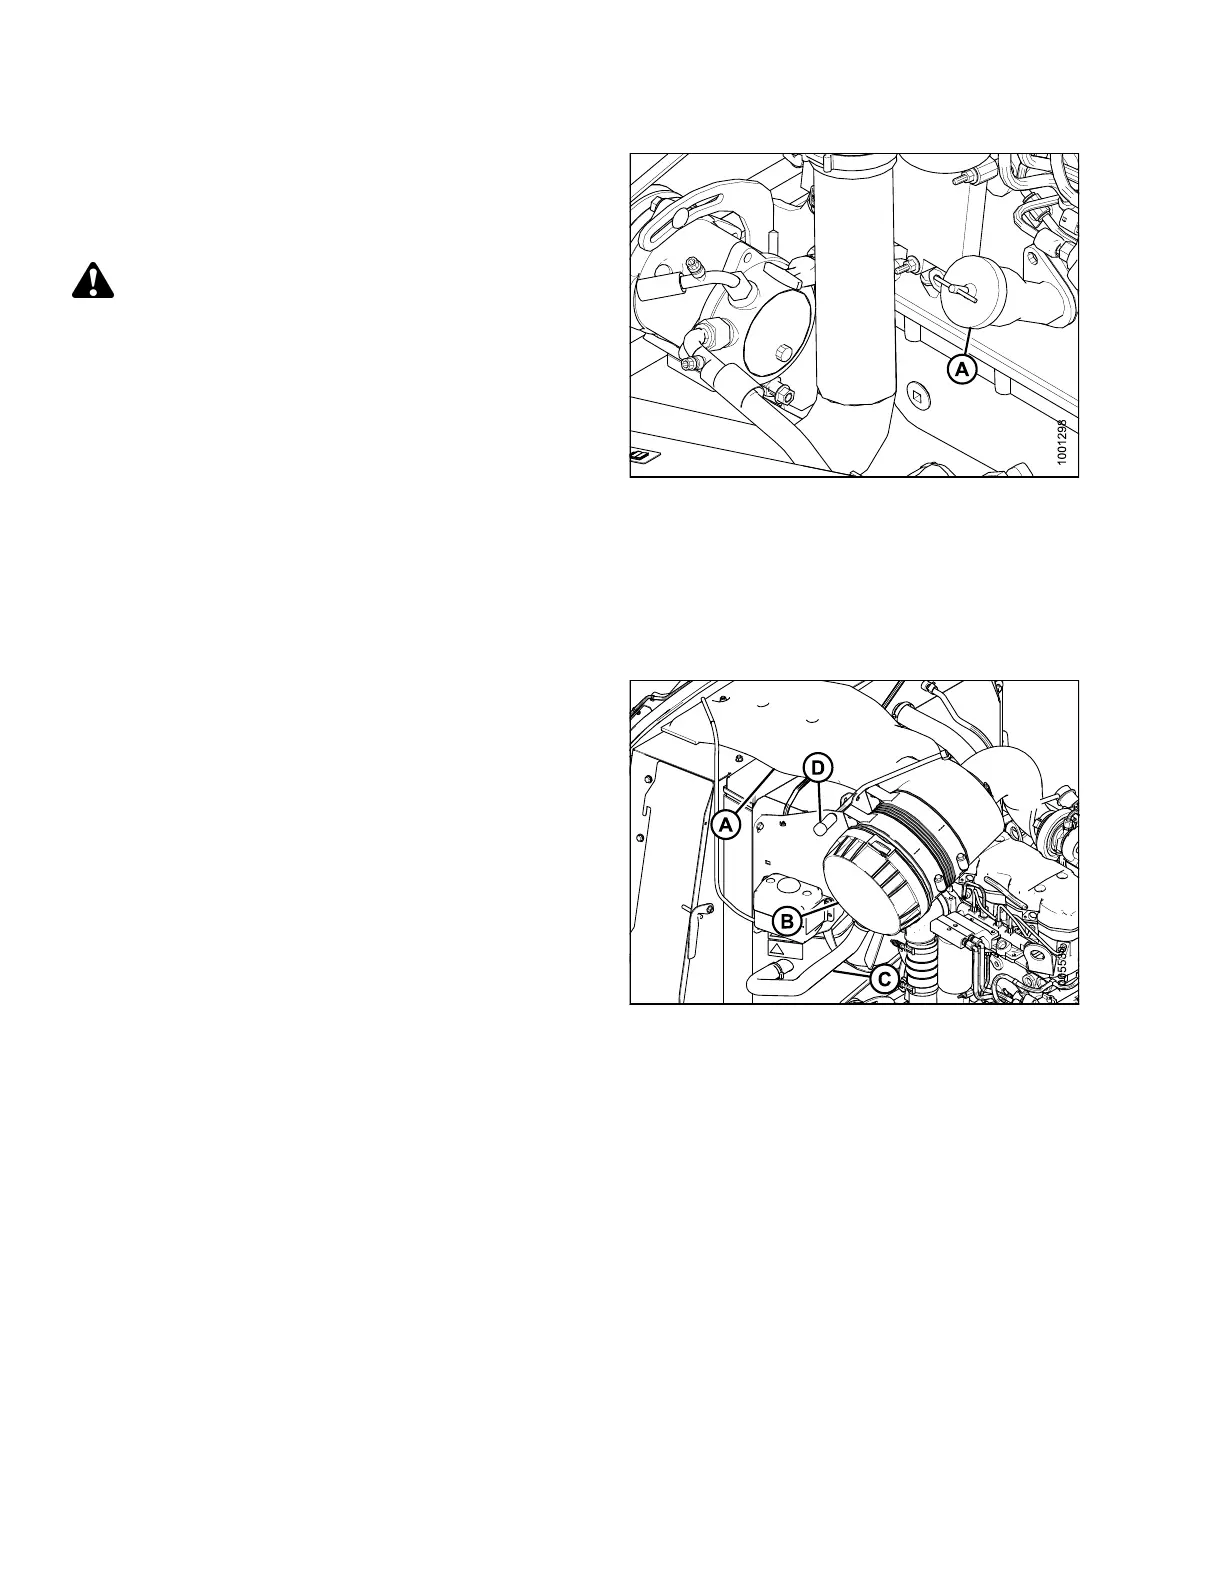
Air Intake S ystem
IMPORTANT
:
Do NOT run e
ngine with air cleaner disconnected or disassembled.
Engine intake air is drawn through a duct (A) from the
cooling box that precleans the air and then through a dual
element filter (B).
The air cleaner canister is equipped with an
aspirator (C) that removes dust continuously from the air
cleaner housing.
The air cleaner is also equipped with an air filter restriction
switch (D) that indicates when the prim ary filter elem ent
requires cleaning.
Refer to Filter Part Numbers, page 200.
Figure 5.65: Air Intake System
IMPORTANT:
•DoNOT run engine with air cleaner disconnected or
disassembled.
• Over-servicing the filter element increases the risk
of dirt being ingested by the engine and severely
damagin g the engine.
• Filter servicing should only be performed when
the CDM indicates “EN GINE AIR FILTER” or
at the specified interval. Refer to Maintenance
Schedule/Record, page 315.
169890 230 Revision A