MAINTENANCE AND SERVICING
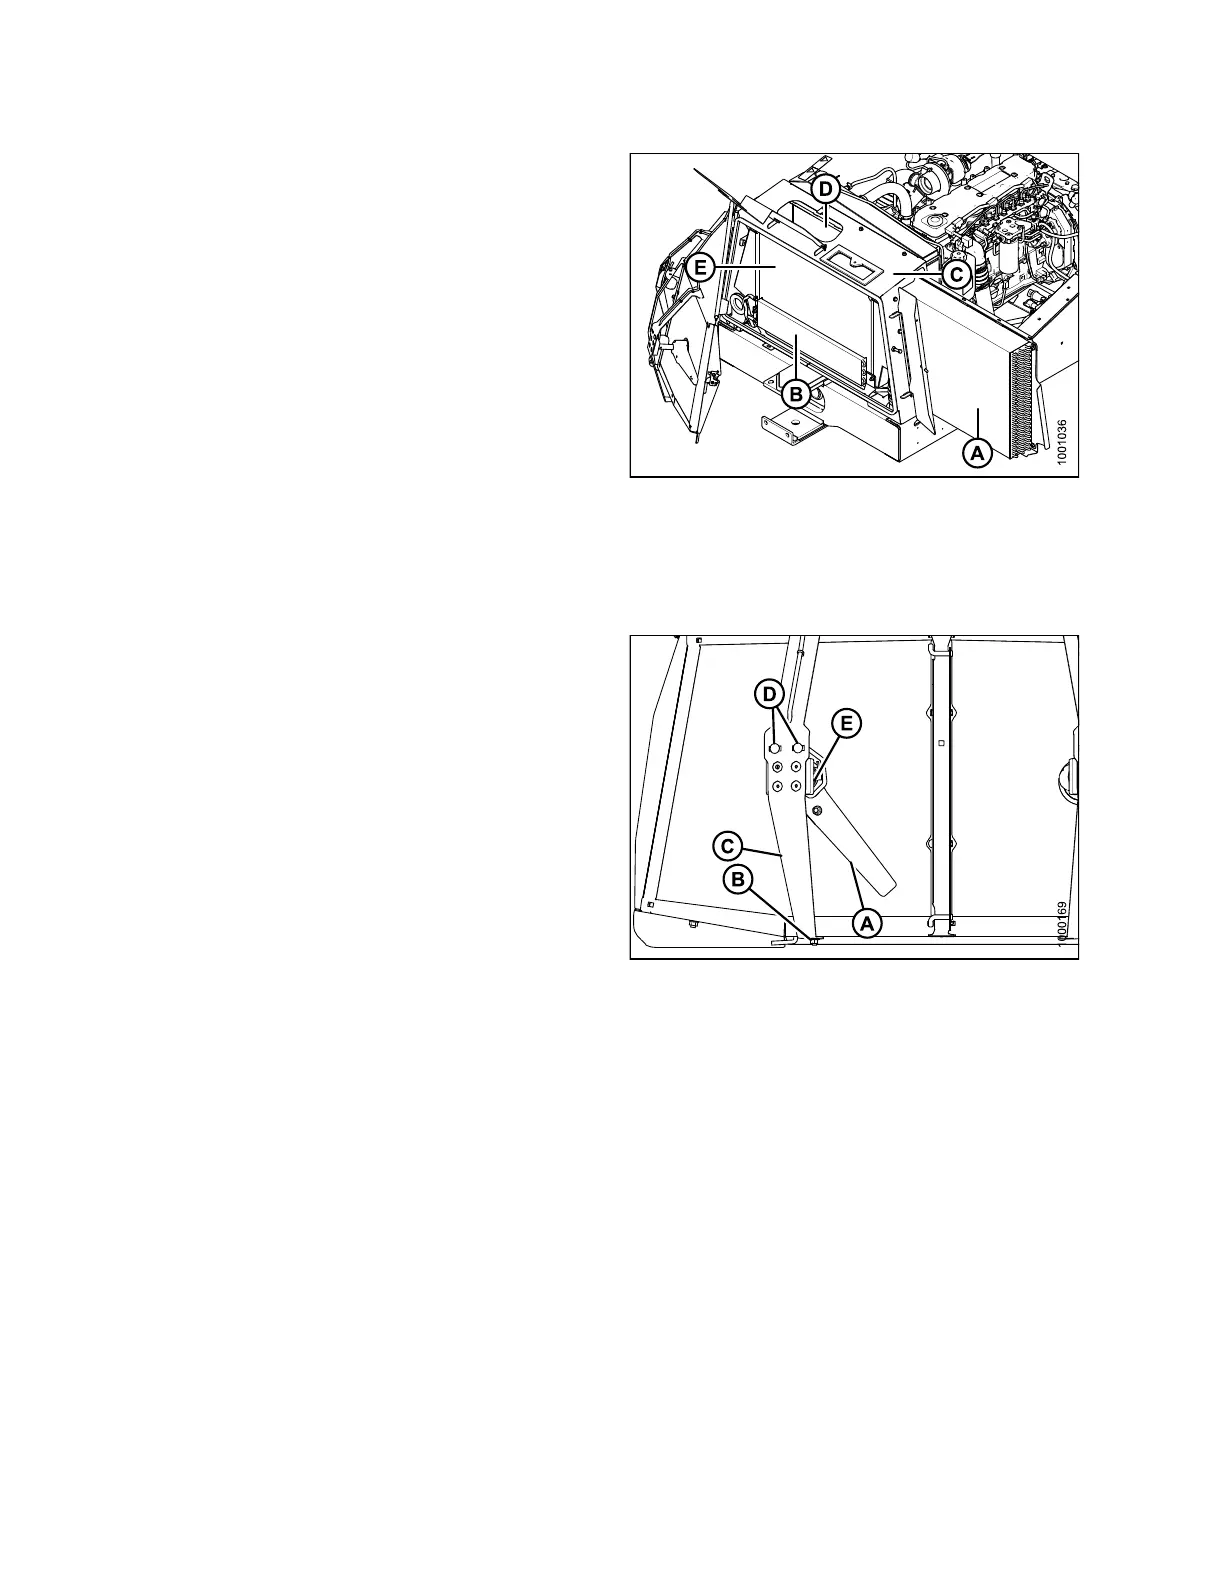
6. Clean radiator (D) through access holes in cooling box
with compressed air.
7. Clean oil cooler / air conditioning condenser (A),
charge air cooler (E), fuel cooler (B), and cooling
box (C) with compressed air.
8. Inspect all lines and coolers for evidence of leaks
and damage.
9. Slide oil cooler / air conditioning condenser (A) back
into co o ling box (C).
10. Close side access door and lock with lever.
11. Close access door on top of the cooling box and secure
with wing nut.
12. Close cooler box screen. Refer to Closing C ooler Box
Screen, page 255.
Figure 5.110: Engine Cooling System
Adjusting Screen C
leaner Duct to Screen Clearance
Check clearance b
etween tra ilin g edge of scre en cleaner
duct (A) and scree
n. It should be 3/64–5/16 in. (1–8 mm)
at all locations
when rotating.
NOTE:
Screen cleaner ducts rotate counterclockwise and may
touch screen as long as it continues to rotate.
If necessary, a
djust clearance as follo ws:
1. Open the hood. R
efer to 5.4.1OpeningHood(Lower
Position), pag
e202.
2. Loosen nut (B)
on motor support (C).
3. Move support i
n or out until duct is 3/32–1/4 in.
(2–6 mm ) from s
creen near the center.
4. Retighten nu
t(B).
5. Loosen the tw
o motor mount bolts (D).
6. Move motor/d
uct assembly (E) to obtain 3/64–5/16 in.
(1–8 mm) gap
to screen at full rotation of the duct.
7. Retighten n
uts (D) on motor mount.
8. Close the h o
od. Refer to 5.4.2 Closing Hood (Lower
Position),
page 203.
Figure 5.111: Engine Cooling System
169890 254 Revision A