MAINTENANCE AND SERVICING
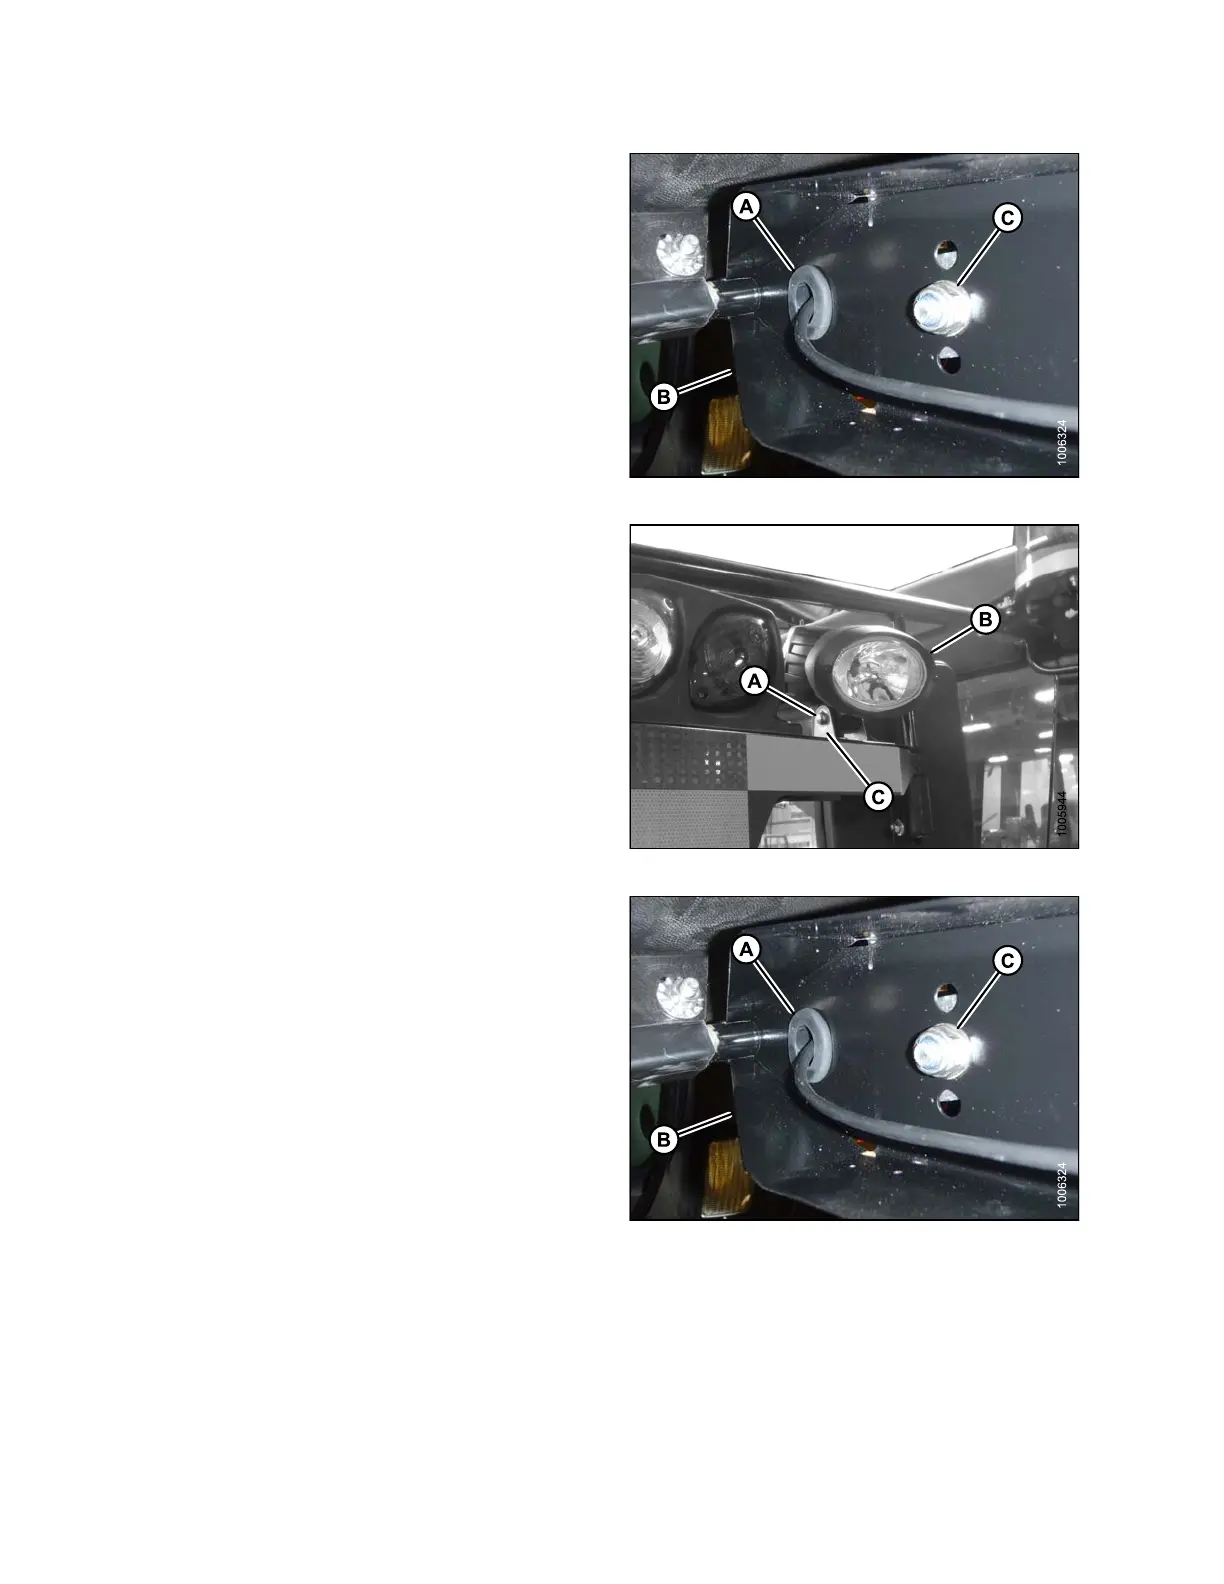
3. Remove gromm e t (A) from light support (B).
4. If replacing lamp and bracket assembly, r emove nut (C)
and spring washer from inside light support (B) and
remove light assembly.
Figure 5.146: HID Light Assembly
5. If replacing the lamp only, remove the nut, spring
washer and bolt (A) securing lamp (B) to lamp
bracket (C) and r emove lamp (B).
6. If installing lamp only, position n ew lamp (B) in lamp
bracket (C) and secure with bolt (A), spring washer and
nut. Adjust lamp (B) to desired position and tighten
bolt (A).
Figure 5.147: HID Auxiliary Lights
7. If installing lig ht/bracket asse mbly, locate ligh t in c en ter
hole in light support (B) and secure with hardware (C)
provided with light assembly. Adjust light assembly to
desired position and tighten nut (C).
8. Route lamp harness through g rommet (A) and s lot in
light support (B).
9. Reinstall gromme t (A) in light support (B).
Figure 5.148: HID Light Assembly
169890
2
74
Revision A