Proceed as follows:
Press the 'Ready' button to start printing.3.
#
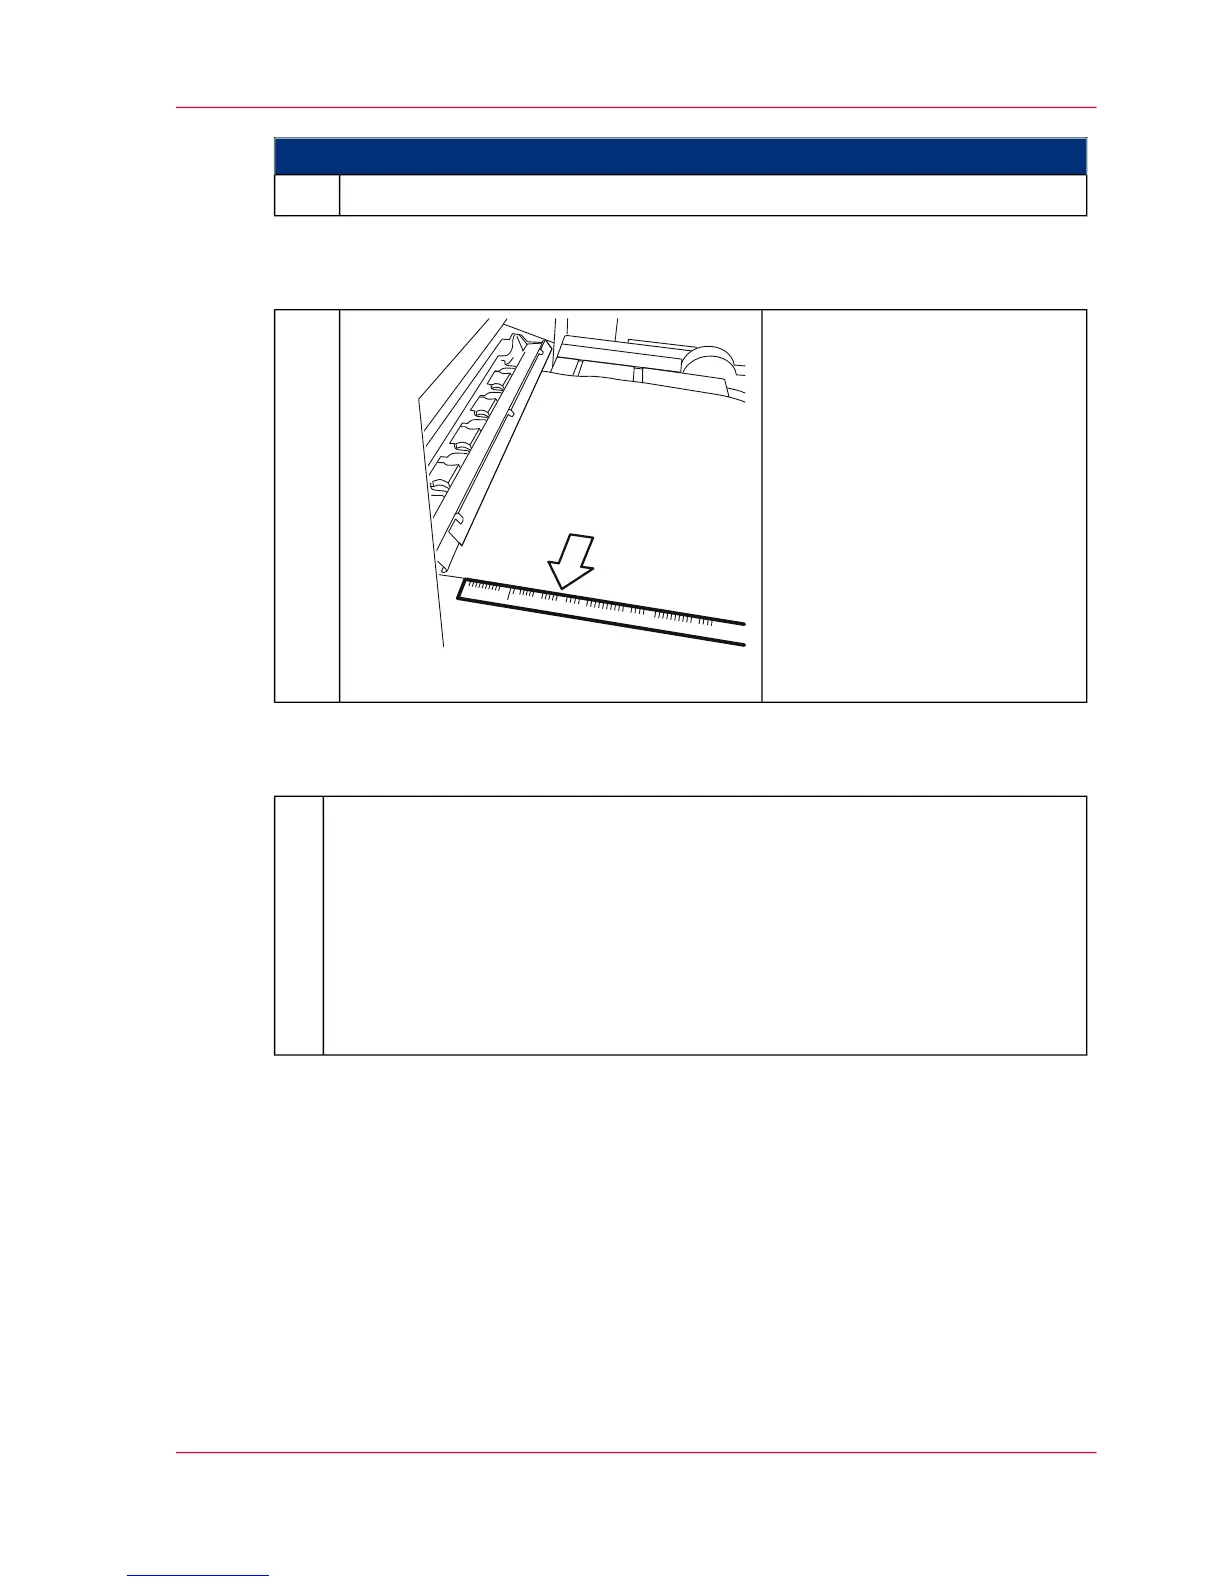
Check the synchronization:
If the synchronization is correct,
the tractor hole or the preprint
mark is positioned exactly at the
marker on the lateral ruler for
the respective form length after
a stop.
Assignment of the markers to
specific form lengths can be
copied from the graphic in the
annex (see ‘Ruler for Checking
Paper Path Synchronization’ on
page 504).
4.
#
If the synchronization needs to be corrected:
■
Press the 'Stop' key.
■
Correcting the position:
- If preprint marks are used for synchronization: In the 'Preprinted marks'
menu adjust the position of the preprint mark to the print image.
- If tractor holes are used for synchronization: Correct the position of the
tractor hole using the 'ADVF' and 'ADVR' keys.
■
Press the 'Ready' key.
5.
Chapter 6 - Operating the Printing System 151
Synchronizing the Paper Path