01/02
4-102
8825/8830 Printer
ADJ 8.4
Repairs and Adjustments
Adjustment
WARNING
Switch off the Main Power Switch. Disconnect the Power Cord.
1. Remove the Transfer / Detack Corotron ( REP 9.9).
2. Remove the Developer Module ( REP 9.5).
3. Remove the white Toner Shield.
4. ( Figure 2): Position the Lower Turnaround Baffle.
5. Close the Media Transport Cover.
Figure 2 Positioning the Lower Turnaround Baffle
NOTE: The position of the Lower Turnaround Baffle determines the position of the Upper Turn-
around Baffle. When the position of the Lower Turnaround Baffle is correctly set, the Upper
Turnaround Baffle is correctly positioned.
6. Cut two strips of 0.030 inch (coral) shimstock 0.75 inches (20 mm) wide.
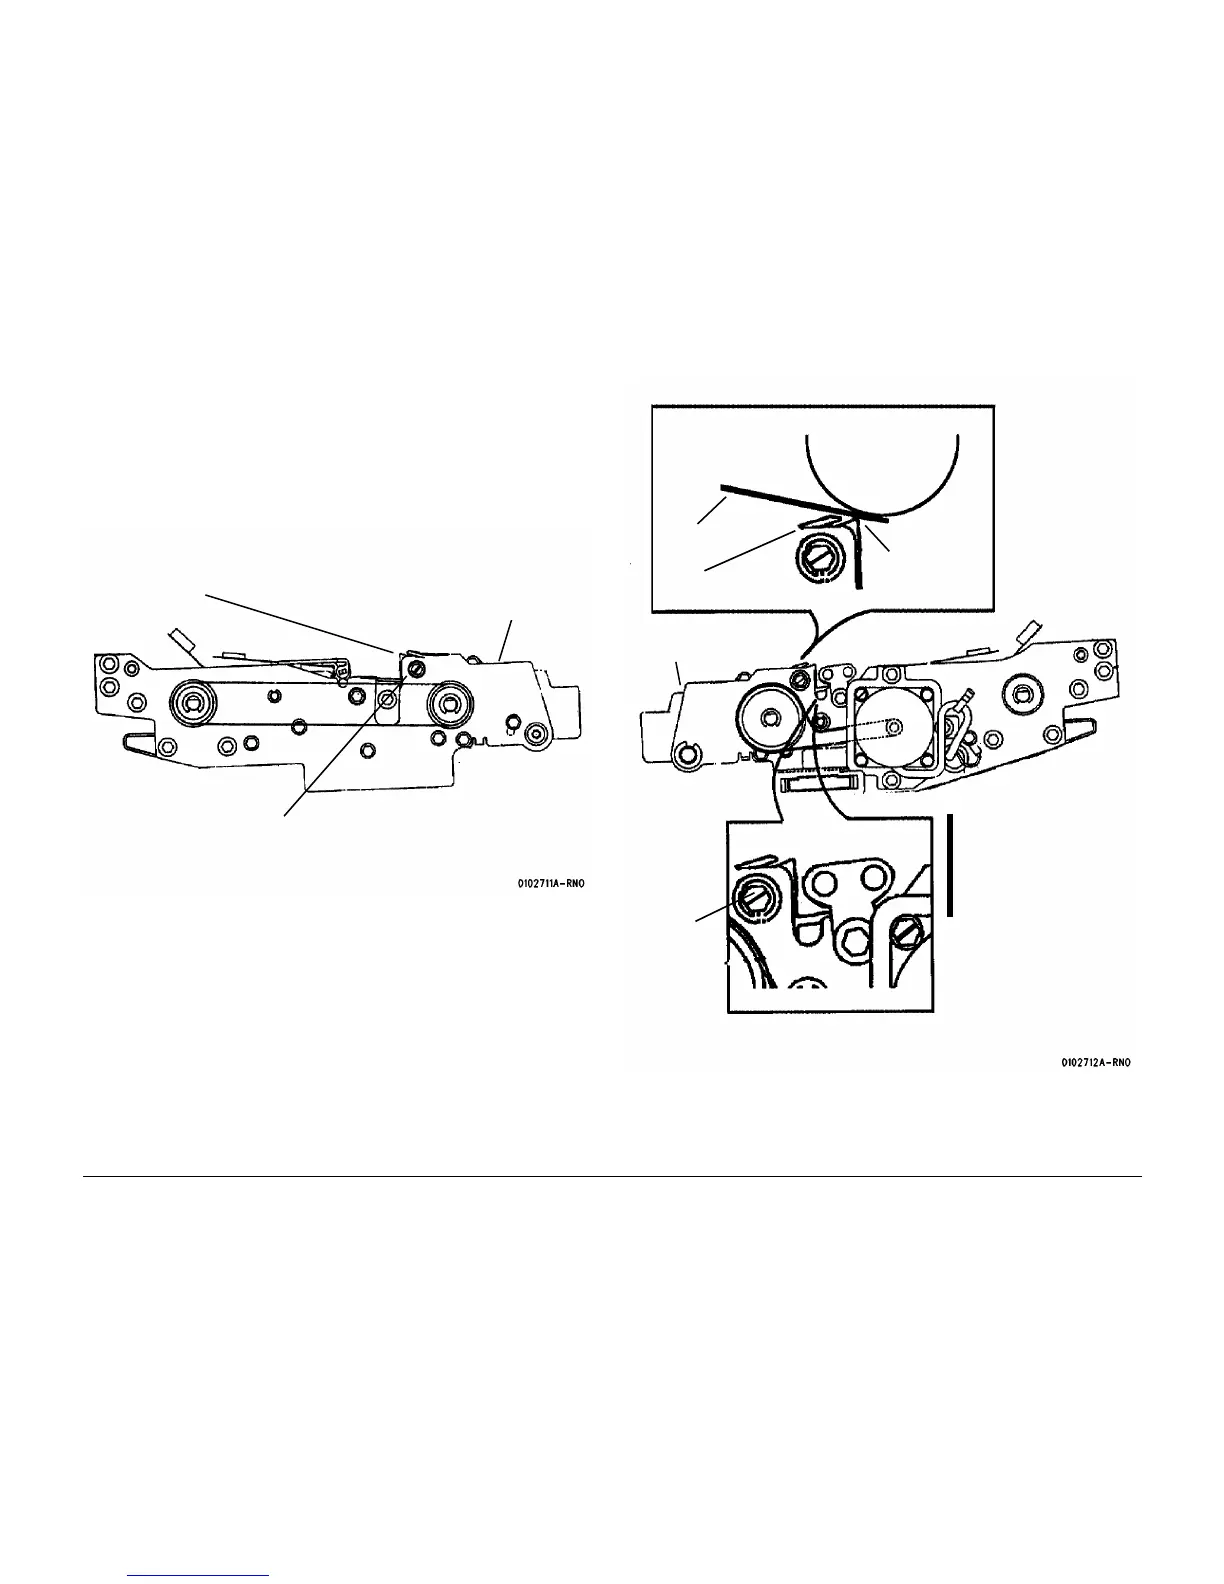
7. ( Figure 3): Adjust the Media Transport to Drum spacing to 0.030
± 0.005 inch (0.76 ± 0.1
µµ).
Figure 3 Adjusting the Media Transport to Drum Spacing
8. Reinstall the Transfer / Detack Corotron. Push the corotron down and in the direction of
the Developer Module before tightening the securing screw.
This view is of the Media Transport as
seen at the front of the printer
1
Loosen the two Turnaround
Baffle retaining screws, front
and rear
Media Transport
2
Push down the Lower
Turnaround Baffle,
front and rear
This view is of the
Media Transport as
seen at the rear of the
printer
3
Use a screwdriver to
push the Turnaround
Baffle fully against the
shims and tighten the
retaining screws (front
and rear)
1
Place the shims into the
notches of the Turn-
around Baffle, one on
each side
2
Ensure that the shims
are positioned
between the Lower
Baffle and the Drum
Drum
Lower
Baffle
Upper
Baffle
Shim
Media
Transport
Retaining
Screws (2)

 Loading...


