01/02
2-18
8825/8830 Printer
Generic Sensor RAP
Status Indicator RAPs
Generic Sensor RAP
Initial Actions
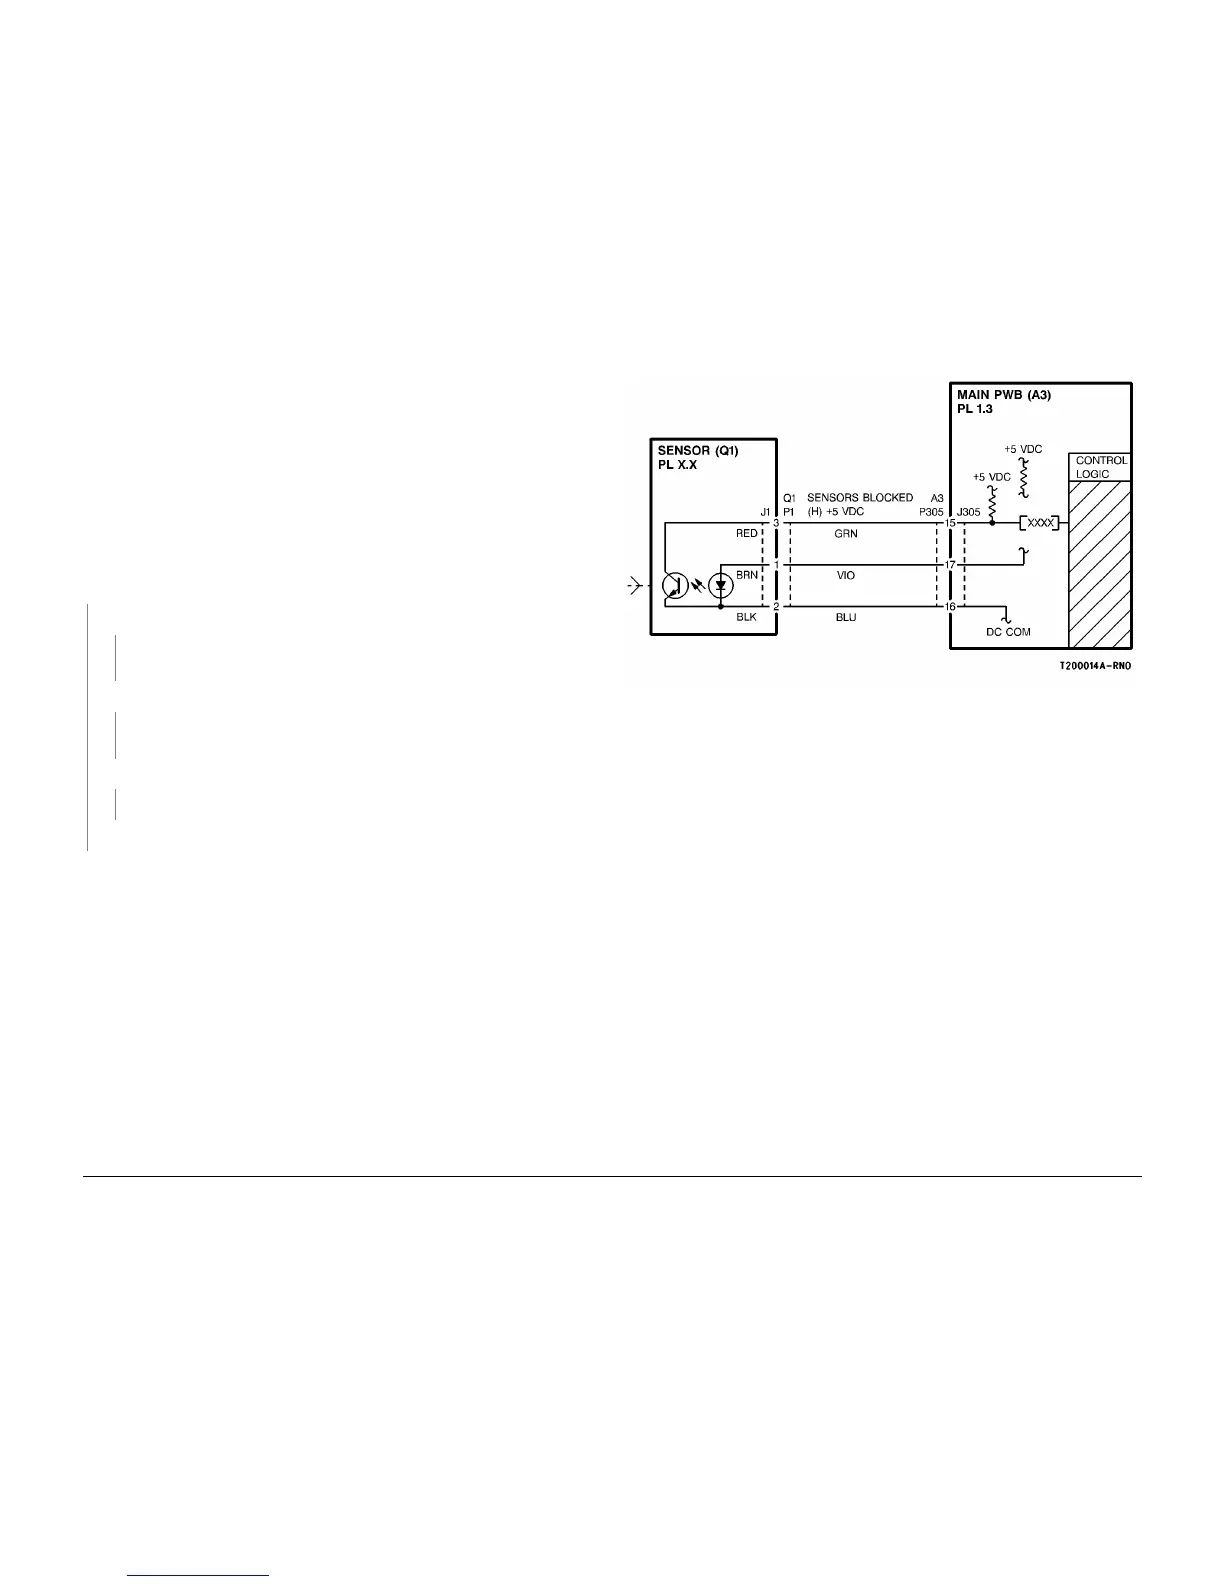
NOTE: This procedure can be used to check any sensor. Due to the generic format of this RAP
there will be no specific ADJ, PL or Diagnostic codes identified.
• Ensure that the Sensor is not blocked.
• Clean the Sensor surfaces before using this procedure.
Procedure
( Figure 1): Enter DIAGNOSTICS (General Procedures). Enter code [xxxx to test the Sensor
(Refer to appropriate BSD for the specific code). Block and unblock the Sensor. The Display
toggles between [1] and [0].
YN
Block the sensor. There is +5
± 0.3 VDC at J1 pin 3 of the sensor.
YN
Check the wire at J1/P1 pin 3 for an open circuit.
If the wire is good, replace the main PWB.
There is +1.4
± 0.2 VDC at J1/P1 pin 1 of the sensor.
YN
Check the wire at J1/P1 pin 1 for an open circuit.
If the wire is good, replace the Sensor before replacing the main PWB.
Unblock the sensor. There is approximately 0 VDC at J1 pin 3 of the sensor.
YN
Replace the sensor.
Replace the main PWB.
The Sensor and its circuit appear to be operating normally, check the adjustment or alignment
of the Sensor.
Figure 1 Sensor (Generic)

 Loading...


