01/02
6-29
8825/8830 Printer
Installation Procedure
General Procedures
Installation Procedure
Prepare to Install the Printer
CAUTION
Before installing the Printer, check for the correct voltage, polarity, and the grounding of the AC
outlet that is provided by the customer. Use the Digital Multimeter. Incorrect voltage applied to
the Printer could result in poor performance or damage to the Printer.
NOTE: The power line outlet must be a 20 amp dedicated line (wired directly to the circuit
breaker panel) with no shared neutral and a different phase from the lighting circuits.
CAUTION
If the supply AC voltage specifications are not met, the AC outlet may be wired or grounded
incorrectly. Inform the customer and request that a licensed electrician correct the problem.
DO NOT attempt to make the correction yourself.
NOTE: The Power Cord is the disconnect device for this equipment. Ensure that the installa-
tion is near the outlet and is easily accessible.
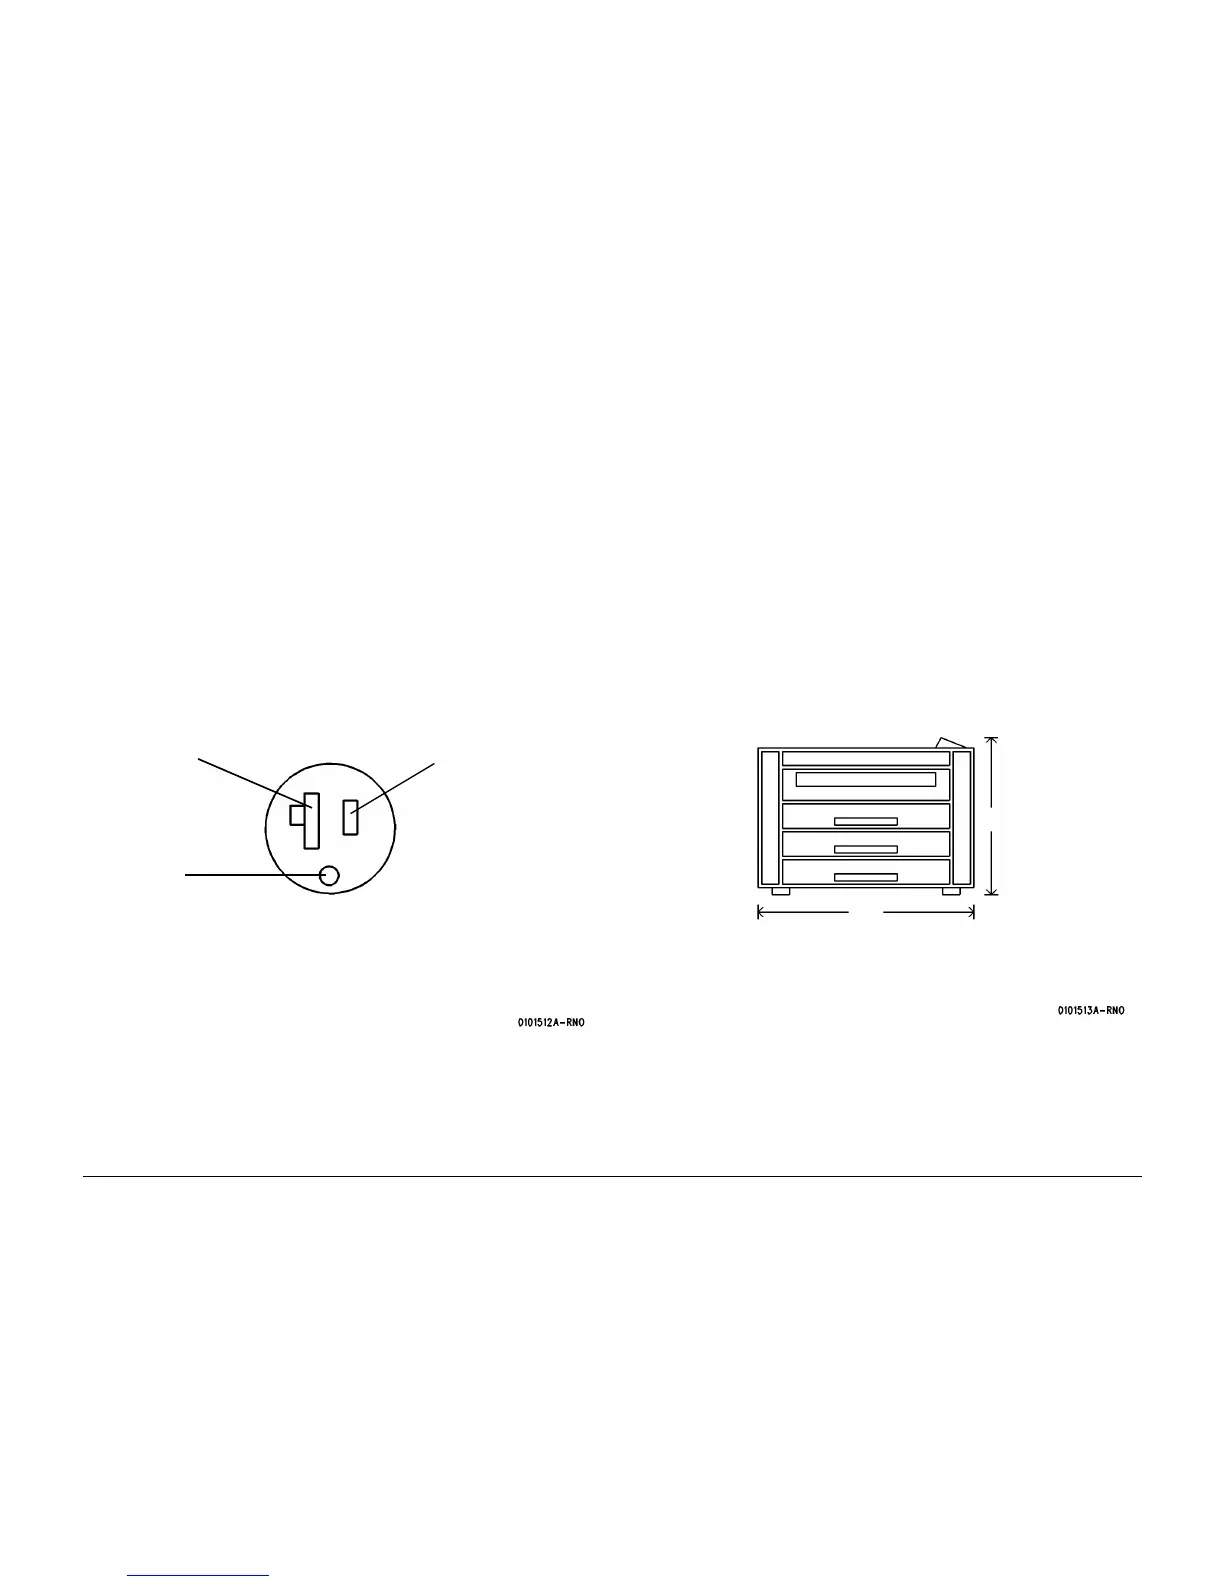
1. ( Figure 1): Check the Ground and AC voltages.
Figure 1 Checking the Ground and AC voltages
On 60 Hz Printers, perform the following:
a. Check for 105-125 VAC between AC Hot and AC Neutral.
b. Check for 105-125 VAC between AC Hot and AC ground.
c. Check for less than 2 VAC between AC Neutral and ground.
On 50 Hz Printers, perform the following:
a. Check for 220-240 VAC between AC Hot and AC Neutral.
b. Check for 220-240 VAC between AC Hot and AC ground.
c. Check for less than 2 VAC between AC Neutral and ground.
Floor Space Requirements
WARNING
This product will produce ozone during operation. The ozone that is produced is depen-
dent on the print volume and is heavier than air. Providing the correct environmental
parameters as specified in Xerox installation procedures will ensure that concentration
levels meet safe limits
• The minimum space requirement is 116.75 inches (292 cm) x 85 inches (212.5 cm).
USO Only: If additional information concerning ozone is needed, request the Xerox publica-
tion 600P83222, Ozone by calling 1-800-828-6571.
( Figure 2): IOT Dimensions.
Figure 2 IOT Front Dimensions
( Figure 3): Minimum Space Requirements.
Neutral (ACN)
White Wire
Ground
Green Wire
Hot (ACH)
Black Wire
20 AMP
600S3703
NEMA = 5 - 20R
600S3703 Preferred
Rear
Front
43.5”
(108 cm)
56.75”
(141.25 cm)

 Loading...


